Baked Potatoes in all forms are like bear hugs! It’s the classic potato side we love to order at a steak restaurant, as long as it comes fully loaded with butter, bacon bits, cheese, sour cream, chives etc.
 By the time we’ve filled the fluffy interior with all those toppings, it’s practically a meal unto itself.
When we sub out a traditional russet potato with sweet potatoes, whether orange or purple, this side dish gets even more special. In fact, baking one up and topping it with a fried egg, or roasted chickpeas, even chicken or turkey salad, and this potato is happily my lunch. Today I’m going to share one of our favourite ways to enjoy these potatoes when I don’t actually feel like stuffing them etc.
Baking with Sweet Potatoes
First off, make sure that no matter what type of potatoes you are using, they are in similar size. Purple sweet potatoes tend to take a few minutes longer to become soft in the centre. So if you are baking both colours at the same time, check the orange ones first and remove if they are done. The longer, thinner potatoes bake up faster than the thick wide ones.
There are several methods for baking sweet potatoes. We need to realize that they will take longer than a typical potato. Allow for up to an hour or more, depending on the temperature and method. For the first one, scrub, dry, rub olive oil all over the skin and poke holes into the whole potato. Then wrap it in foil, place them on a baking sheet, and bake at 425F for up to 60 minutes, depending on the size of the potatoes band your oven. If the potatoes are on the smaller side, check after 45 minutes. If a sharp knife slides in easily, right to the centre, they are ready. Let them cool a little. Trim either end, slice in half and top with butter etc.
Second method is the one I am sharing here today. Instead of leaving them whole, slice them in half lengthwise.(depending on the potato, this will require trimming off the ends, since they are often very woody and dense.) Again, poke a few holes on the skin side of the potatoes. Rub all sides with a little olive oil and lay the cut side down on a parchment lined baking sheet. Bake at 425F till the edges are caramelized and the flesh is tender. Again, a knife will be your best indicator. Since they are sliced in half, the time in the oven is reduced, so check them after 40 minutes, depending on their size. And once baked, the skin is quite delicious!
There is also the microwave method, but since we don’t own a microwave, I think it best to share the methods I actually can test right here!
Flavouring with Miso Butter
This simple condiment takes traditional butter to the next level. Sure, we could just use a pat of butter over the soft interior, and call it a day. But when we take miso and mix it in with softened butter, we get built in umami flavours. The slight saltiness (not overly, I promise) adds instant flavour (and healthy properties) so with a bit of black pepper, you could stop here. Or you could add a smidge of honey, cinnamon, even roasted sesame oil to the mix. Blend together and store in the fridge for up to a week. I always use white miso. It has the most gentle flavour of all the miso options. But if you only have a red or medium hued miso, just use a little less at first to see how you like it. If you mix it well and form it into a log, you can wrap it well in plastic, twisting either end tightly to form a compound butter to store in the fridge. Then slice it off and watch the slices melt into the potato. Or add it over grilled chicken or steak! I especially love it over steamed green beans or broccoli.
Chili Crisp Oil
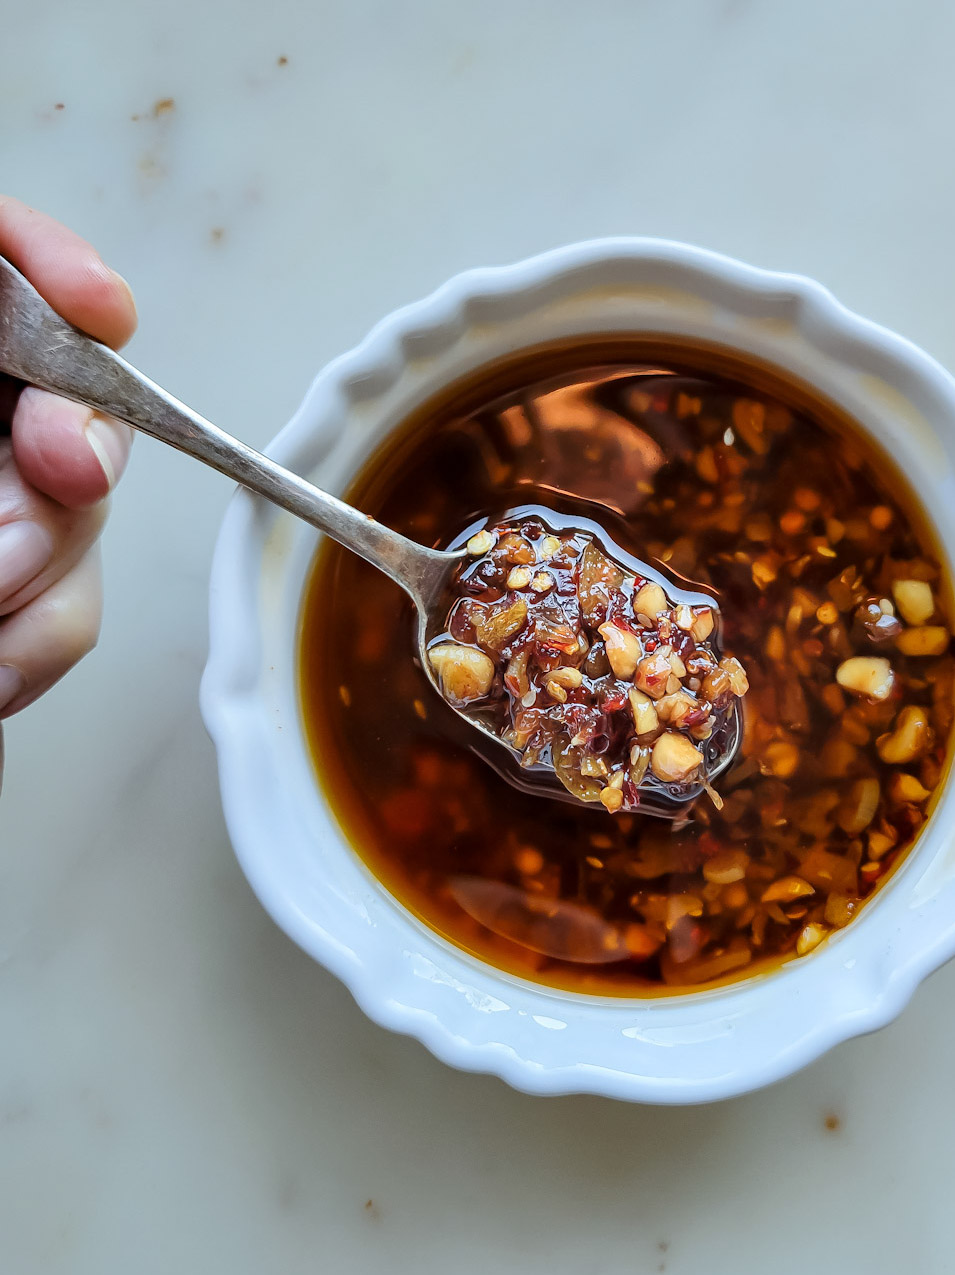
I am finally getting around to sharing my recipe for this amazing condiment! Think of this as a confit of sliced garlic, shallots, peanuts and ginger, and then using the oil to flavour chilli flakes, sesame seeds, tamari and honey (or sugar), I view it as a kind of an Asian version of Italian La Bomba!! Yes, there are store bought versions out there, but we never know what quality of the ingredients are, so in a few short minutes, why not make a batch of your own chili crisp? The recipe over at Bon Appetit was my inspiration, but I have made it my own as well. If you happen to have some mushroom powder on hand, add a tsp for an extra umami boost. Once done, this can stay in the fridge, and be spooned over eggs, veggies, meat, into grilled cheese etc.
The only part of the method I want to emphasize is that the oil in the pot should keep everything simmering, but not turning everything brown too early. You will run the risk of charring the pieces of garlic, peanuts and ginger. And then the whole pot is useless, as that burnt aroma is pretty awful. I keep it on low, and use a spoon to keep everything moving. Once everything has a beautiful golden brown hue, you can take the pot off the heat. Once you pour everything through a colander over the bowl holding the chilli flakes etc, spread out all the contents of the strainer so that they can dry out and stay crispy. Then, once the garlic, shallots, peanuts, and ginger are completely cooled, as has the oil, combine the two. The time out in the air will help the chopped portion of the crisp maintain as much crispiness as possible. Having that bit of honey or sugar makes this condiment highly flavourful, there is such a balance of sweet, sour, hot and salty. Try not to eat it with a spoon!! Until I can get a blog post dedicated to this Chili Crisp up, I’ll share the recipe below. This batch will last in the fridge in a sealed container for a good few months.

Final Thoughts
Adding the chili crisp over the miso butter onto these baked sweet potatoes takes these potatoes to the stratosphere of Flavour. Sprinkle the finished potatoes with sesame seeds and chopped parsley or cilantro, and these are fancy enough for company. If it’s just the two of you, an entire potato with some Lebanese Chicken , Chicken Piccata Meatballs or Pomegranate Glazed Pork Chops, and you’ve got dinner! Or for a completely vegetarian feast, add these to my Rose Harissa Roasted Carrots with Hummus.
Love Jen


Baked Sweet Potatoes with Miso Butter
Ingredients
Sweet Potatoes
- 4 sweet potatoes, scrubbed clean, ensure they are all of similar size (if smaller, then one per person is good)
- olive oil
- 1 tbsp chopped cilantro or parsley, optional
- 2 tsp white sesame seeds, optional
Miso Butter
- 4 tbsp butter, softened
- 2 tbsp white miso
- 1/2 tsp black pepper
Chili Crisp Oil
- 4 small shallots, thinly sliced
- 1 head of garlic, separated into cloves, sliced thinly
- 1/4 cup chopped dry roasted peanuts, chopped
- 1 two inch piece ginger, peeled, finely chopped
- 1 ½ cups vegetable oil, like grapeseed or canola
- 2 three inch cinnamon sticks
- 6 star anise pods
- ¼ cup crushed red pepper flakes
- 2 tbsp. tamari or soy sauce
- 1 tbsp white sesame seeds
- 2 tsp. sugar or honey
Instructions
Sweet Potatoes
-
Preheat the oven on to 425 degrees F, and have a rack set at the centre position. Line a baking sheet with parchment paper.
-
Scrub each sweet potato. Use a fork to poke a few holes all over.
-
Slice each sweet potato in half lengthwise, Rub a small amount of olive oil over all the sides of the potatoes and place them cut-side down on the baking sheet.
-
Bake for 25-40 minutes until tender when you slide a knife into the thickest part of the potato, and are caramelized around the edges. Cooking time will vary based on size of sweet potatoes you are using.
-
Top each half with a pat of miso butter and a drizzle of the chili crisp. Finish with a sprinkling of chopped cilantro or parsley and sesame seeds.
-
Leftovers can be frozen or stored in the fridge for up to 3 days.
Miso Butter
-
Combine the softened butter, miso and pepper in a bowl with a fork till well blended. Use immediately, or store in a sealed container for the week.
Chili Crisp Oil
-
Bring shallots, garlic, peanuts, ginger, oil, cinnamon, and star anise to a simmer in a medium saucepan over medium heat.
-
Reduce the heat to low, but high enough to maintain a gentle simmer. Swirl or stir the pot occasionally, until garlic and shallots are golden brown and crisp, 20–25 minutes. (Take your time—you want to drive all the moisture out before they brown.) Keep your eye on everything. You want everything to cook, but not scorch, so keep everything moving, not settling on the bottom. Right towards the end you will find that everything will start crisping up, so don't leave the pot.
-
In the meantime, mix red pepper flakes, tamari, sesame seeds, and sugar in a medium bowl.
Strain shallot mixture through a fine-mesh sieve set over red pepper flake mixture. If the bottom of the sieve touches the oil, lift it off and place it over a different bowl.
-
Let garlic and shallot cool in sieve (this will allow them to crisp further) before stirring back into chile oil. Spreading everything in the sieve out so that the air can reach it all as it cools and dries will have the best results.
-
Transfer the completely cooled garlic, shallots, peanuts etc from the sieve to the bowl with the oil mixture. You can remove the star anise and cinnamon sticks, but I leave them in to continue to impart their flavour and aroma. Stir well. Place everything into a glass jar with a lid.
-
Do Ahead: Crisp can be made and stored in the back of the fridge for a few months easy.
-
See blog post for more details

[…] Miso Butter & Chile Crisp […]