
I’ll let you in on a little secret, a good egg salad sandwich will make me weak in the knees!
 You know how at gatherings, showers, luncheons, there is always a platter of egg salad sandwiches, most often cut into small triangles? Well, I am guilty of eating more than my share, so I apologize if you were looking for one and they were all gone.
There is a running joke between me and my sister regarding my old method of making an egg salad sandwich. According to her, what should have been lunch might not have gotten served till dinner time because I just took too long cutting up the eggs into uniform small bits. I was a tad overly precise back in the day. These days, I’ve gotten less uptight, and my method would make her proud.
Here are my favourite egg hacks when it comes to prepping an egg from beginning to end.
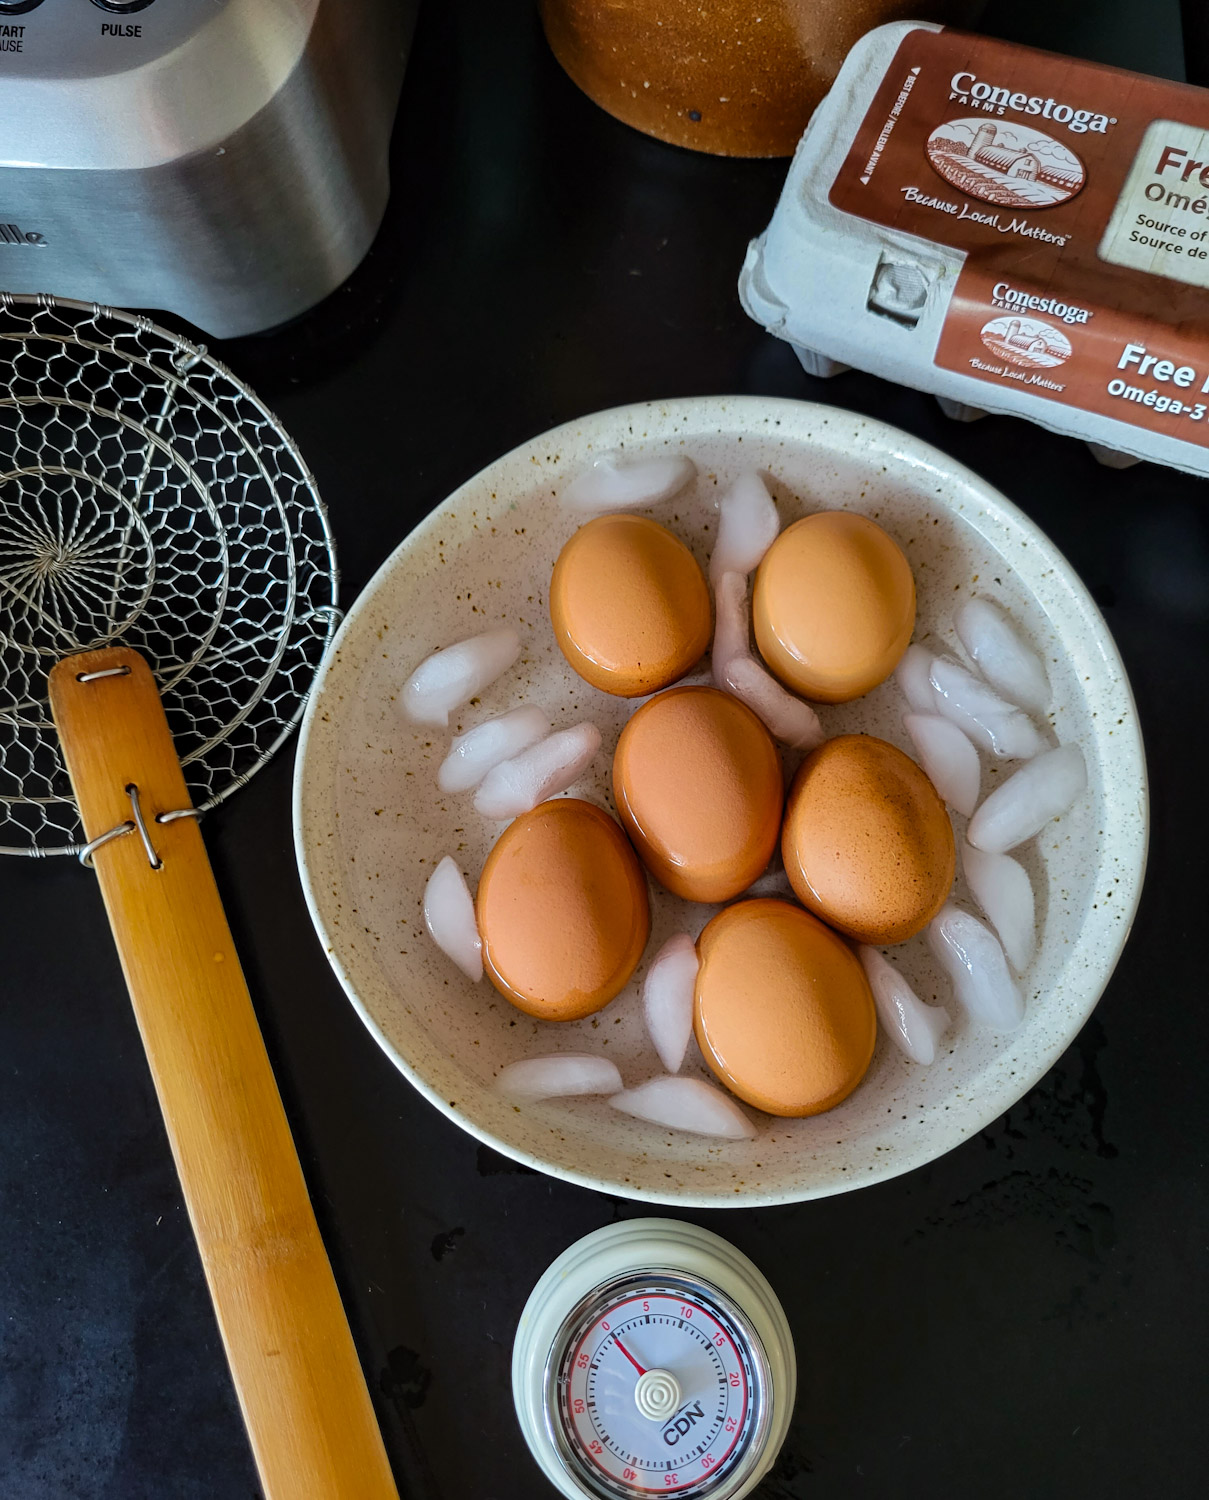
Steaming
First of all, I don’t boil my eggs, I steam them. Check out my Soft Boiled Egg post (one of my early blog posts!) for the history on my journey to making eggs even more foolproof. Instead of submerging the egg(s) into a pot full of water, there is only 1/2 inch of water in the pot. Once the water is boiling, I add the egg(s) In 6 and 1/2 minutes exactly, the steam cooks them into the most uniformly cooked soft boiled egg. Every time. For eggs that I will be using for egg salad or breakfast bowls etc, I steam them for 10 minutes. No matter how long they are steamed, the minute the timer goes off, remove them from the pot with a slotted spoon or spider and transfer them into an ice water bath. This will stop any further cooking. Once cool to the touch you can peel them.
Peeling
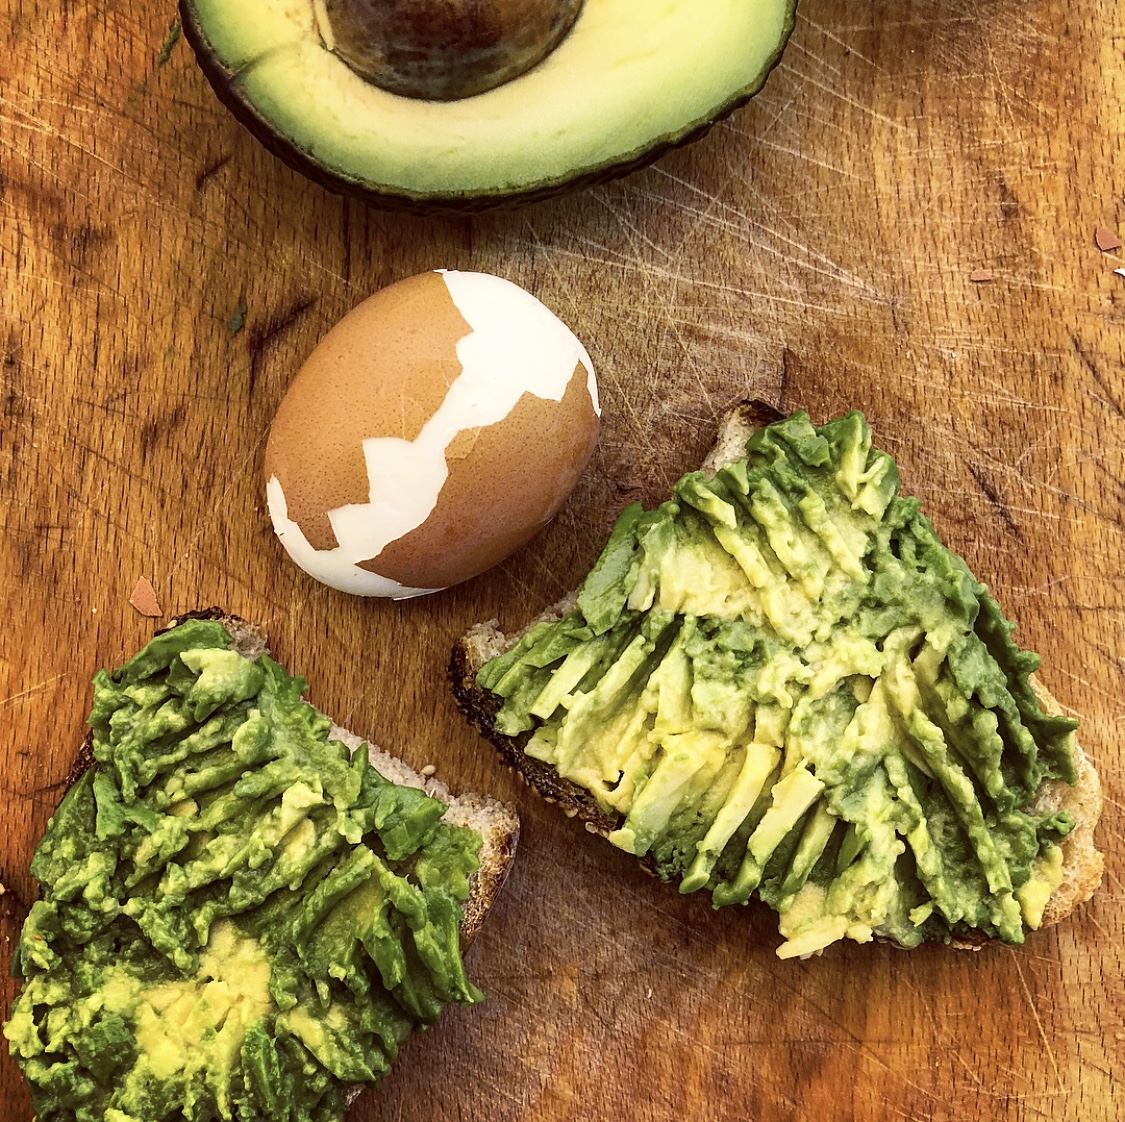
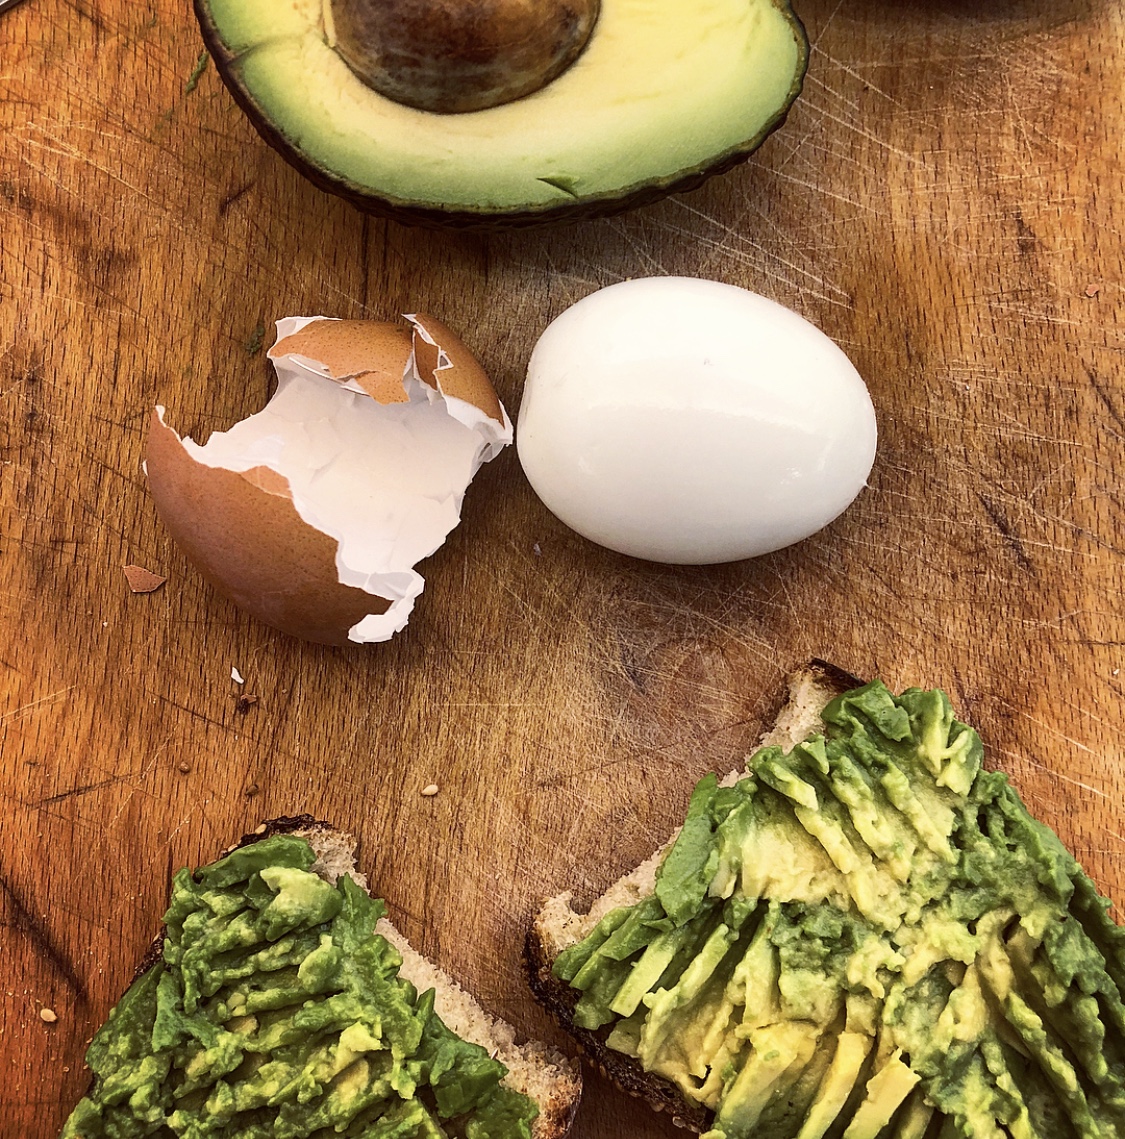
Here’s a great way to peel eggs, it works for me every time as well: Tap both ends of the egg, and peel away the shell. Then peel a little seam down the egg to join the top and bottom. Then you can slip your fingers/palm under the shell on one side and pull it away. It will often come off in one or two pulls, quite cleanly. Of course, always make sure you have started pulling by grabbing the membrane as well. I showed this in my Soft Boiled Egg post as well, but here are the primitive photos!
Grating Eggs
And here is the time saver that will put me back in my sister’s good book! Instead of chopping the eggs, I take my box grater and just grate them all up into a bowl. No separating the yolks from the whites (why do some recipes call for this, I just don’t get that extra step?!) and in no time all the eggs are ready for being turned into egg salad.

Classic Egg Salad Filling
I’m totally old school when it comes to egg salad. I have tried the yogurt, the mashed avocado etc to make the filling creamy. But for me it just doesn’t taste like the real deal. So I stick to a good mayo, like Hellmann’s. Of course, an avocado oil mayo, or homemade mayo or aioli is fine, but in the end, I love the flavour and texture it gives. Make the salad while the eggs are still warm, and then chill the filling before actually using it for sandwiches. But you may find that they soak up more mayo as they chill, so a bit more may be needed to bring it back to the creaminess you desire.
Ratio of mayo to egg: I like one heaping tablespoon of mayo for each boiled egg. So for six eggs, expect to use six tablespoons of mayo. You don’t want it too thick, but you don’t want it to turn into a mayo with a bit of egg type of filling. Six eggs should be enough for 4 average sandwiches.
When it comes to crunch, there are several ways we can go. If you like, finely diced celery, raw onion, scallion, dill pickles, even shredded arugula are all great. But my personal favourite: bread and butter pickles!! Yep, there is something so amazing that happens, when the sweet crunch of the chopped pickles join up with the creamy eggs. I think it is sublime! To finish, salt and pepper are obvious. If you want paprika, curry powder or some other form of heat, I wouldn’t use it with the bread and butter pickles. Use those seasonings with the crunchy add-ins I listed earlier. When it comes to the pepper, I like either black or white, white won’t stand out, so if you are making this for special occasions, you make like the finished result without the black flecks everywhere.

Bread
For potlucks and showers, classic white bread with the crust removed is just so retro and elegant. If you are eating this at home, fresh artisanal sourdough can work, but I would warm it slightly just so that the slices aren’t too tough to chew through and end up pushing the egg salad out the sides. Growing up I loved egg salad on marble rye. But again, fresh bread is best. If the bread isn’t fresh, just lightly toast it to wake it up!
I actually love spooning egg salad into lettuce wraps with some extra radish for crunch. But any bread wrap, lettuce and even cucumber will make for a great rolled up sandwich. And if you want to skip making sandwiches, just serve the salad in a bowl with a micro-green or chive garnish and use crackers to scoop it up!
Egg salad can be made and kept in the fridge for two or maybe three days. After that you may find that it will start to separate. I like making up a batch and live on it for a couple of days, since it just seems silly to do all the work for just one sandwich, when you can make more!

Classic Egg Salad with Bread and Butter Pickles
Ingredients
- 6 large eggs
- 6 tbsp mayonnaise
- 1/3 cup finely chopped bread and butter pickles
- kosher salt
- pepper
- bread
- lettuce
- crackers
Instructions
-
Bring 1/2 inch of water in a medium sauce pan to a boil. Immediately add the eggs gently, and cover.
-
Set the timer for 10 minutes and prepare a water bath by placing 1 cup or more of ice cubes in a bowl along with some cold water.
-
As soon as the timer has gone off, use a spider or slotted spoon to transfer the eggs to the water bath.
-
When they are cool to the touch, peel them. I do this by cracking both the top and bottom of each egg, peel away the shell, and then peel a seam to connect them. Then pull away at the shell, ensuring that you have captured the membrane as well. Repeat with all the eggs.
-
Using a box grater, grate the eggs into a medium sized bowl. Add the mayonnaise and stir through gently. Add the pickles and a good pinch of salt and pepper. Stir through and taste, re-season if desired.
-
Place in the fridge till time to use. If it has stiffened, feel free to add another tbsp of mayonnaise.
-
There is enough here to make 4 average sized sandwiches.
-
Make sure the bread is fresh or warmed through so that it isn't too tough or chewy. (if it is, you may find that the egg salad oozes out the sides too much)
-
Lettuce, microgreens, cucumber slices or even tomato are all great on an egg salad sandwich.
-
Alternatively, place in a bowl, scatter with microgreens and scoop up with crackers!
Recipe Notes
See blog post for more details.
The egg salad will keep in the fridge for 2-3 days.
Can this be done in a steamer pot?
Hi Rachel, I would think so. Since I use a steamer basket inserted into a pot, a steamer basket should do the same. You may need to adjust the timing, if the basket is far from the water source.