Print
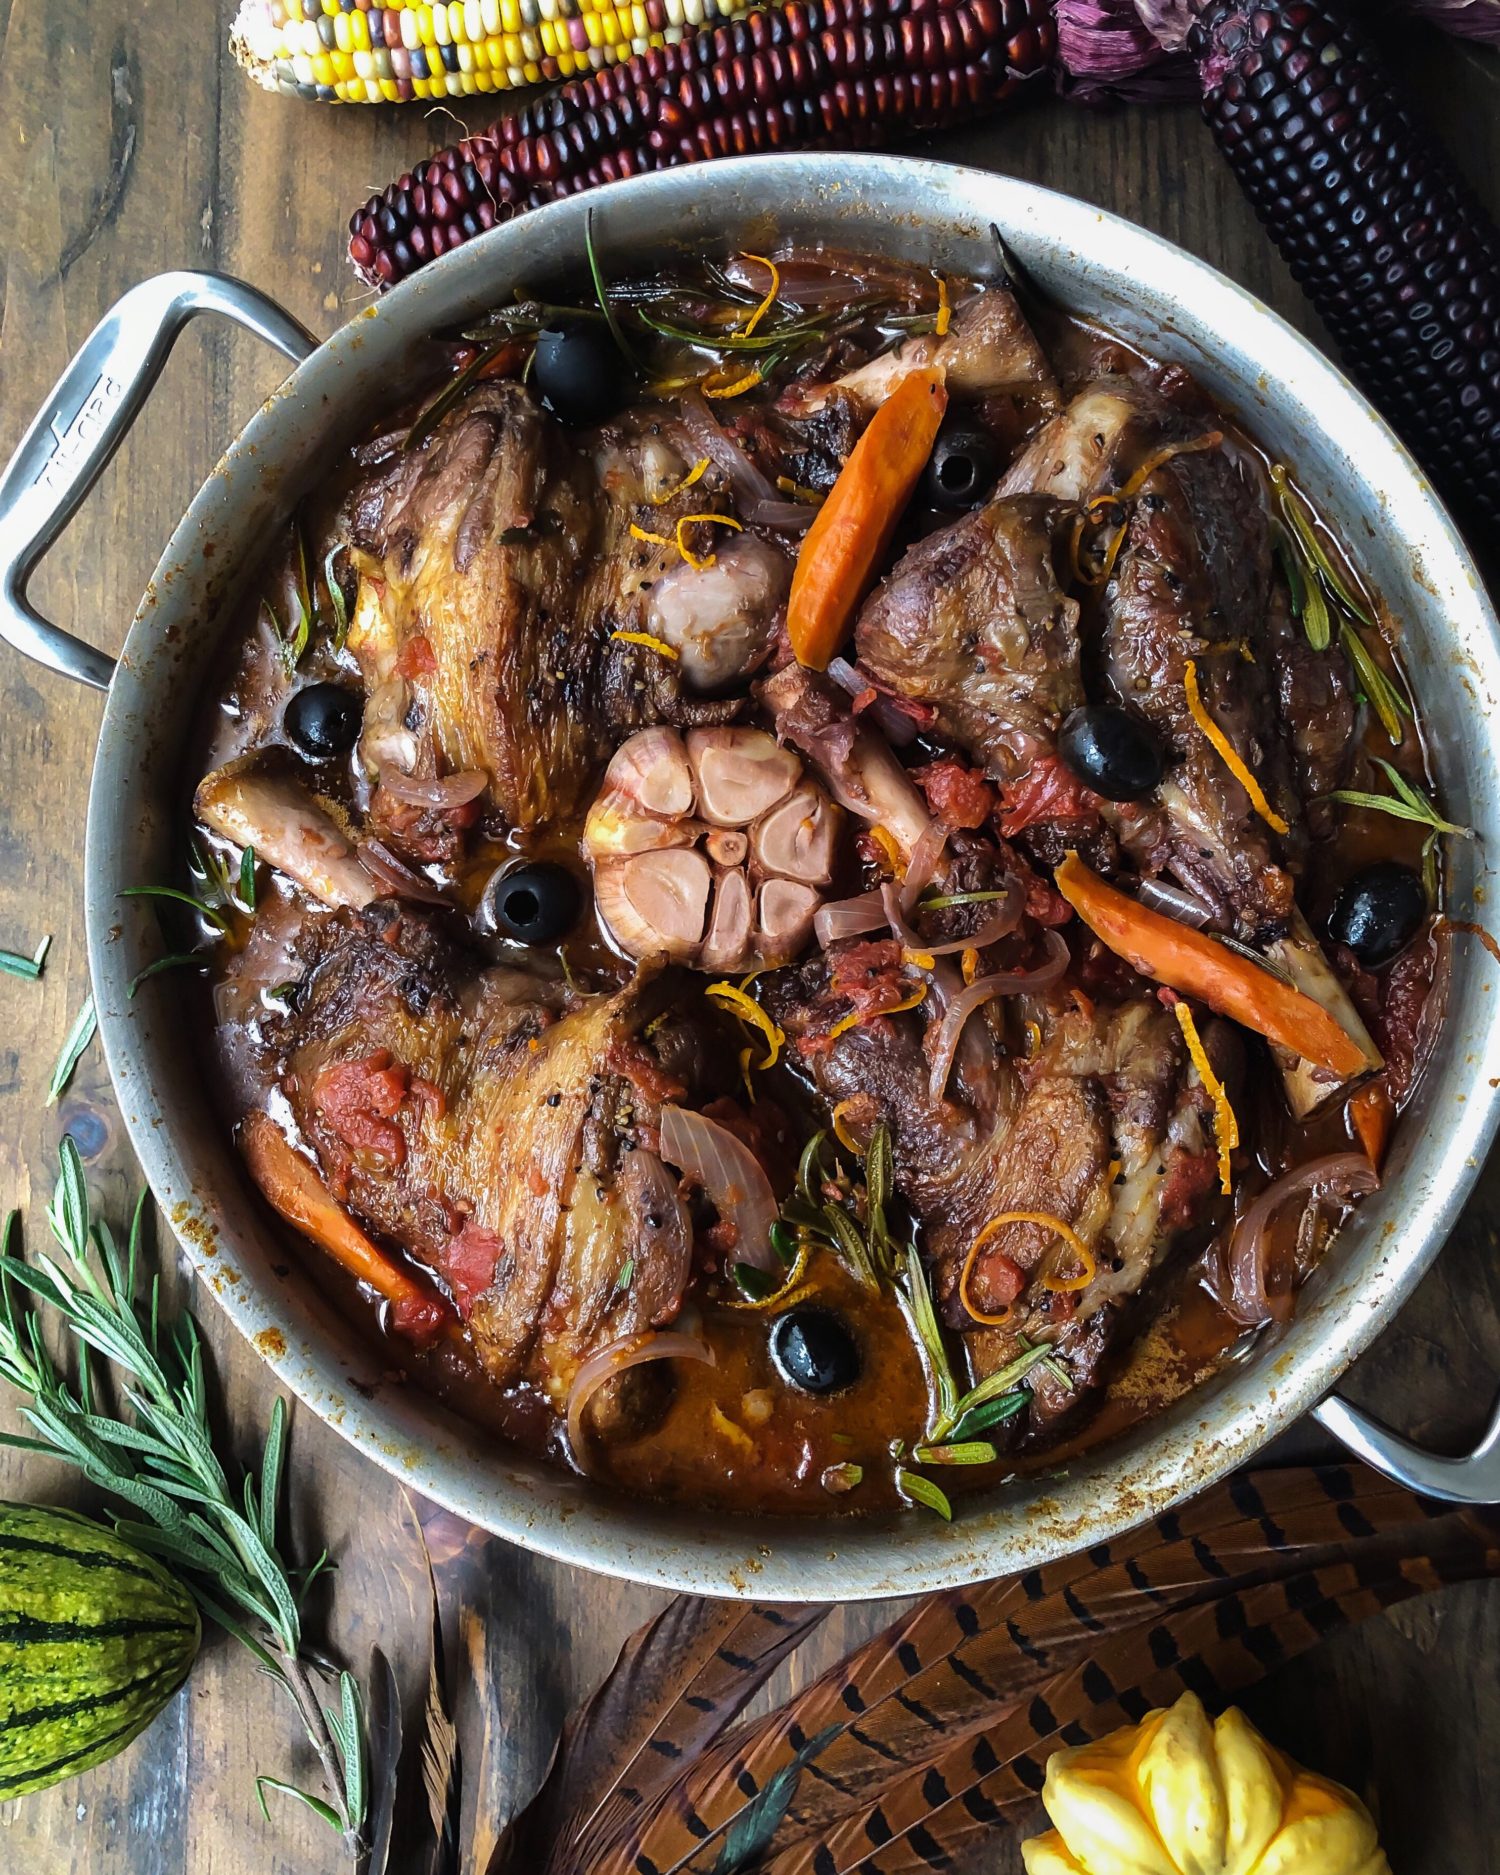
Braised Lamb Shanks with Tomatoes and Olives
Prep Time 30 minutes
Cook Time 2 hours
Servings 4
Ingredients
- 4 lamb shanks
- 2 tbsp grapeseed or other neutral oil
- kosher salt and freshly ground pepper
- 2 tbsp olive oil
- 1 garlic head loose skin removed
- 2 carrots peeled and chopped
- 1 large or 2 medium onions trimmed and cut nose to tail in thin strips
- leaves from 2 sprigs of rosemary
- 1 28 oz 794 g can of whole tomatoes, preferable San Marzano, with the juice
- 1 tbsp anchovy paste or 1 tsp Worchestershire Sauce
- 1 1/2 cups 360 ml dry white wine
- 1 cup 240 ml chicken stock
- 1 cup about 150 g oil cured black olives, pitted
- Thin strips of peel from one orange. exclude the white pith I use a bar zester to achieve this. If you don't have one, use a vegetable peeler to remove the peel and then cut the peel into very thin strips.
- 1/4 tsp Urfa pepper or a pinch of cayenne pepper or red pepper flakes
Ragù
- parmesan cheese
- stock or tomato sauce, to extend the leftovers into a rich sauce if needed
Instructions
-
Choose a stock pot, Dutch oven or braising dish that will hold the shanks and other ingredients so that the shanks can sit in one layer.
-
Pat the shanks dry with paper towel. Heat the vegetable oil in the pot over medium heat and brown the shanks on all sides, about 10 minutes. You may need to work in batches. When the shanks are browned, transfer them to a plate or platter and season well with salt and pepper.
-
Pour out the used oil from the pot and replace with the olive oil. Cut off just enough of the garlic head to expose the tops of the cloves. Toss the garlic, carrots, onions and rosemary into the pot. Season with salt (about 1 tsp) and cook over low heat, stirring until the vegetables are softened but not coloured, about 10 to 15 minutes.
-
Meanwhile open the can of tomatoes and pour everything into a bowl. Using your hands to crush the tomatoes into bite sized chunks. This is one of the best feelings ever in the kitchen!
-
Stir the anchovies or Worchestershire sauce into the vegetables in the pot. Cook for about 1 minute. Add 1 cup of the white wine, turn up the heat and boil till the wine has almost evaporated. Add the remaining white wine, the broth, the tomatoes and their juices, the olives and the citrus peel and the pepper into the pot. Stir everything to combine.
-
Add the lamb shanks to the pot. Ideally they should fit in one layer, and should be at least 3/4 submerged under the liquids. Bring to a boil, place a lid on the pot, and then reduce the heat to low to keep everything at a gentle simmer. There should be some bubbling going on. Adjust the heat to maintain this.
-
Braise as such for 2 hours and then check the shanks, if the meat is falling off the bones, they are ready! If not, keep cooking until this is achieved. Check after every 30 minutes or so.
-
Pick out the garlic cloves, and serve the shanks with the sauce. Garnish with fresh rosemary if desired.
-
Serve over mashed potatoes, puréed parsnips, rice, couscous or even orzo.
Ragù
-
Shred any remaining meat into thin, bite sized bits. Chop the carrots into a small dice. Do the same with the onions. Store with all the sauce, either in the fridge, or in a freezer safe container.
-
When ready to reheat, thaw and add to a medium stock pot. As it simmers on low heat to warm through, add enough liquid (stock or tomato sauce) to turn it into a sauce consistency of your liking. Taste and re-season if necessary.
-
Serve over a hearty pasta like papardelle or rigatoni. Add a fresh grating of parmesan cheese
Recipe Notes
This is from Dorie Greenspan's book, Everyday Dorie.
The recipe feeds four. It can be easily made to feed six or even doubled. Just increase the rest of the ingredients accordingly. And use a pot large enough to contain everything without overcrowding.
Dorie calls for the braising to happen in the oven. I personally don't like to braise in the oven. I would rather do it on the stove top over low heat. This way I can check the pot periodically to ensure that the heat is correct and the liquids are bubbling at a low simmer. Then when it comes time to check for doneness, it is easily accessible. I find that having to pull the pot out of the oven to check it more work on my back etc. Lifting a lid is much easier when it is right there!