If there is one way to get a heated debate started on any Canadian street corner or coffee shop counter, it’s whether or not there should be raisins in our butter tarts.
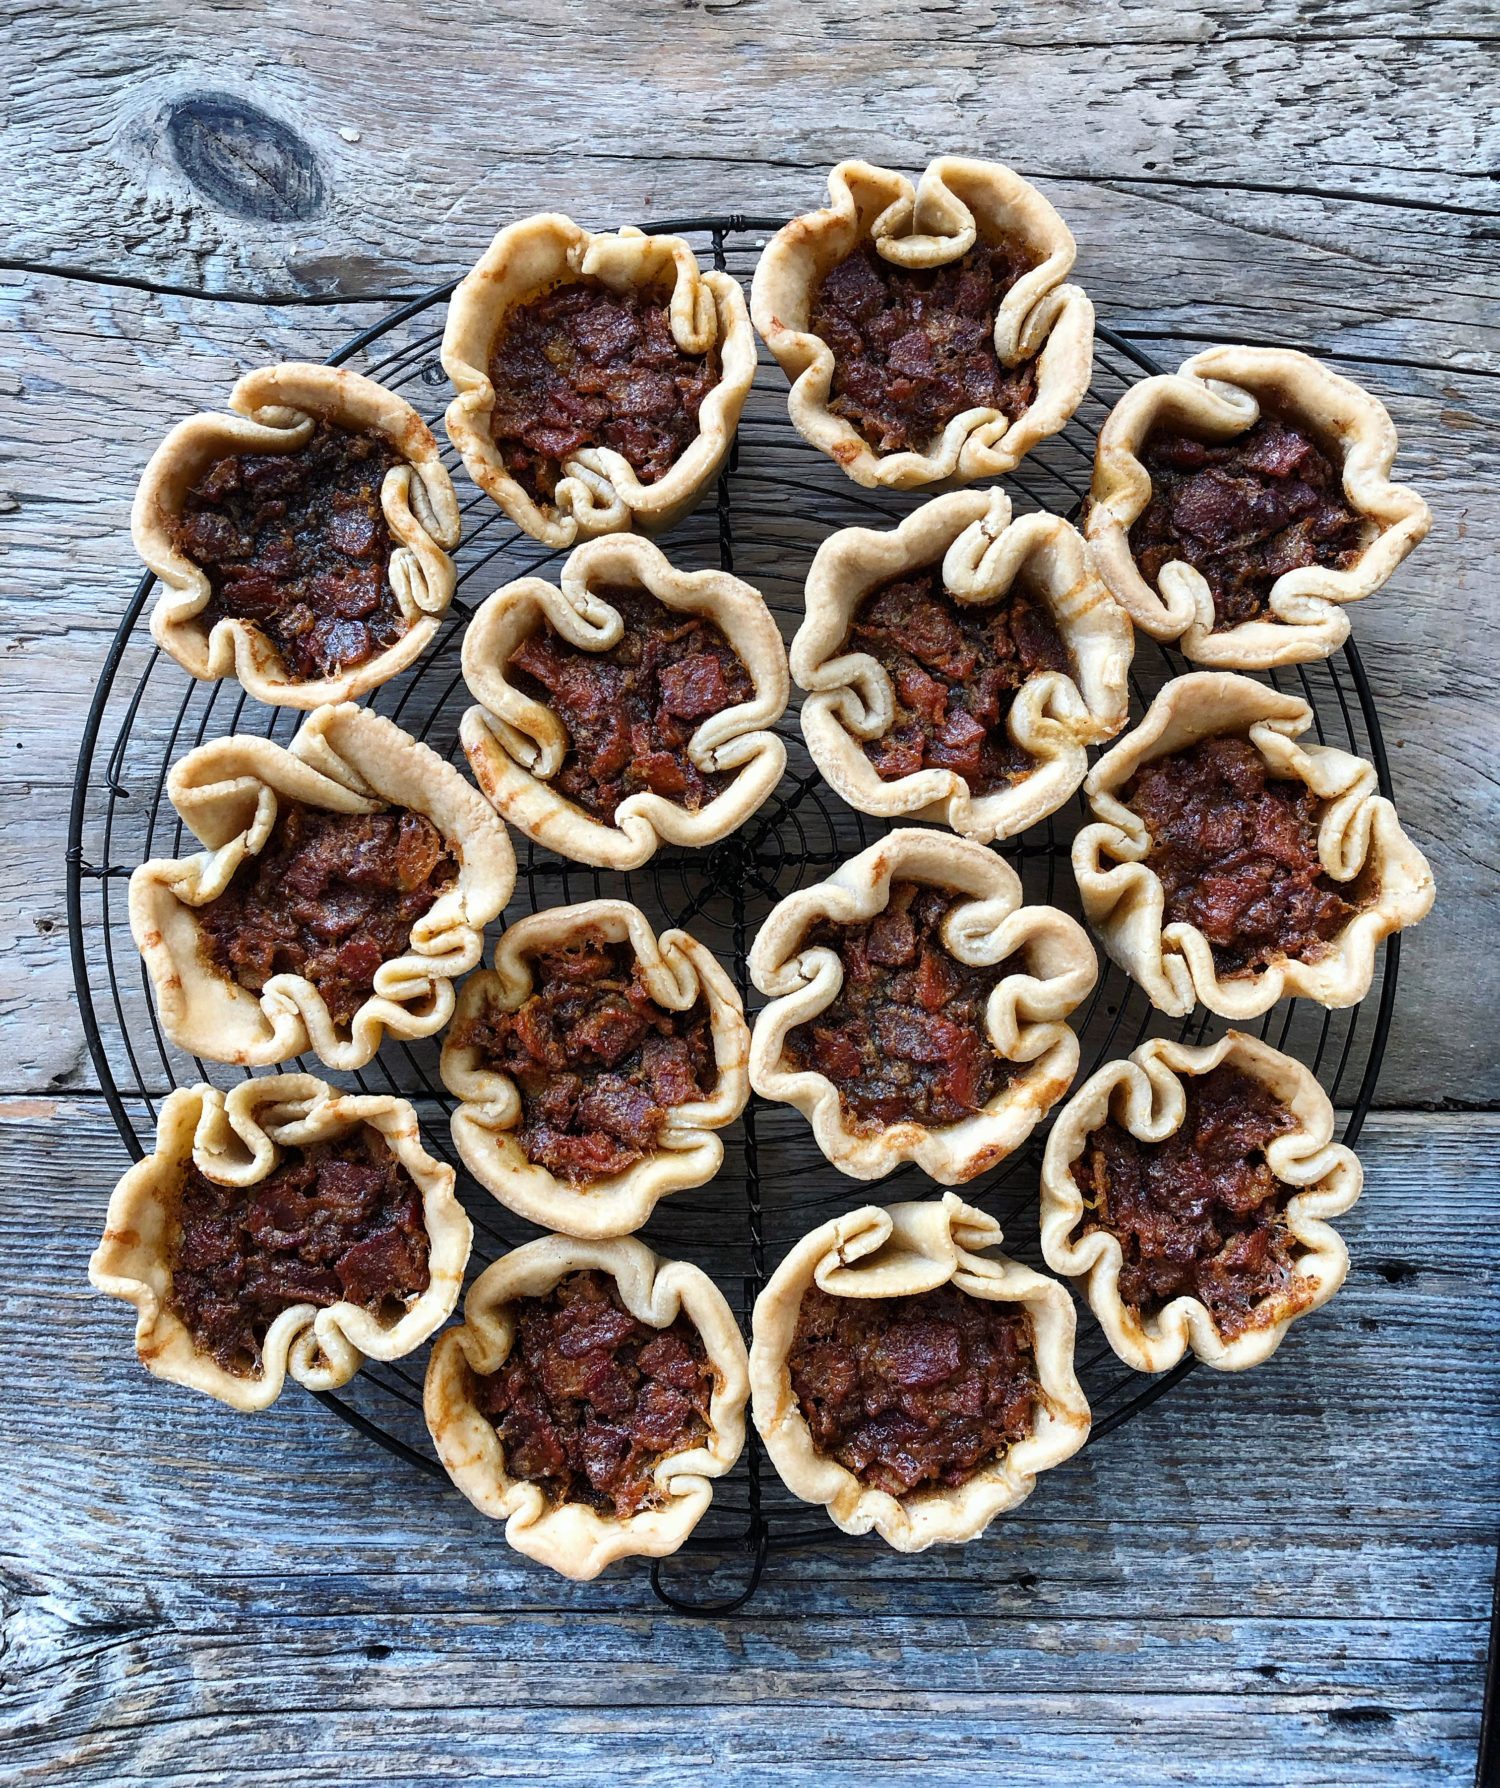 Let me settle the issue once and for all. There should be bacon.
Okay, where I stand on the raisin debate is non-negotiable. I am Team No Raisin. That custardy chess pie-like filling should not be adulterated with the dubious squishiness of raisins. I don’t mind raisins in say, a mincemeat pie, because their presence isn’t in isolation. They join all sorts of other dried fruits, nuts, candied peel etc. So they actually add something to the texture. In butter tarts on the other hand, they stand out like a sore thumb. Just when your tongue has gotten used to one texture, the raisin appears and ruins it. It could be that I really don’t like plumped up raisins by themselves. Whatever the reason, I’m sticking to it.
Now, nuts on the other hand are just fine in a butter tart, as far as I’m concerned. They don’t pretend to be soft and appealing. They add a crunchy earthy texture in complete contrast to the filling of eggs, sugar and butter. See, it’s not that I am totally averse to anything else showing up in a butter tart. Just not raisins. But it is amazing how something seemingly insignificant can raise such ire and loud voices on the Canadian landscape. Well, I guess if this is our biggest concern, we’re doing pretty good as a culture.
Having solved the Great Raisin Debate once in for all, I can now move on to what should ultimately be added to the butter tart filling. Bacon. And maple syrup. Come on. The butter tart is one of Canada’s food treasures. What better addition to an already amazing pastry creation, than our favourite food pairing: maple and bacon. When I first decided to make a batch of butter tarts this way, Jim wasn’t sure I should play with his precious memories of butter tarts. He thought is was an assault on tradition. And then he tasted one. He looked at me and apologized. So if Jim is on board, you know that these babies are good!!
Butter Tarts at their most basic are like mini chess pies. Think of pecan pie without the pecans. The gooey filling alone is what makes a butter tart a butter tart. It is a combination of melted butter, sugar, eggs, and a few other additions for flavour. These can vary depending on the recipe. But the core of that custardy filling must be met.
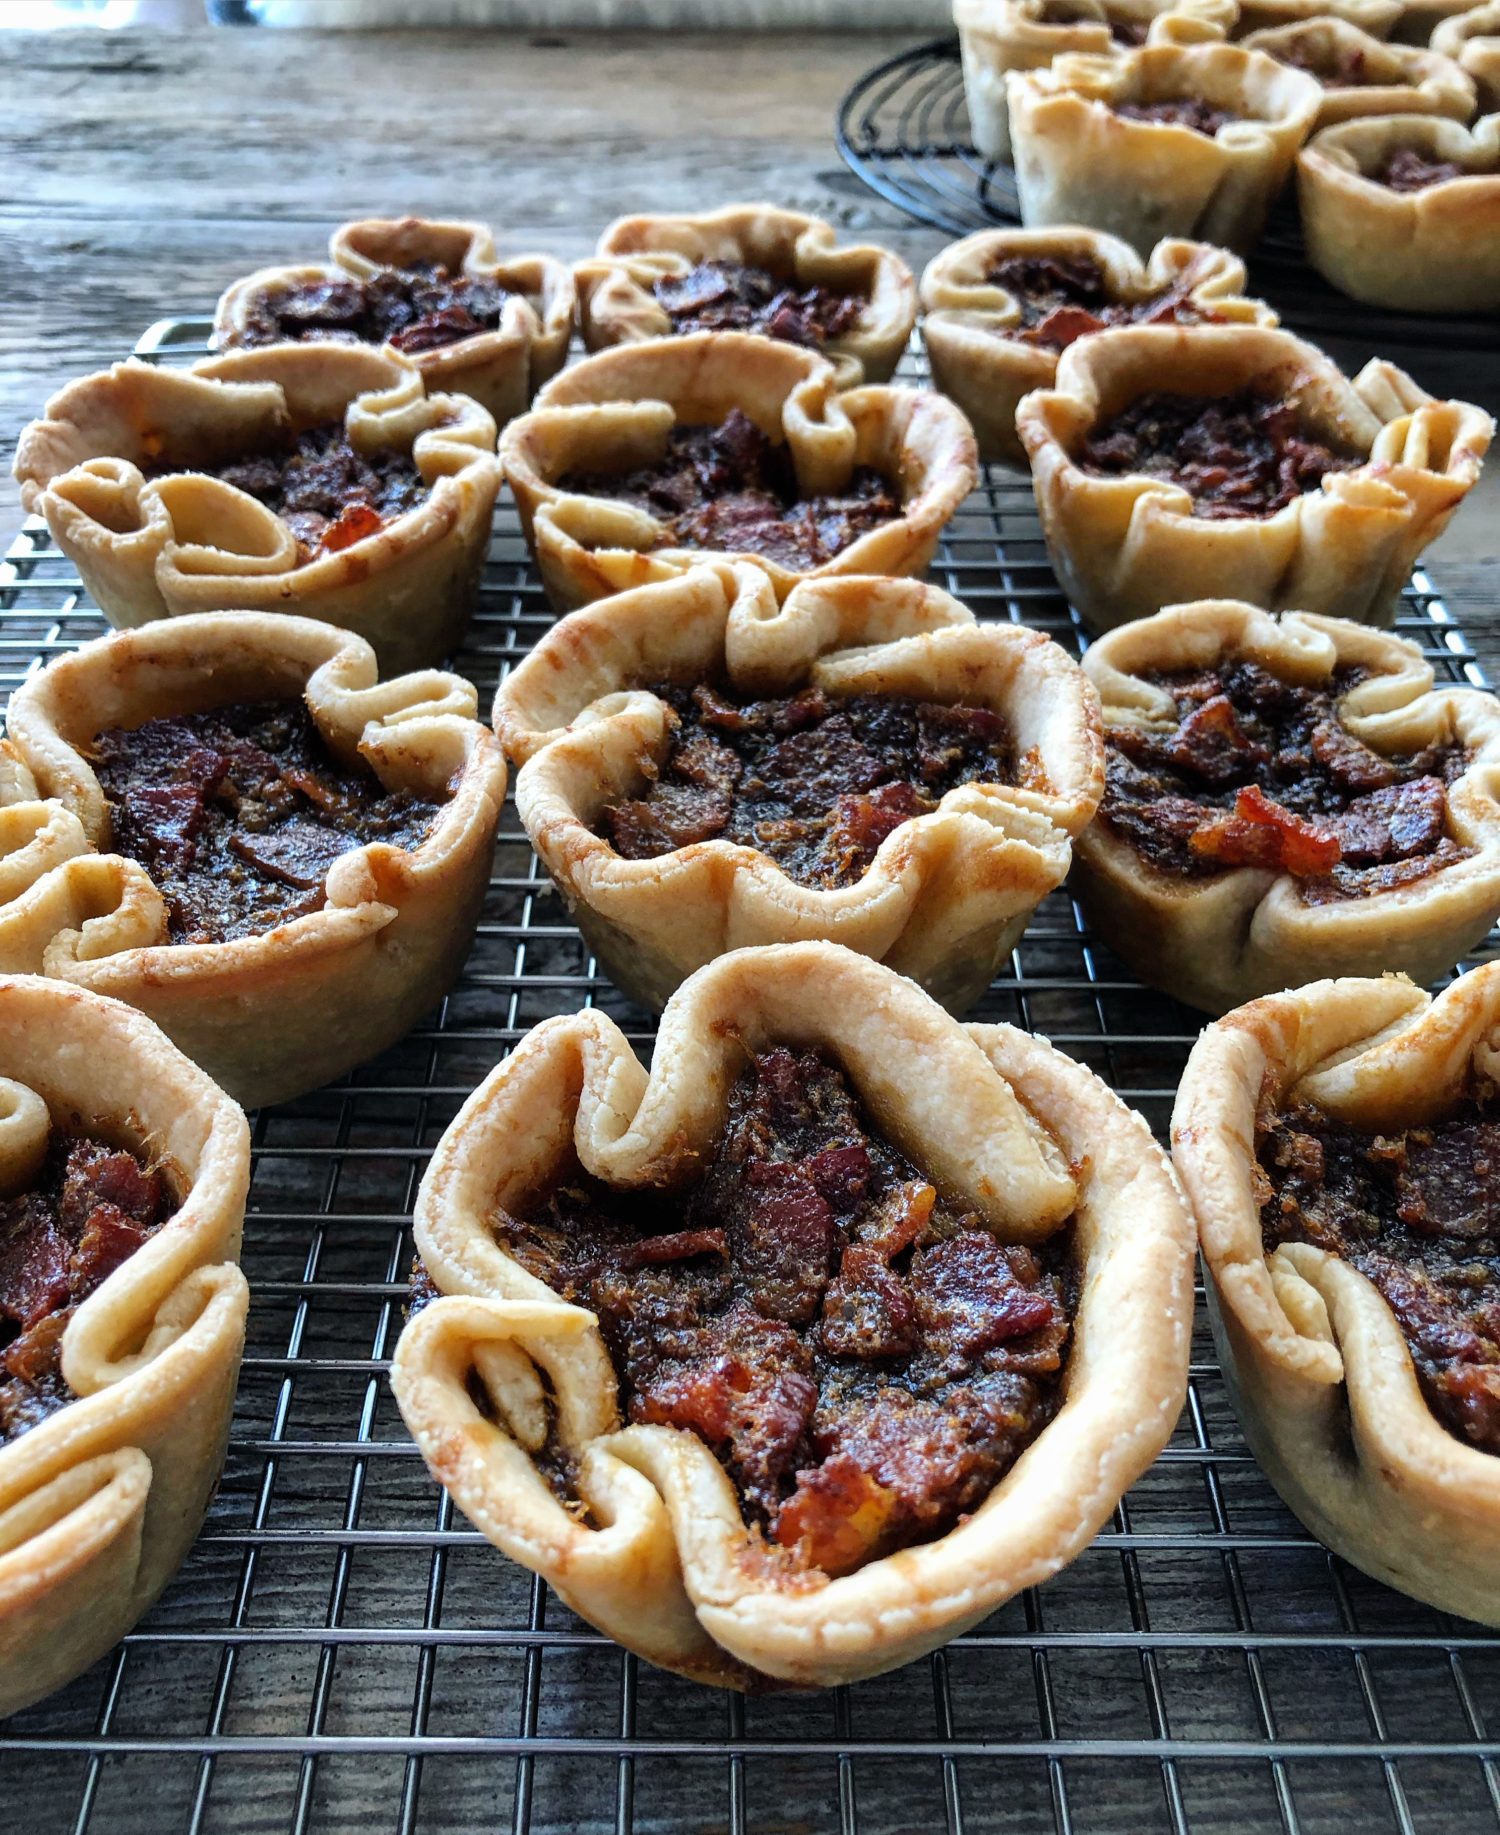
When I decided to combine the maple syrup and the bacon, I knew that the pastry could be played with as well. We are using a basic pie pastry for these tarts. So I decided to add a bit of whole wheat flour to the mix, since it has the heft and flavour to balance the more robust bacon and maple flavours happening in the filling. Rye flour would also be an amazing option.
How to Create the Pastry Shells
Here is my tip for making the pastry for the tarts. You will want to roll out your dough to just 1/6 of an inch. You will cut out 4 inch rounds with a cookie or biscuit cutter, a glass, or even a small bowl with a sharp edge (don’t use anything with too thick an edge- it won’t cut through the pastry cleanly). Once you have your 4 inch rounds, you will take the rolling pin and roll them out to 5 inches. This will result in the pastry ending up being 1/8 inch thick. Which is ideal. You don’t want the dough to be any less than 1/8 inch thick. It needs to be able to hold the filling once baked.
I want you to do this for the following reason. Most recipes have you using just the 4 inch round to fit into your average sized muffin tins. However, this means that the dough barely makes it up the sides. And there will be a certain amount of shrinkage during baking, which means that they will sink further down. I don’t like the look of the shrunken tarts. I would rather there be extra pastry higher up. They have more personality! Now, the whole issue is mute if you have a 5 inch cutter. In that case, roll immediately into 1/8 inch thickness and cut out. Done.
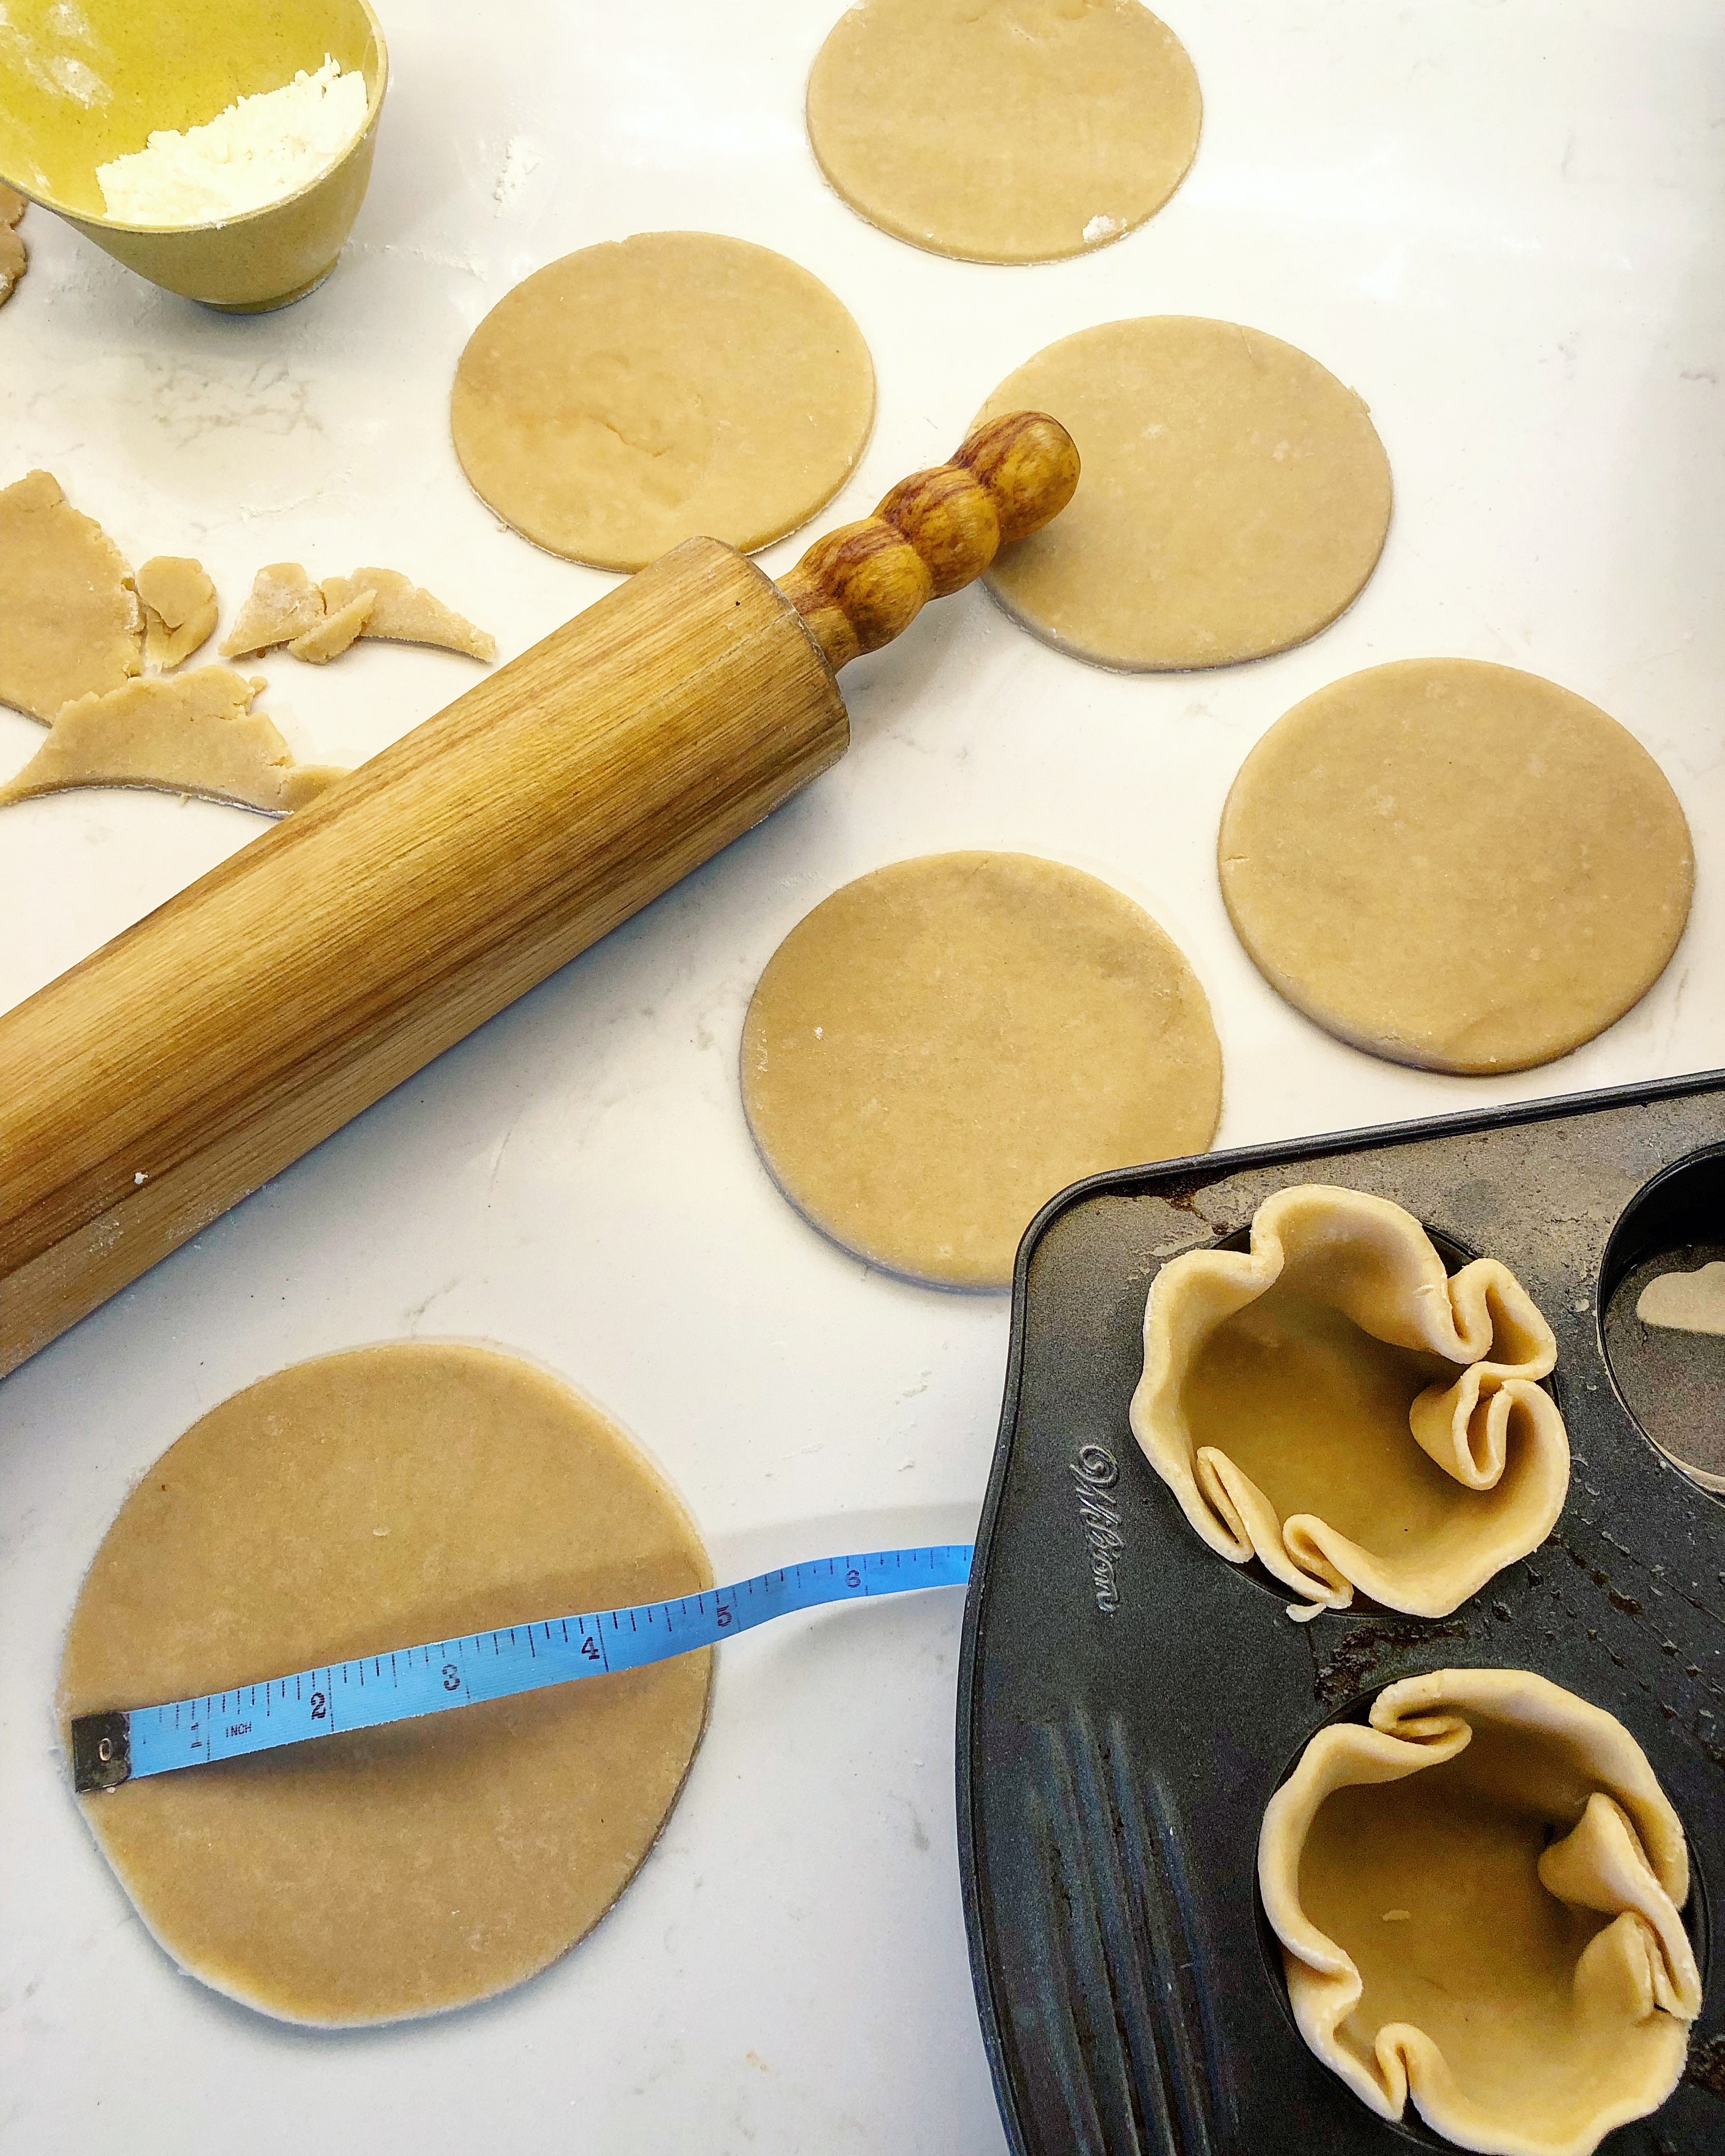
There are two ways to fit the pastry to your muffin tins. Either gently fold the edges to create soft pleats and ease it down into the well. They will definitely look more organic this way (I love this method) You can also try this method: take a pair of scissors and make 1 inch cuts (about 7 in total) all around the outer perimeter of the pastry round. Then pleat one ‘fringe’ over the next, so that they create a finished edge or wall. This has a unique look as well. Do what floats your boat.
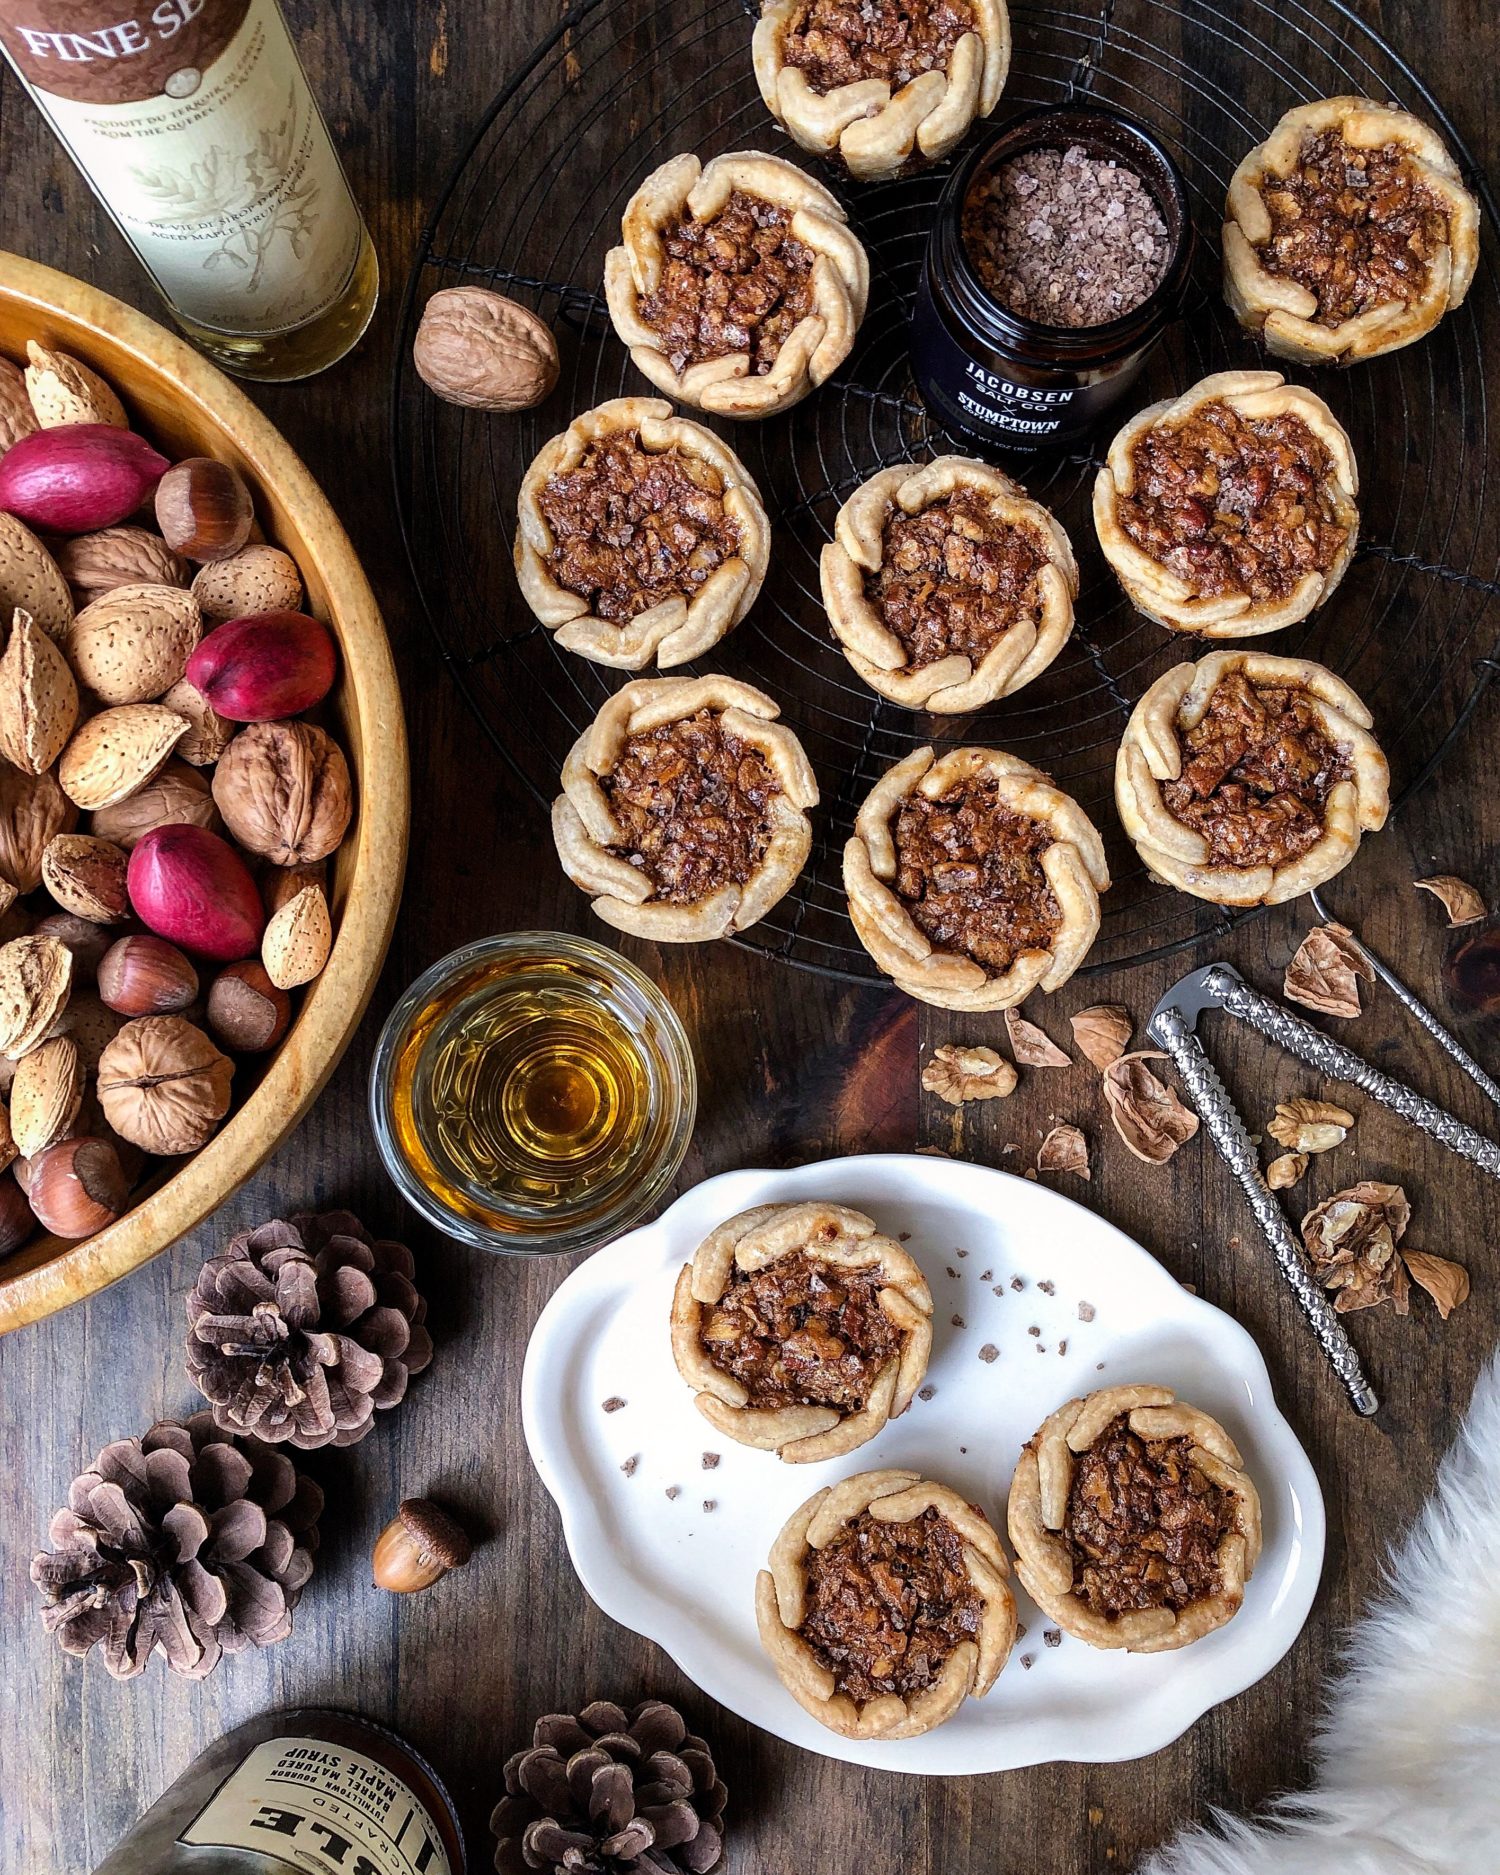
The filling starts as a classic filling. Eggs, brown sugar, maple syrup and butter. But I got a great tip from Sift, the baking journal that King Arthur flour publishes. Add a smidge of molasses. It adds an earthy tangy sweetness that balances the saltiness of the bacon and the finishing salt to come. But here is where I am really putting a fresh spin on this recipe. Brown the butter first.
Brown Butter is a process unto itself. Once you have done it a few times, you will think nothing of taking the few extra minutes to take butter to the next level. Browning the butter brings out a wonderful nuttiness, and the colour will deepen to a lovely maple hue. The following is great info from The Kitchn:
How to Make Brown Butter is simple — you melt butter slowly over low heat until it foams and the milky whiteness turns brown and sinks to the bottom of the pan. Two things are happening in the process. First, the water in the butter is cooking out, concentrating the butter’s flavour. Second, the butter’s milk solids caramelize, flavouring the butter with their nutty richness and extending the life of the butter. It is important to use a lightly coloured pot to brown your butter and have a bowl for cooling standing by. It will seem like the butter is taking forever to brown and then it will go from perfect to burnt in a few short minutes. The light pot will help you keep an eye on things, while the bowl will quickly cool and stop the cooking process.
Here are some important tips:
- Brown butter can turn from perfectly coloured to burnt in the blink of an eye, and can happen even faster than that when you’re working over high heat. Follow this tip: The temperature setting is really what allows you the most control over this process. To avoid burning the butter, keep the heat set to medium. The butter will cook more slowly, and you’ll have more control over it.
- Brown butter isn’t one of those things you can start cooking and walk away from. It requires your total attention, which means stirring the butter every once in a while. Without stirring, the butter has more potential to cook unevenly, and the milk solids can stick to the bottom of the pan and eventually burn. Follow this tip: As the butter melts, it’s important to stir regularly to ensure it cooks evenly. Stirring or swirling the pan will also allow you to see how the butter is progressing (especially as it starts to foam), and will prevent the milk solids from sticking to the bottom of the pan.
- Once the butter has finished cooking, it’s not only important to remove the pan from the heat, but also to pour the butter into a separate dish. Even off the heat, the residual heat from the hot pan will continue cooking the butter, and when left in there too long, it may actually burn the butter. Follow this tip: Once the butter smells nutty and reaches the level of browning you prefer, remove the pan from the heat and transfer the butter to a separate bowl to cool. This will prevent the residual heat from the pan to continue cooking, or burning, the butter.
Once you have your brown butter, then the rest of the recipe is easy. You do also need to fry up some bacon. I like to use a double smoked hickory bacon, but really, any bacon will work great. It is just a matter of chopping it into 1/2 pieces (working from very cold to almost frozen bacon works perfectly when having to cut it into small pieces) and then sautéing it over medium heat. Once nicely crisped up (don’t over cook it) drain it well on paper towels and then store till needed. You can even sauté your bacon the day before you need it. In fact, I will often sauté up an entire package of bacon all at once, and store it in the fridge for baking like this, and then to add to scrambled eggs or salads throughout the week.
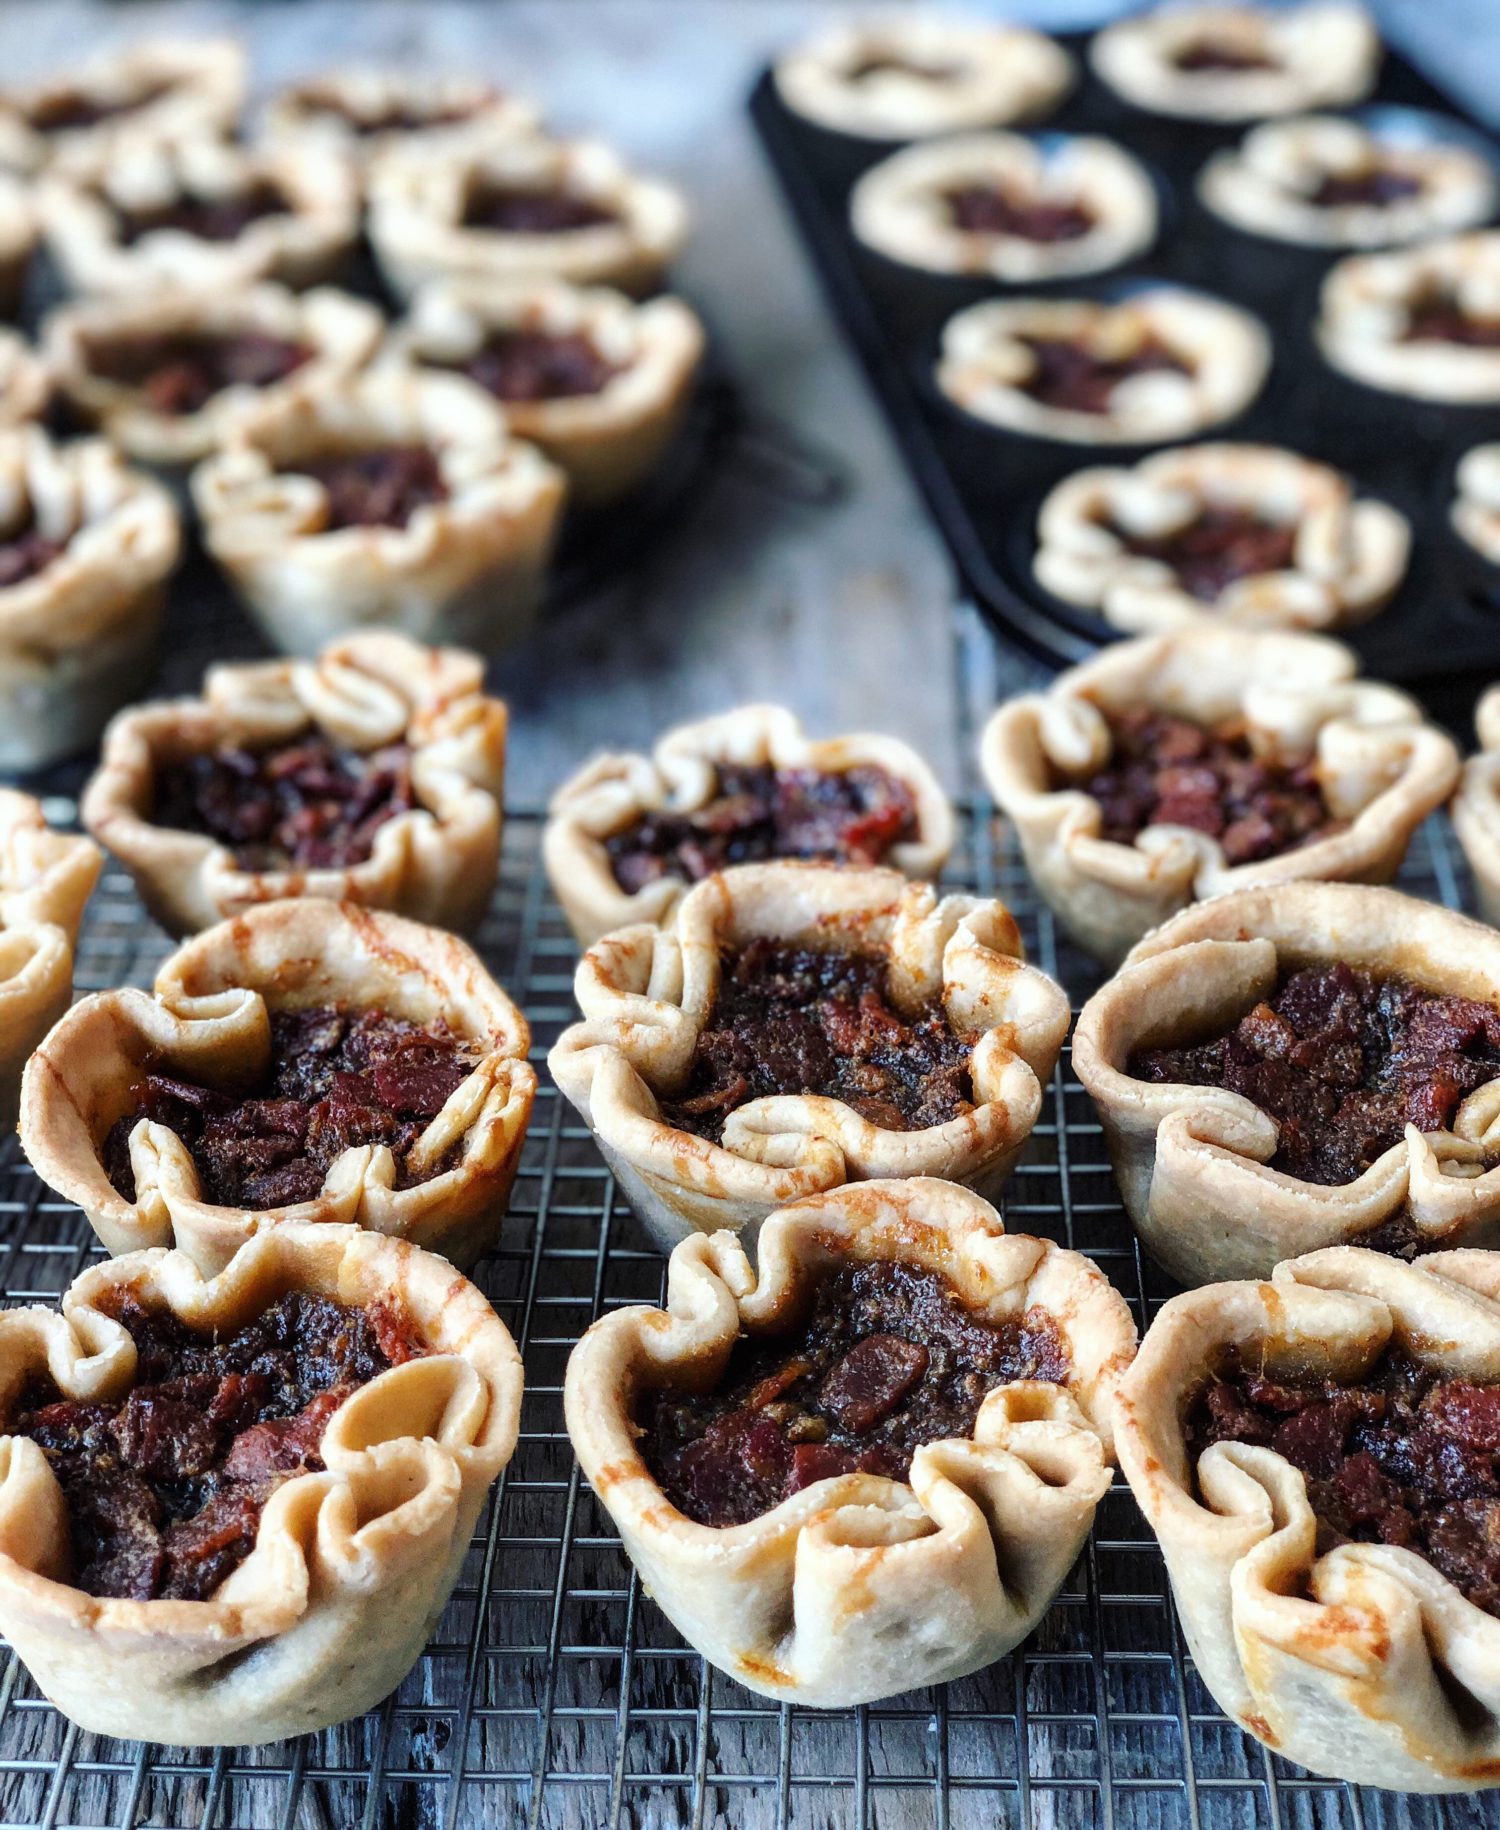
One final addition. Just in case there wasn’t enough saltiness to these babies, I add a sprinkling of Maldon or other finishing salt to them as soon as they come out of the oven. I have some Jacobsen salt that has Stumptown coffee added to it, and it works perfectly in this setting. The play of the salt against the sweetness of the maple syrup and molasses is brilliant.
Final Thoughts
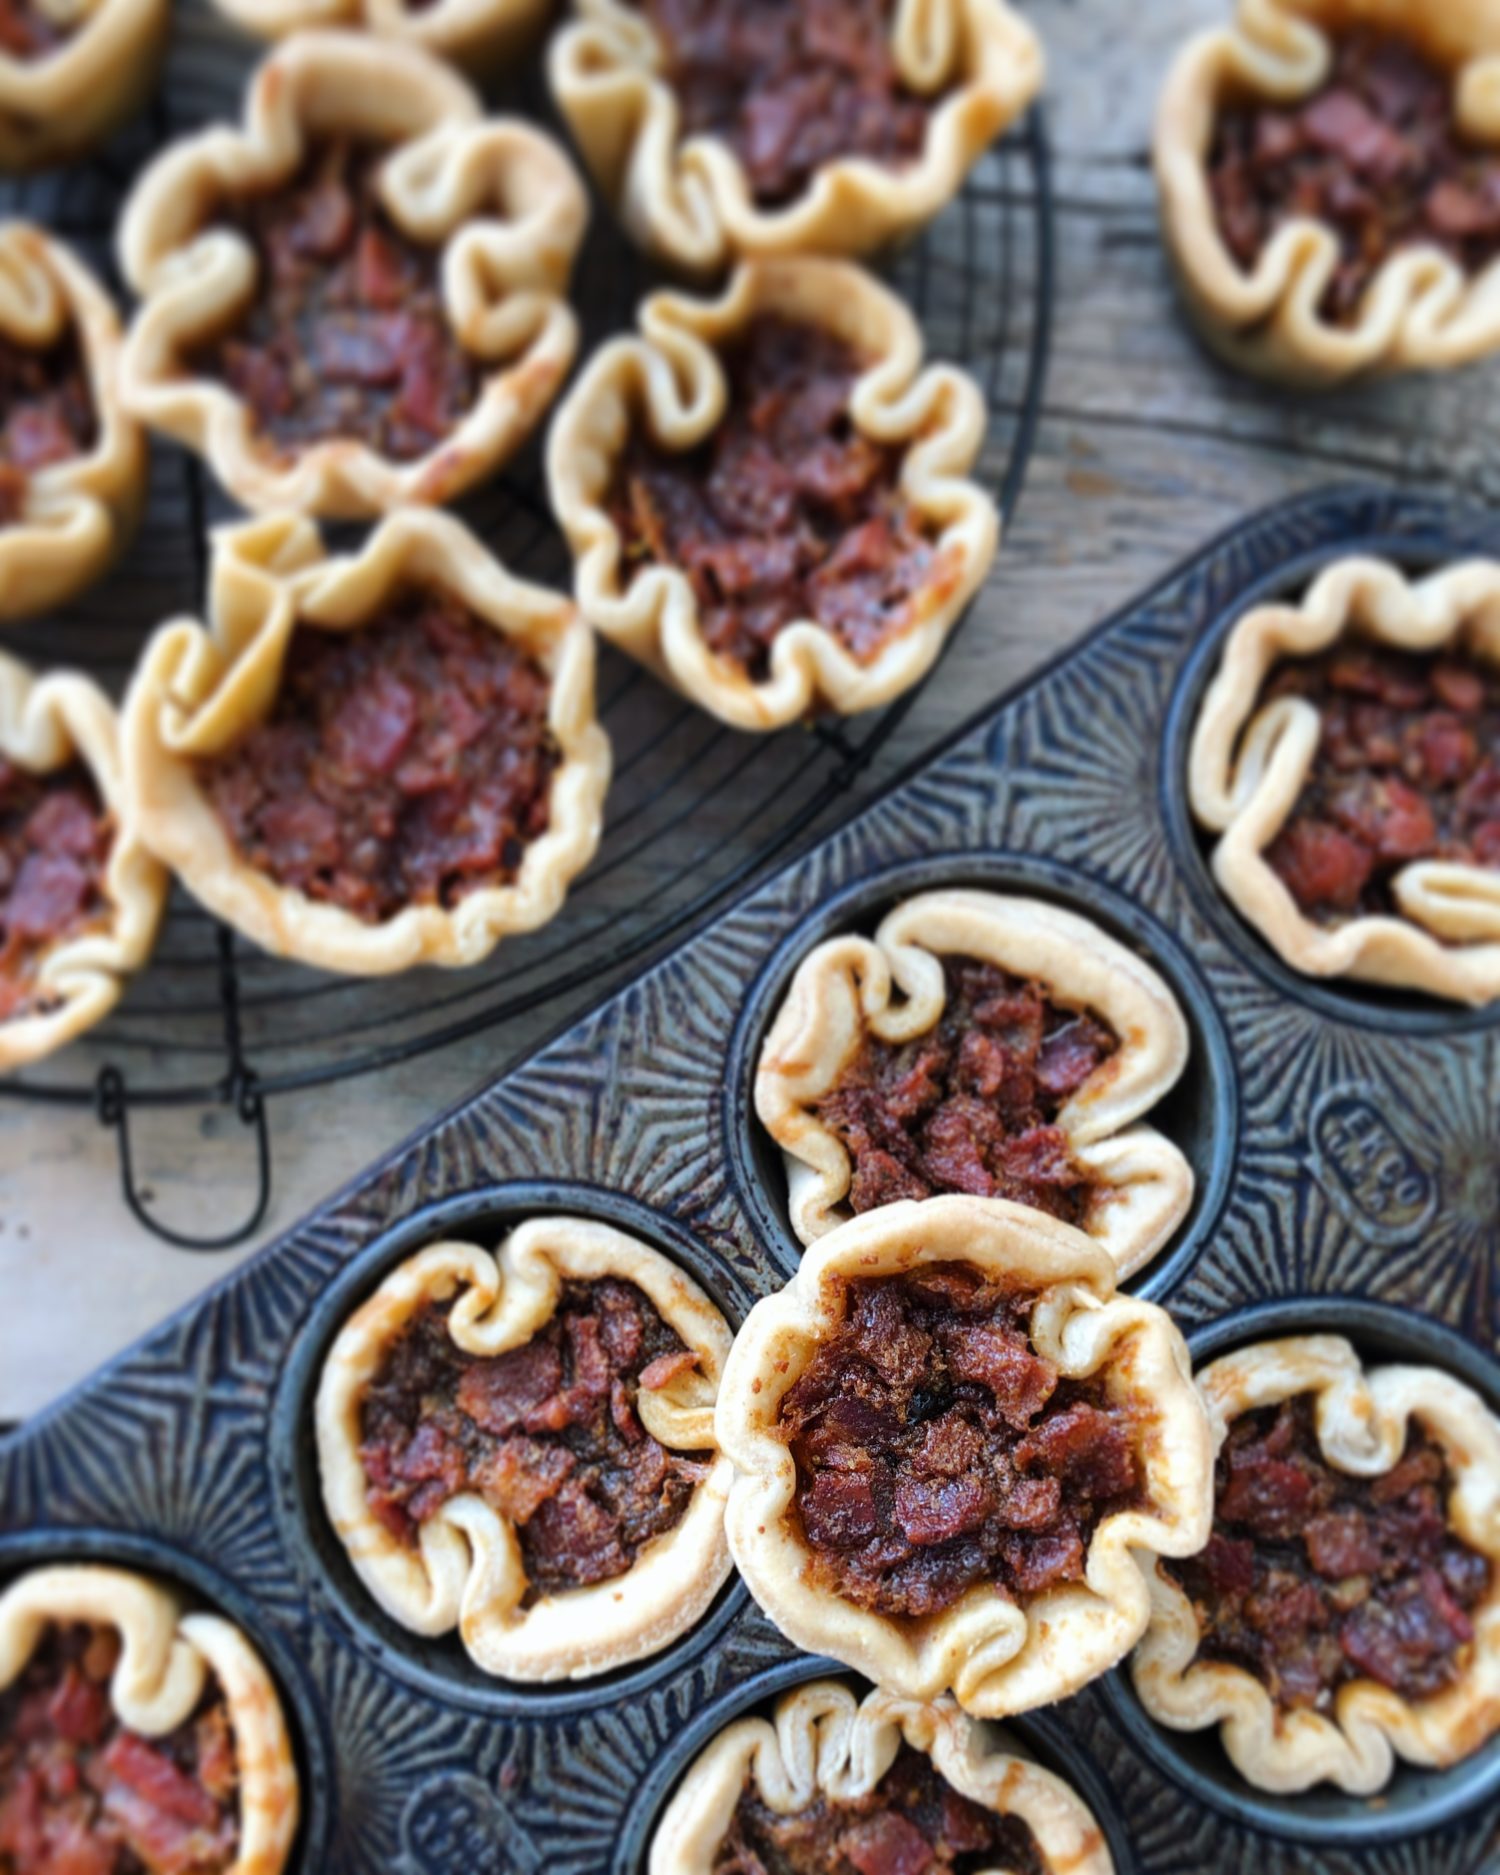
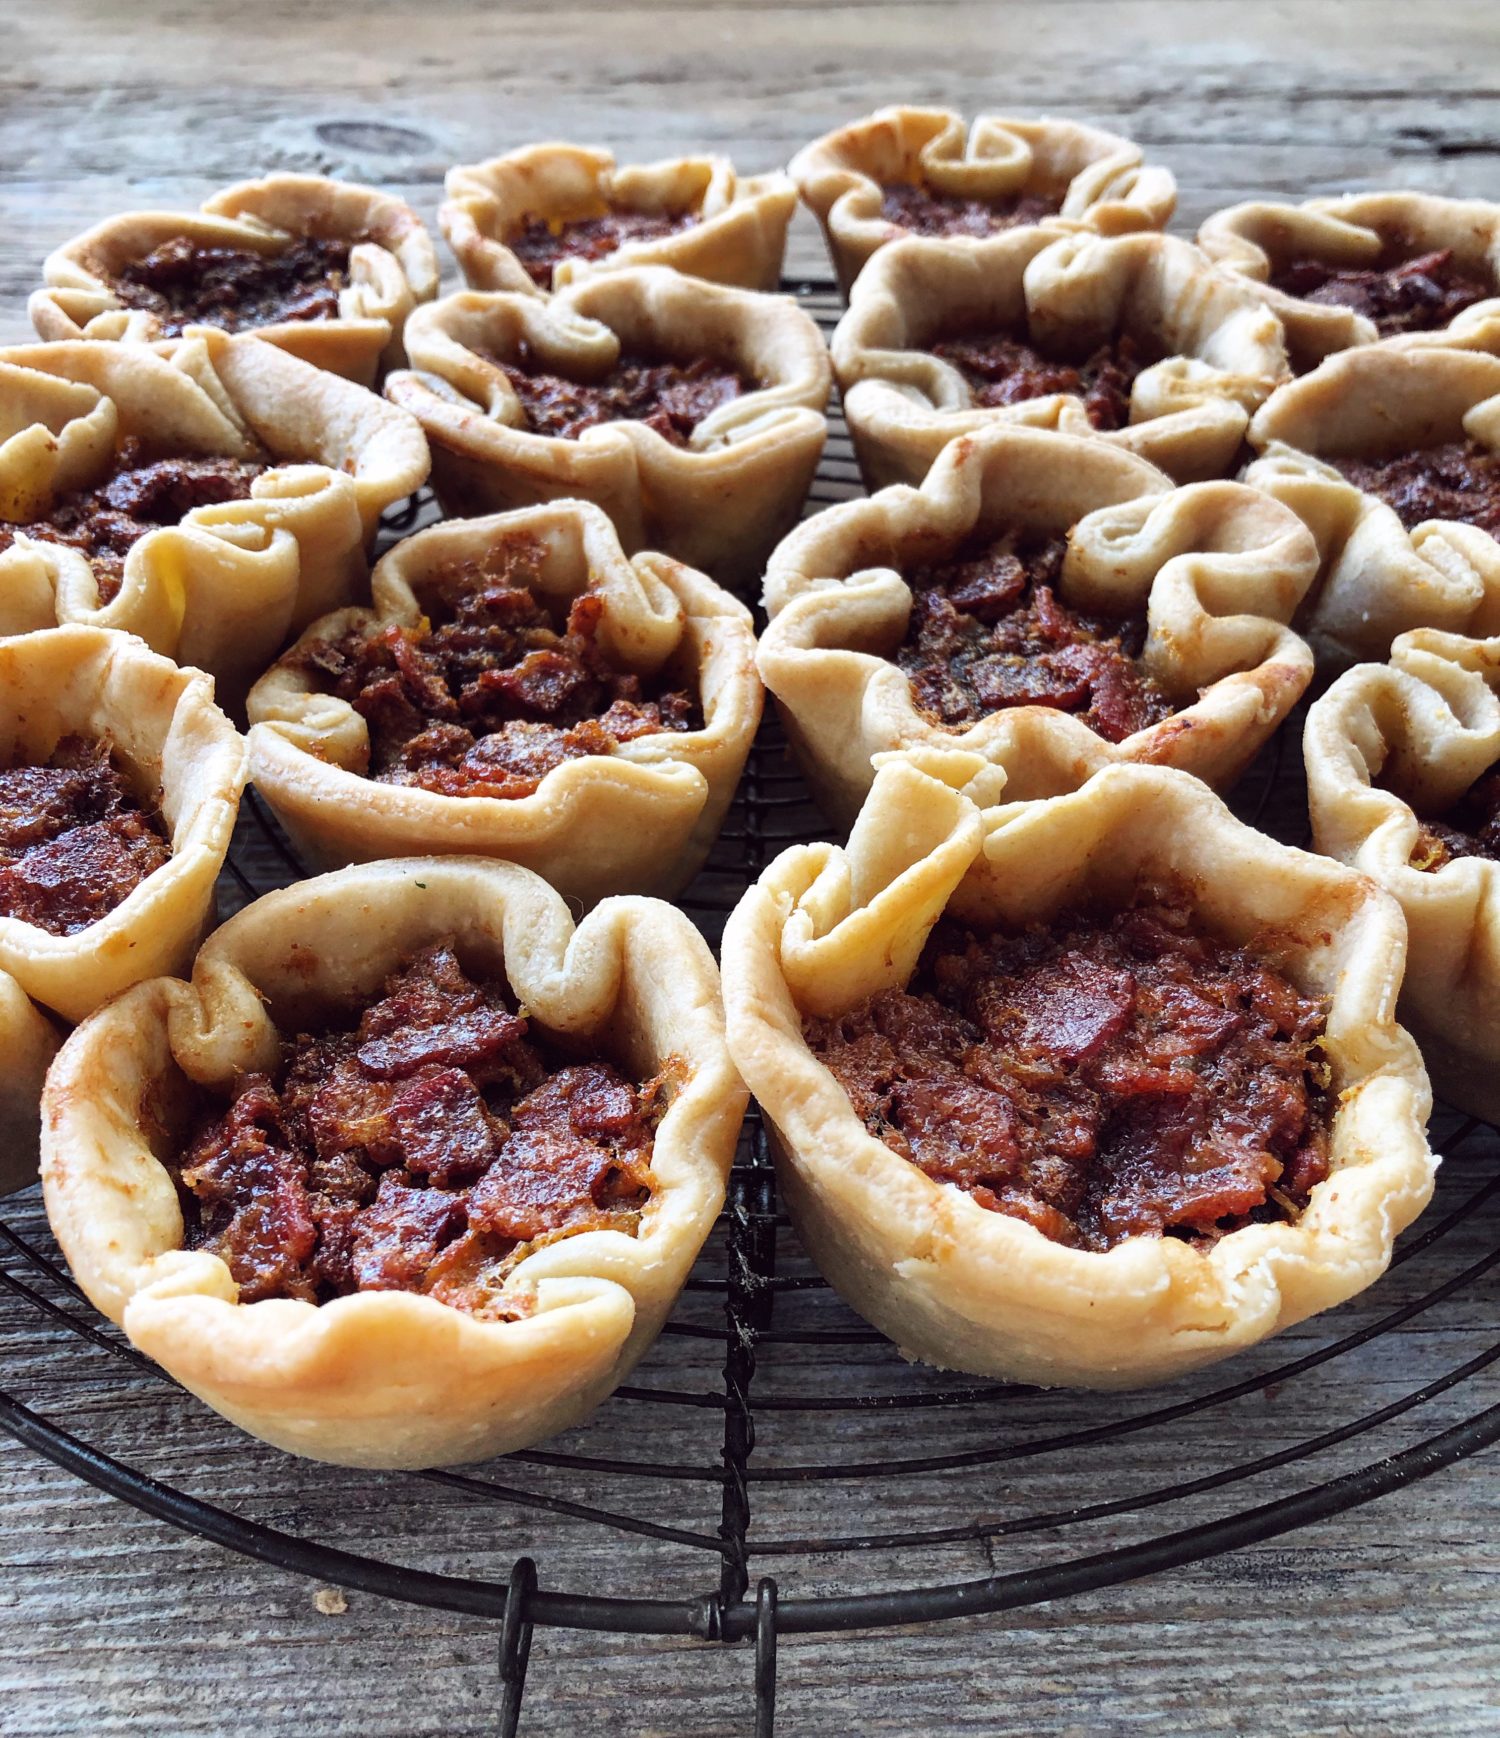
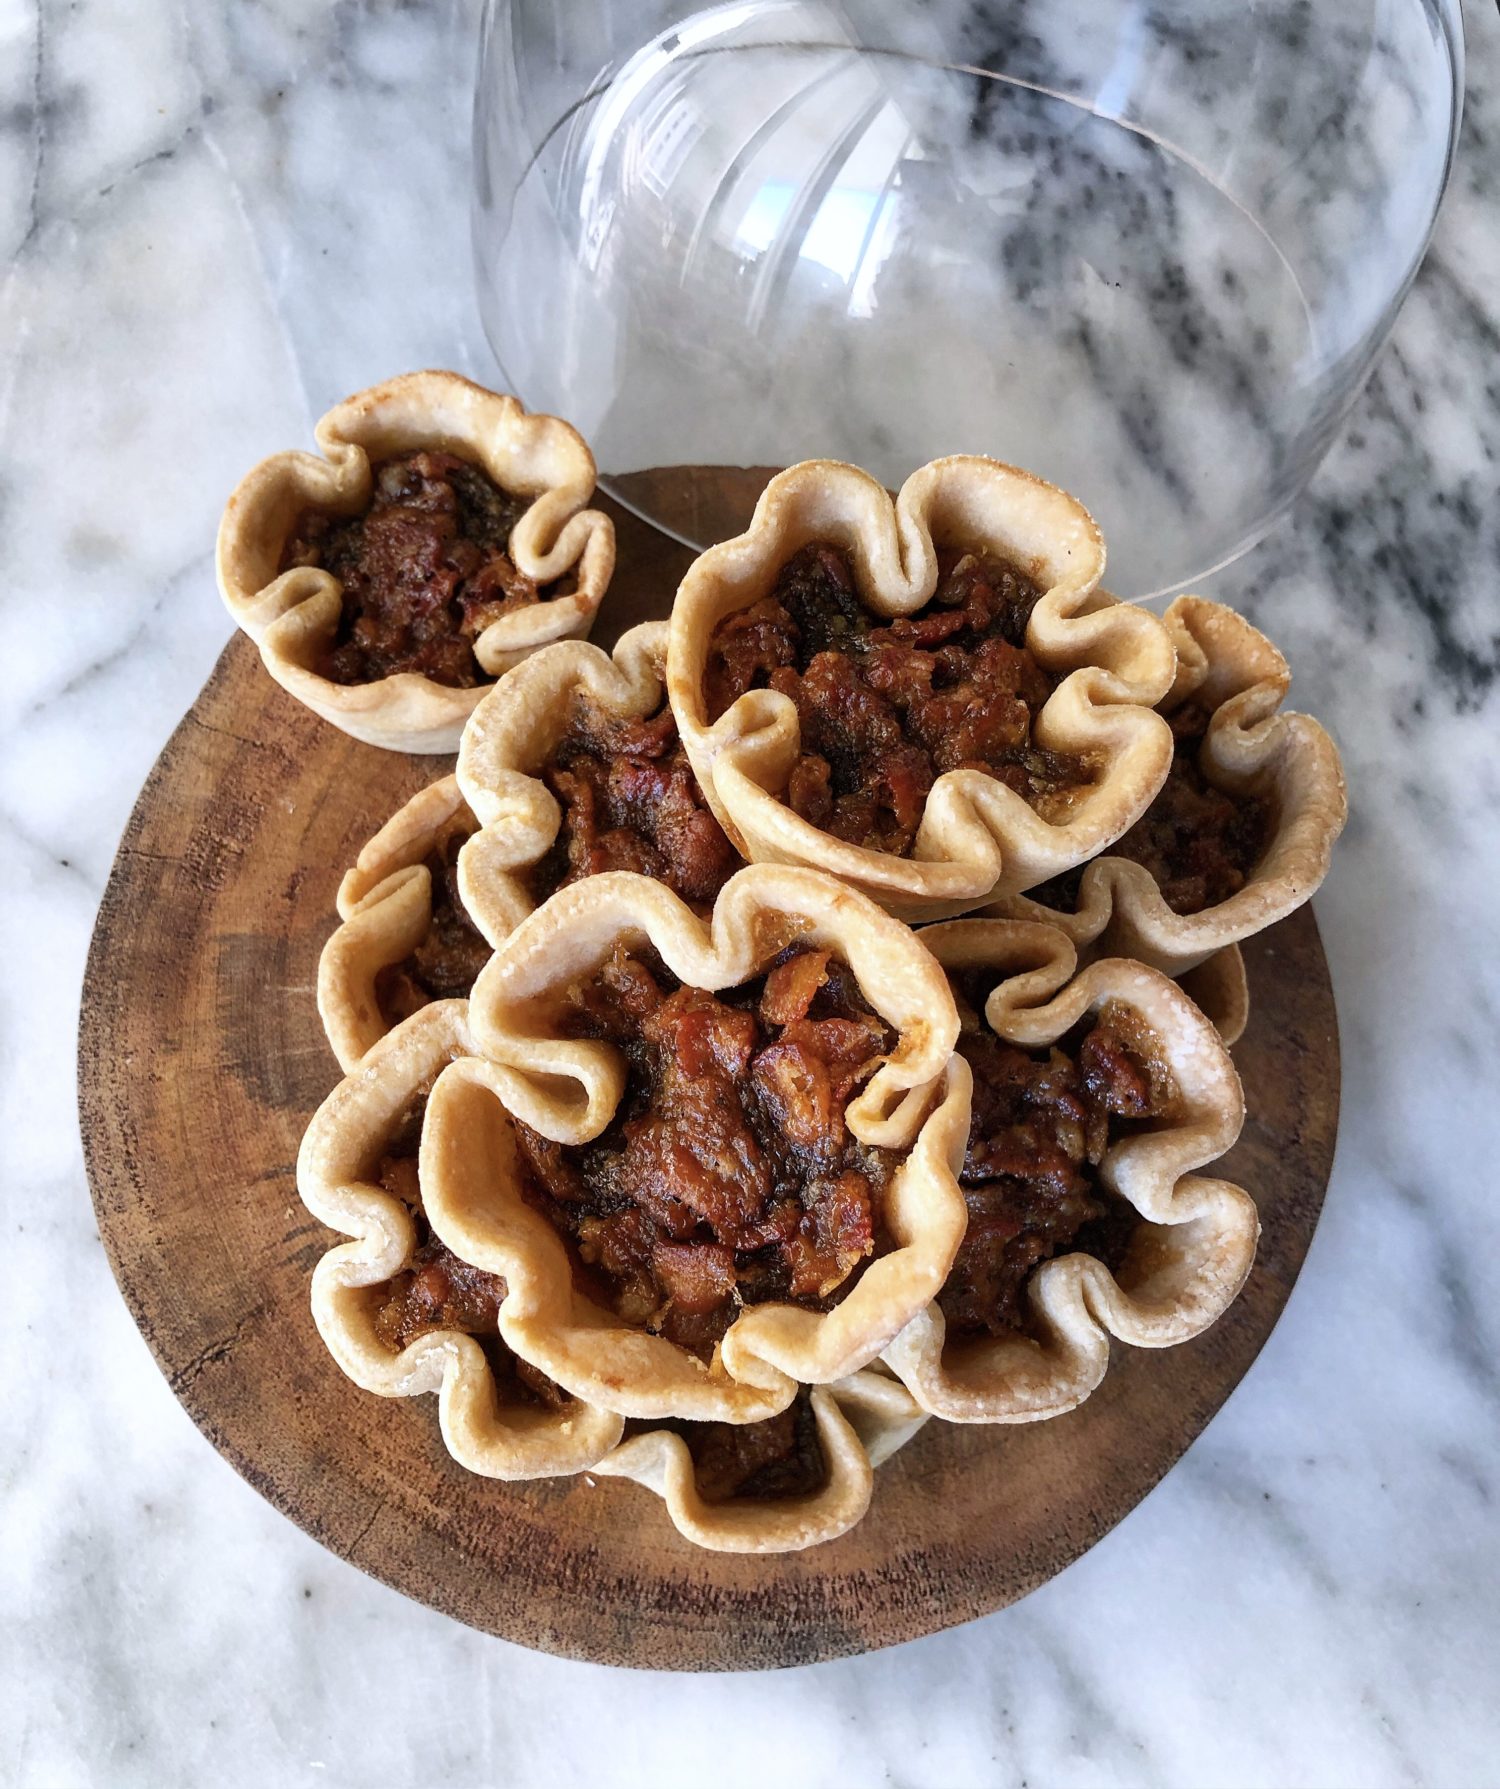
These butter tarts are a go-to for me. I love making them for pot-lucks or picnics, or even making a batch for a shower or games night. When our cat sitter asks for a batch to keep her company when she comes over to sit, I am happy to make them. As you can see by the photos, big batches often happen around here! The pastry stays nice and tender, even a couple of days later, when stored in a sealed container.
*For an indulgent extra, use the recipe for my Espresso Maple Bourbon Bacon for the bacon portion of the recipe! Make and let cool and then chop into small bits. These can be stored in a container till needed.
Love Jen

Brown Butter Maple Bacon Butter Tarts
The classic Canadian pastry treat, the Butter Tart, gets the all-star treatment with the addition of bacon and maple syrup, an iconic Canadian flavour duo. In addition, browning the butter adds a lovely nuttiness and depth to the filling flavour. Ooey, gooey, the best little pastry ever!
Ingredients
Pastry
- 1 1/4 cups AP flour
- 1 cup whole wheat flour, see Notes
- 1/4 tsp kosher salt
- 1/2 cup (1 stick; 8 tbsp butter) frozen or chilled
- 1 large egg
- 1 tbsp white vinegar or fresh squeezed lemon juice
- 4 tbsp cold water, or more
Filling
- 1/2 cup cooked, crumbled bacon (this can be made in advance, and stored in the fridge till needed) See Notes
- 1/4 cup (1/2 stick; 4 tbsp) butter
- 2 large eggs
- 1/2 cup packed dark brown sugar
- 1/4 tsp salt
- 1/2 cup pure maple syrup, don't use substitutes, please!
- 1 tsp apple cider vinegar
- 1 tbsp backstrap molasses
- Maldon or other finishing salt
Instructions
Pastry
-
Whisk the flour and salt together in a medium sized bowl.
-
Grate in the butter quickly to keep it cold
-
Toss together to coat the butter and distribute it evenly throughout the flour.
-
Whisk the egg, vinegar and 4 tbsp cold water together in a small bowl. On a very dry day (winter, heat on) you may actually need another tbsp of water.
-
Drizzle this over the flour mixture and toss it to get the liquid evenly distributed.
-
Fold it together in the bowl with your hands till a rough ball forms. If it isn't coming together, add one more tbsp of water. In dry kitchens (winter, heat on) it may easily need a touch more water.
-
Transfer to a floured surface and continue to quickly bring the dough together. Pat it into a disk, wrap in plastic and chill for at least one hour.
-
When ready to use, bring to room temperature on the counter. If chilling in the fridge overnight, you will need to give it some time to warm up again.
-
Take a 12 cup muffin tin and spray or grease as you want.
-
Flour the surface well, along with your rolling pin, and roll the disk out to 1/6 of an inch.
-
Using a 4 inch (10 cm) cookie or biscuit cutter, create rounds out of all the dough. Take the scraps and set aside.
-
Using your rolling pin, roll each round out gently to a 5 inch circle. It should now be 1/8 of an inch thick, but hopefully a little thicker in the middle. Perfect. Don't roll any thinner- they need to hold the weight of the filling once baked. Having the middle thicker will help create stability.
-
Take each round and gently create folds or pleats and place into one of the muffin wells. Let it sink into the well, helping the edges along by pleating as needed. They shouldn't look perfect, this is part of their charm. The sides of the pastry should be as high or slightly higher than the muffin tin well. They will shrink during baking, this way, they won't go too far down.
-
Continue with the scraps of dough, rolling out again, and making rounds, till all the muffin wells are filled. You may find that the scraps will shrink a bit when rolling and then cutting out. Roll out the dough and then give the dough some time to rest before cutting. Roll out to 5 inches. Fit into the muffin tin.
Filling
-
Preheat the oven to 375F
-
*Have your bacon prepared by chopping and sautéing enough bacon to create 1/2 cup cooked and drained. The amount you start with will depend on the type of bacon you are using. I would hesitate to suggest using thick cut, as the pieces may be too large for the filling- they would take over the tart. A lovely double smoked will work, as well as any good quality low sodium bacon. Let it cool and drain completely.
-
*Brown the butter. Cut the butter into a few even pieces. Place the butter in a small pot and heat on medium. Do not use too a high a heat (see above in the blog post for trouble shooting)
-
Once you have gone through all the stages (from foaming to light tan to toasty brown with solid bits on the bottom of the pan, it is has a fragrant nutty aroma, remove and let the butter cool.
-
Now you are ready to make the filling.
-
You can use a hand mixer, or a whisk. Beat the eggs, brown sugar and salt until very smooth.
-
Add the maple syrup, the apple cider vinegar, the backstrap molasses, and the cooled brown butter. Beat or whisk vigorously for a few more minutes.
-
Gently stir in the crumbled cooled bacon.
-
Fill each pastry shell 2/3 full with the filling.
-
Bake the butter tarts till the filling is bubbling and the crust is golden, about 20-22 minutes.
-
Remove to a cooling rack and sprinkle each tart with finishing salt.
-
Cool in the muffin tin on a cooling rack for at least 20 minutes. Remove to finish cooling, ideally using a small offset spatula to gently loosen to lift out.
-
These will keep for several days in an airtight container.
Recipe Notes
If you would like to add the flavour of rye to your pastry (such a lovely addition) then replace the whole wheat flour with 1/2 cup All Purpose flour and 1/2 cup Rye flour.
For a fun substitute to the bacon, feel free to make my Espresso Maple Bourbon Bacon first and then chop once cooled.

I am so happy that someone else shares my sediment about raisins in butter tarts! My husband loves raisins and I love pecans in tarts so this is another divided Canadian house! At least we both agree that bacon is a welcome addition to dessert. Thank you for this delicious recipe…it will become a regular favorite in my house!
Hi Sue, hehehe! Yes, raisins are a huge bone of contention, aren’t they!! This is one of our most favourite and loved recipes, so happy you like it! Love Jen
Hi Jennifer!
I love how exciting and informative you are!!! Can’t wait to try these out!! I am also no raisins!
Thank you Dianne
Hi Dianne, thanks so much for your kind words. Yay Team No Raisins! We rule! Love Jen
I do love raisins but I do love bacon more – Can’t wait to try this! thank you!
Hi SaraLou, Hehe, I’m sure you’ll love the bacon version! Love Jen