Here’s a retro classic dish I loved as a kid, and deserves to make a comeback!
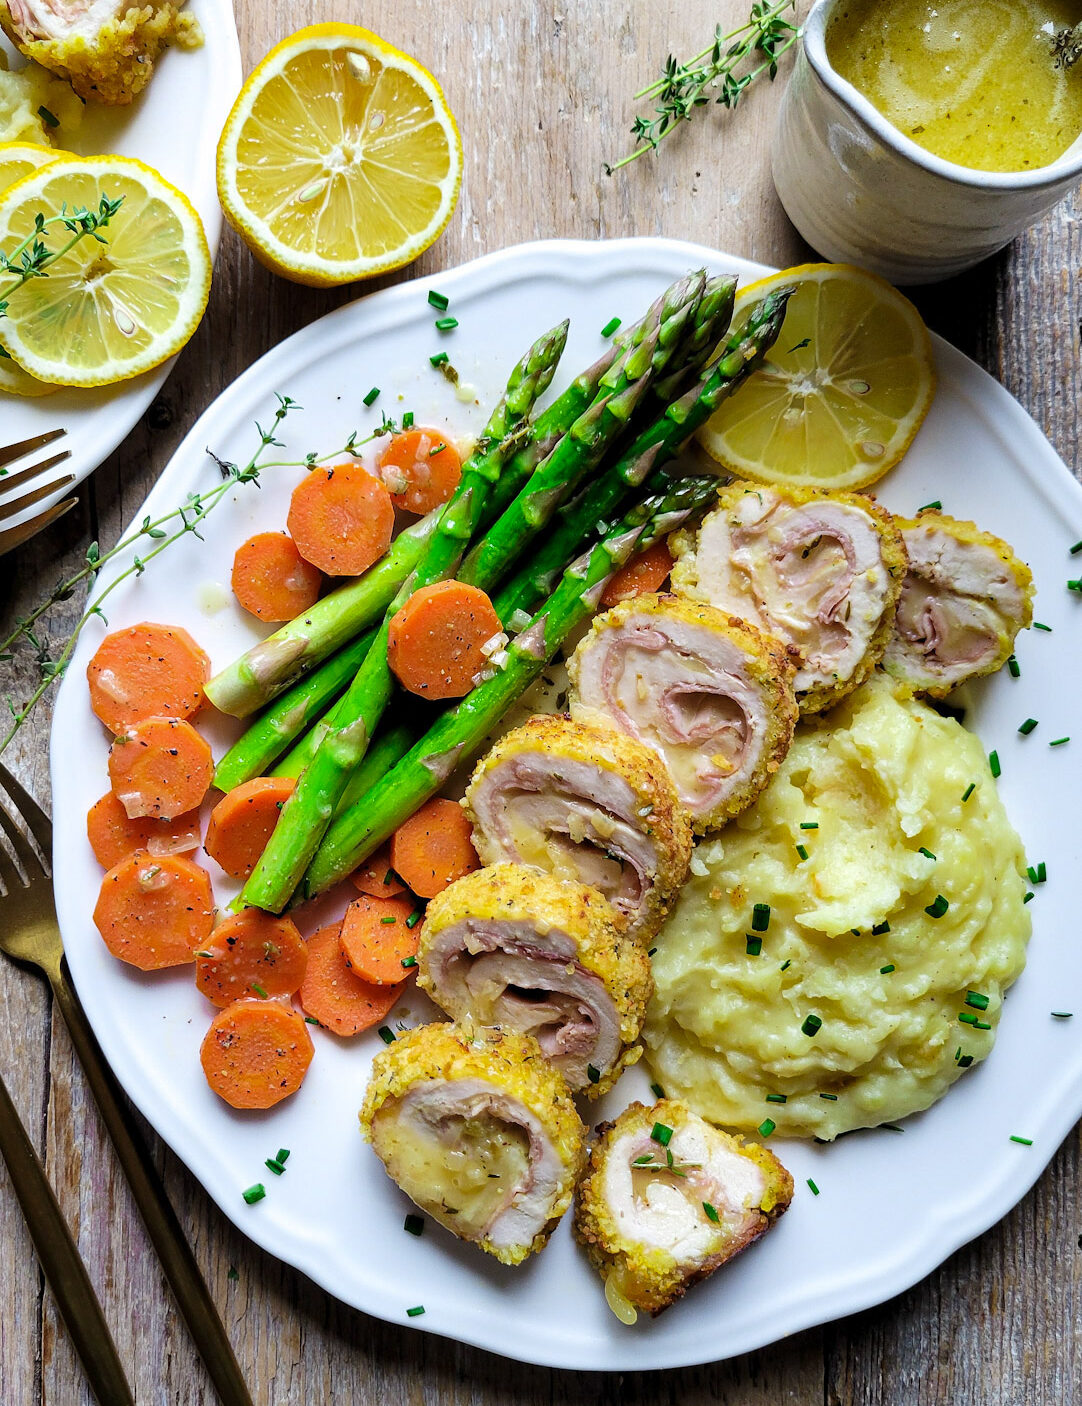
Classically, tender juicy chicken breasts are wrapped around ham and swiss cheese, then breaded and pan fried. I’m making it a bit more flavourful and healthy.
Where Does Chicken Cordon Bleu Come From?
This dish is really a variant on a veal or chicken schnitzel wrapped around cheese, a Swiss dish popular in the 1940’s. It evolved into a breaded veal or chicken breast wrapped around ham and cheese and the name Cordon Bleu refers to the Blue Sash designation given to food dishes prepared to a very high standard by outstanding cooks. (the blue refers to the blue sashes of French chefs) and the name has been around since the 50’s. Chicken Cordon Bleu is a cousin to Chicken Kiev, which is stuffed with herbs and butter.
Some preparations use bacon or prosciutto, or different types of cheese. Some versions just wrap the chicken around the filling and are held together with toothpicks, others are roulades, or rolled, as the one I am sharing today.
Ingredients
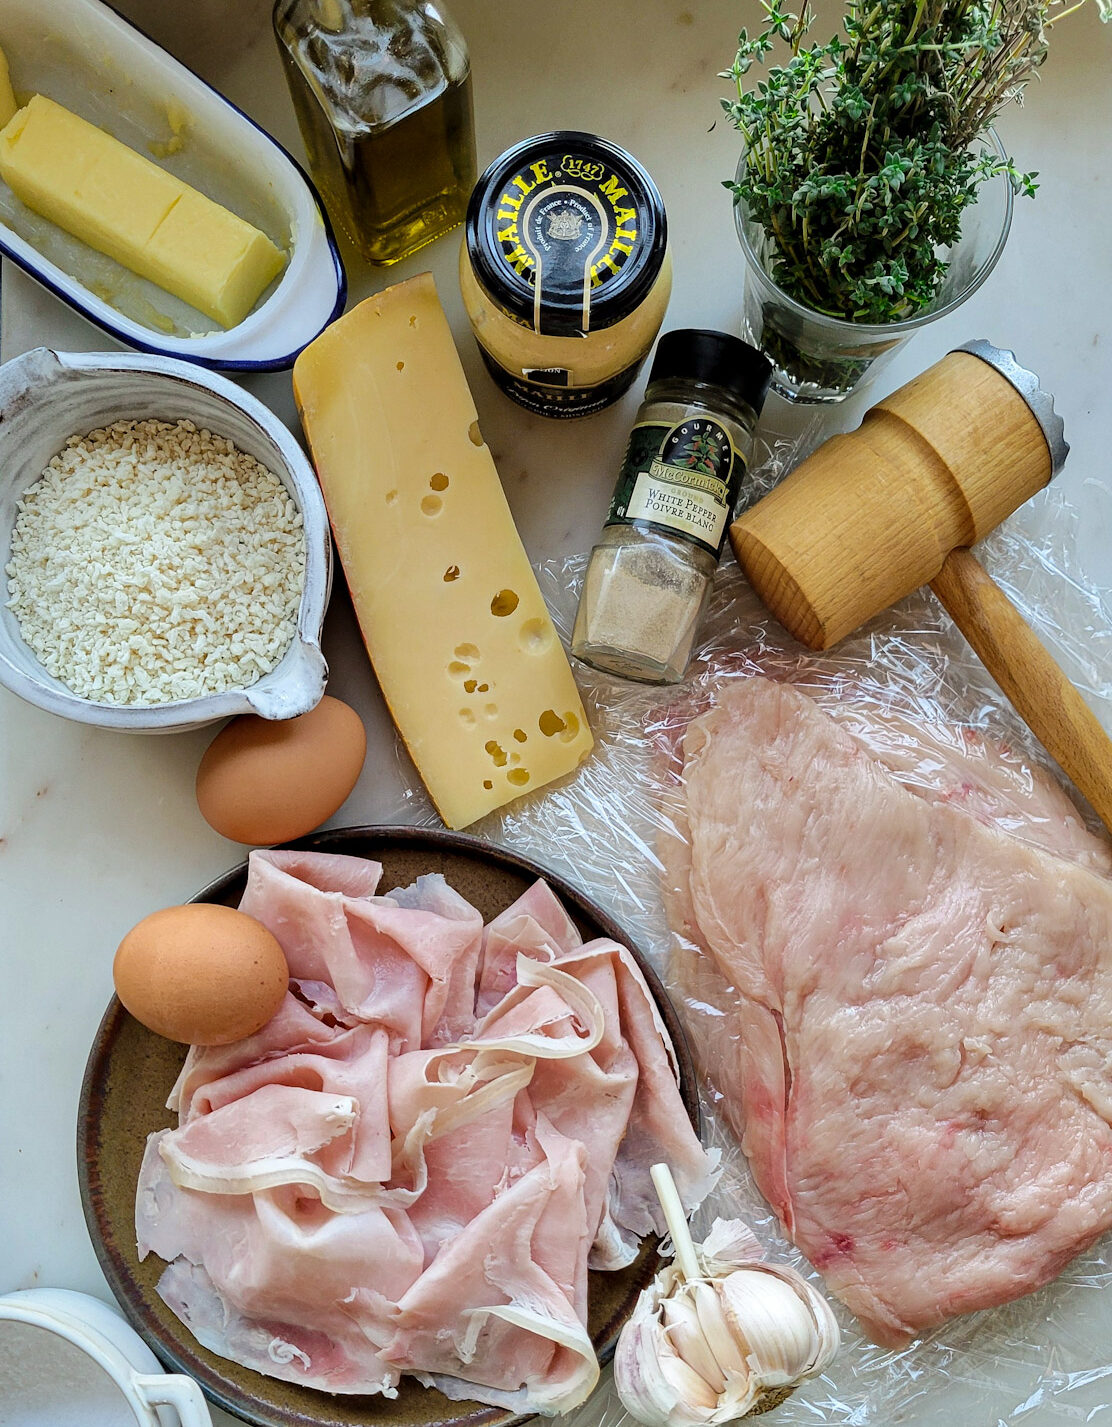
Along with pounded chicken breasts, you will need ham. I like using fresh imported French ham from my deli counter as opposed to the packaged ham slices. I just find it has more flavour and is more tender. Any Black Forest style ham will work as well. For cheese, you can use sliced Jarlsburg, Swiss, or Gruyere etc. Or you can shred it. Or if you are feeling the vibe, go ahead and use a mild cheddar, but not one that is too sharp, dry or crumbly.
You will also need Dijon mustard, salt and white pepper, and fresh thyme for the chicken rolls themselves.
For the dredging, you will need eggs, panko bread crumbs, and flour, as well as seasonings for each portion of the dredge.
 Method
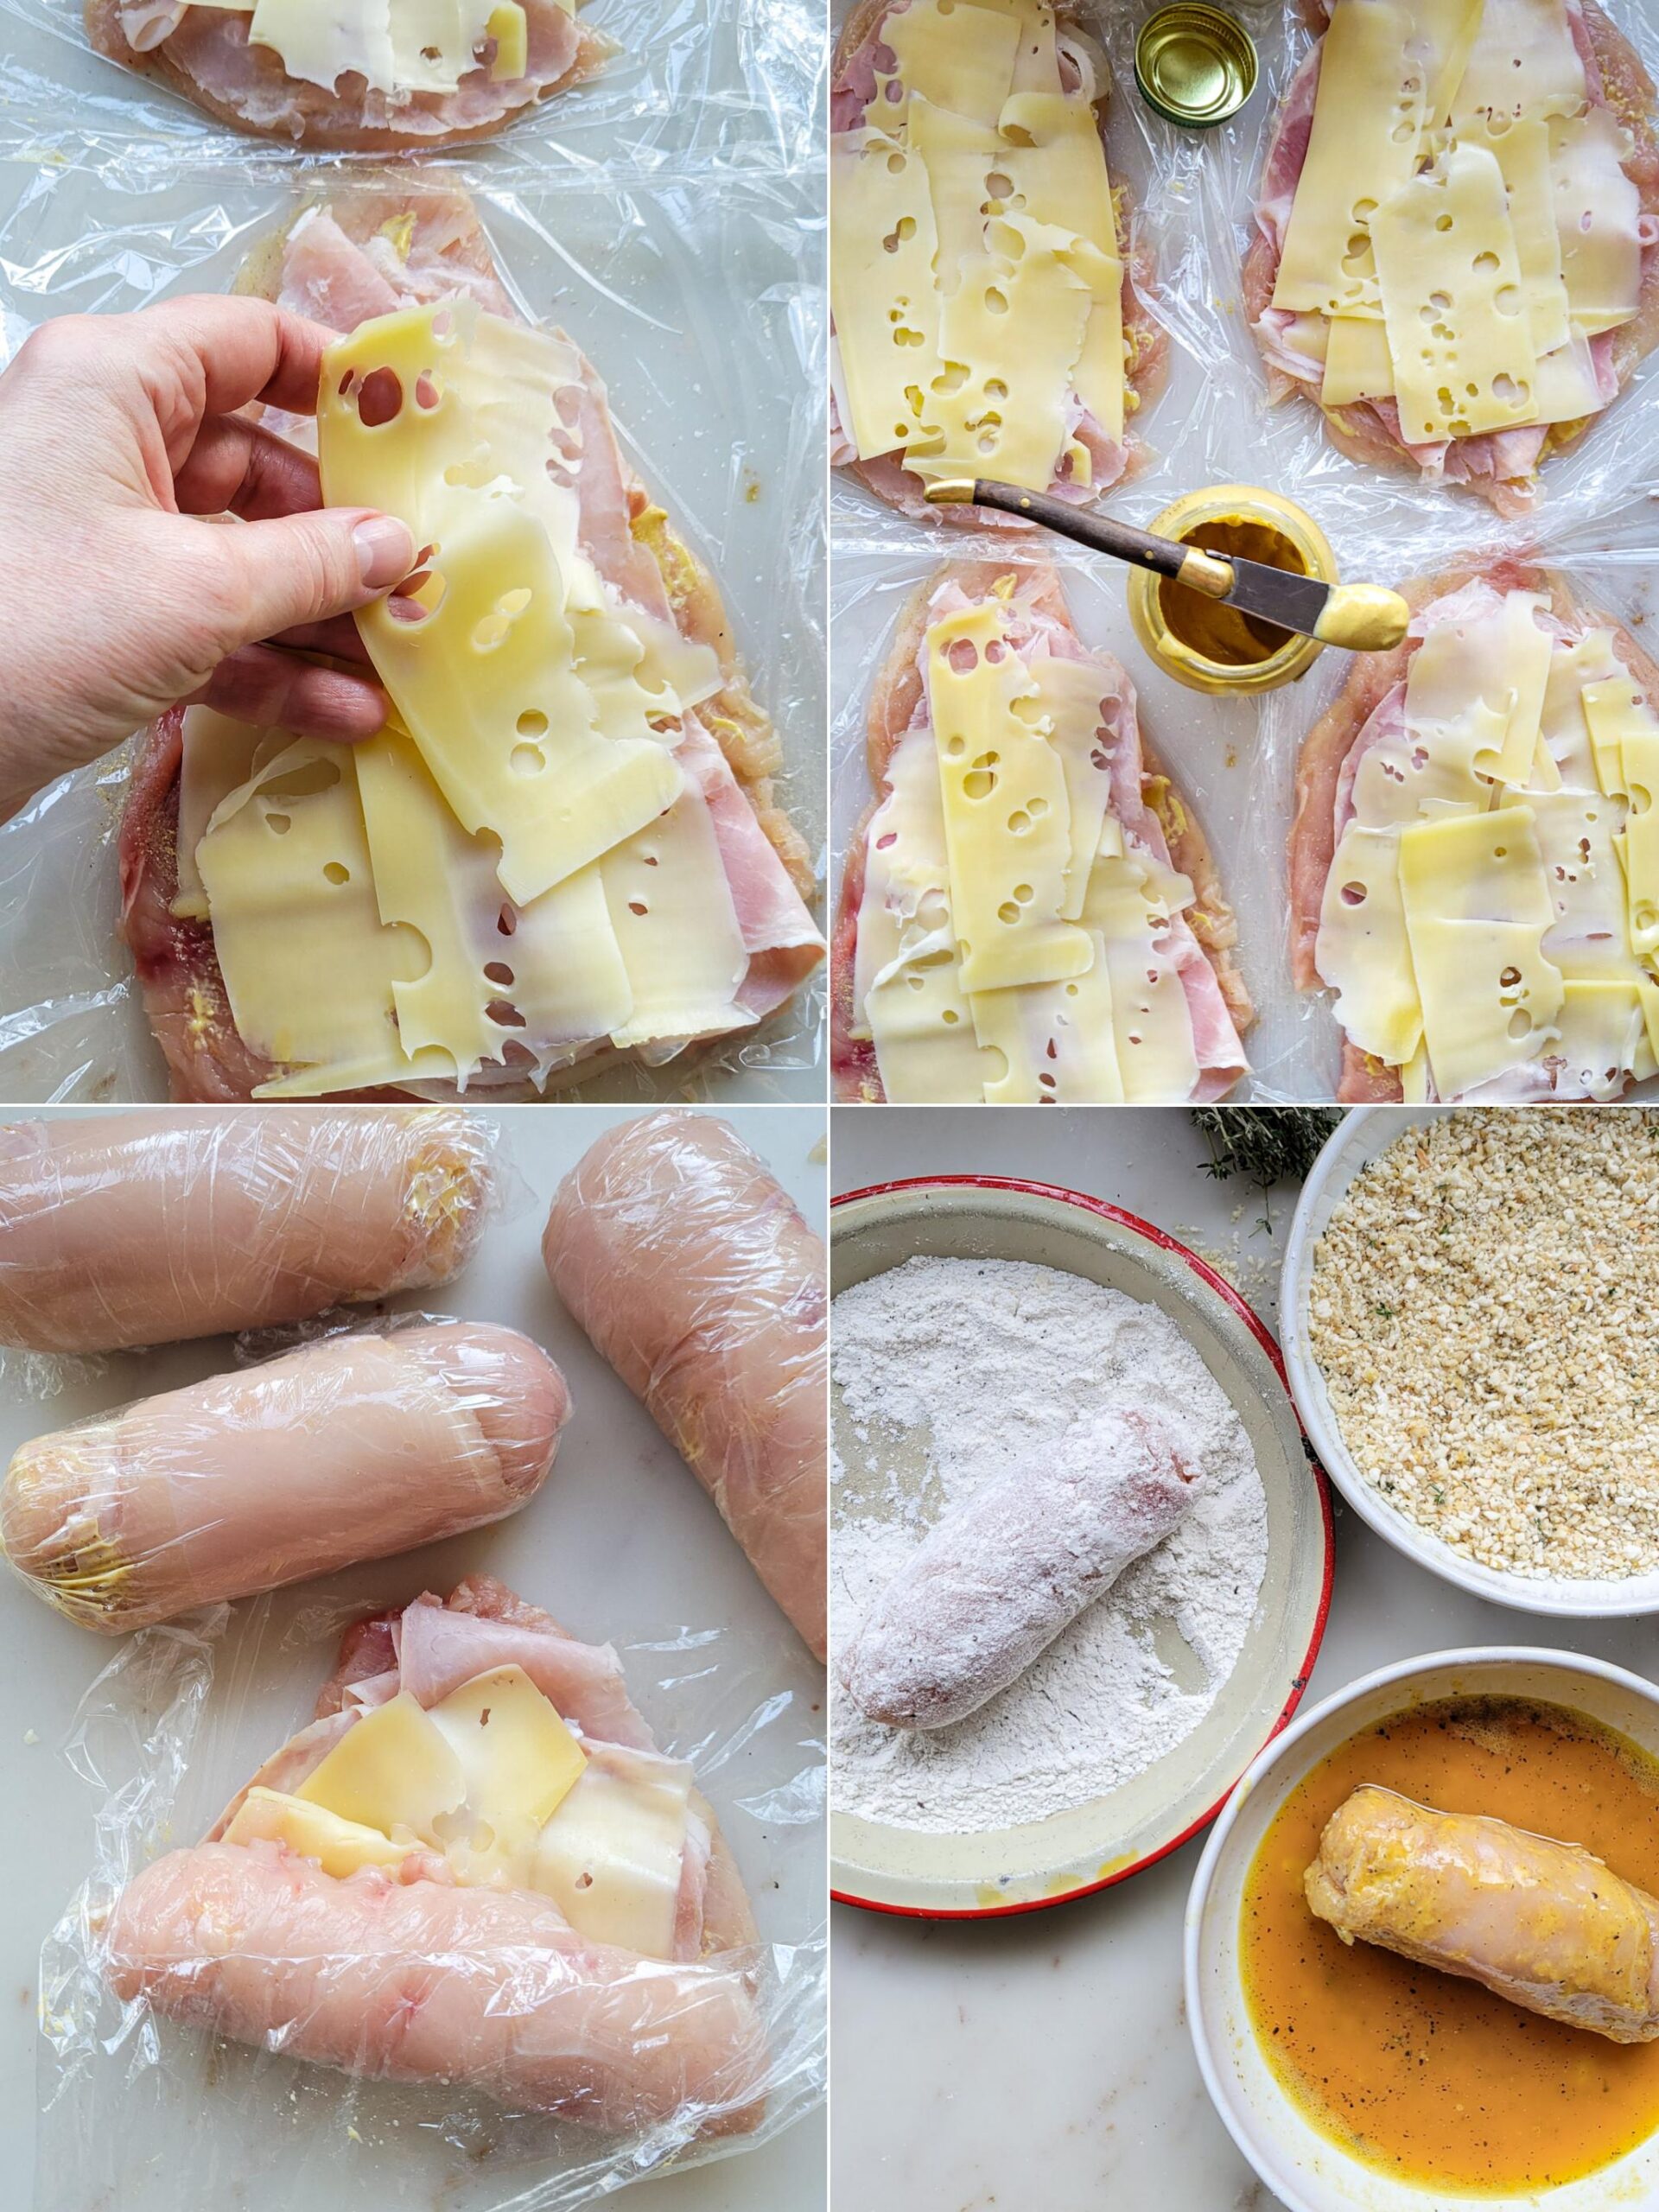
Spread out your pounded chicken on a cutting board or clean counter. Lay a large piece of cling wrap under each piece of chicken. Spread a thin layer of mustard over each portion of chicken, and top with salt and pepper, as well as a sprinkling of fresh thyme.
Next layer is the ham. Lay out thin layers of ham slices over the chicken, keeping it contained to inside the outer edge of the chicken. Top this with cheese. Now, carefully wrap up the chicken, tucking in the sides if possible, using the pastic wrap underneath to guide the chicken over itself. Be firm without unnecessarily pulling on the chicken meat to avoid tearing it. Once completely wrapped up, use your hand to squeeze out any air and form the chicken into an even roll. Twist the sides of the plastic on either end to secure the roll. Repeat with all the chicken rolls. These can now all go into the fridge to set up till you are ready to bread and bake. They can stay in the fridge for at least 30 minutes, or even the whole day.
Bread and Bake
We are going to bake these chicken roulades. Yes, pan-frying will give the exterior more colour. But I find that the crispness when baking these is still perfect, even if the colour is a little less pronounced.
When ready to bake, set the oven to 400F. Set out three shallow bowls or pie plates. Into the first will go flour. The second will hold whisked eggs, and the final one is breadcrumbs. Each dredging bowl will also get seasoned with salt, pepper and thyme leaves.
Pull the chicken rolls out of the fridge and unwrap. Because they have chilled, they really should hold their shape and not require a toothpick or kitchen twine to hold them together. Gently dredge the rolls, first in flour, then the egg wash, then finally into the breadcrumbs. Be sure to get the ends of the rolls as well. Once completely covered, transfer them to a greased baking sheet or pan. There is a bit of oil in with the panko crumbs to help with browning, but feel free to spray the tops of the each with a little olive oil spray to help with browning half way through baking if you aren’t seeing any colour yet.
Bake till cooked through and bubbling. The breadcrumbs should be golden. This should take about 30-35 minutes, depending on your oven. If your chicken is cooked through, but you want more colour on the breadcrumb coating, you may choose to set the baking sheet under the broiler for a few minutes, but keep an eye on them. With a thermometer the centre should read 165F.
Lemon Butter Sauce
Instead of a heavier, creamier sauce, I like to serve my Chicken Cordon Bleu with a Lemon Butter Sauce. While it has a gentle decadence, it doesn’t add unnecessarally to the richness of the dish. The brightness of the lemon is a beautiful contrast to the rich filling of the chicken rolls. The garlic and shallots as well as herbs like parsley, basil or thyme also help keep it from becoming too cloying. If you want to use tarragon, start with less, as it has a more pronounced flavour.
You will need a shallot, garlic, lemons, parsley, butter, chicken broth, and salt and pepper.
The sauce starts by gently sautéing the shallot and then garlic in butter. Once golden, lemon zest and juice are added, as well as the broth. Bring it to a gentle boil and reduce the sauce by about half. Then, lower the heat and whisk in the remaining butter, till smooth. Season with salt and pepper. Finish with fresh chopped parsley or thyme.
Any sauce that you don’t use right away, can be stored in the fridge. It needs to be reheated gently on low, to help the butter re-incorporate into the sauce.
Serve
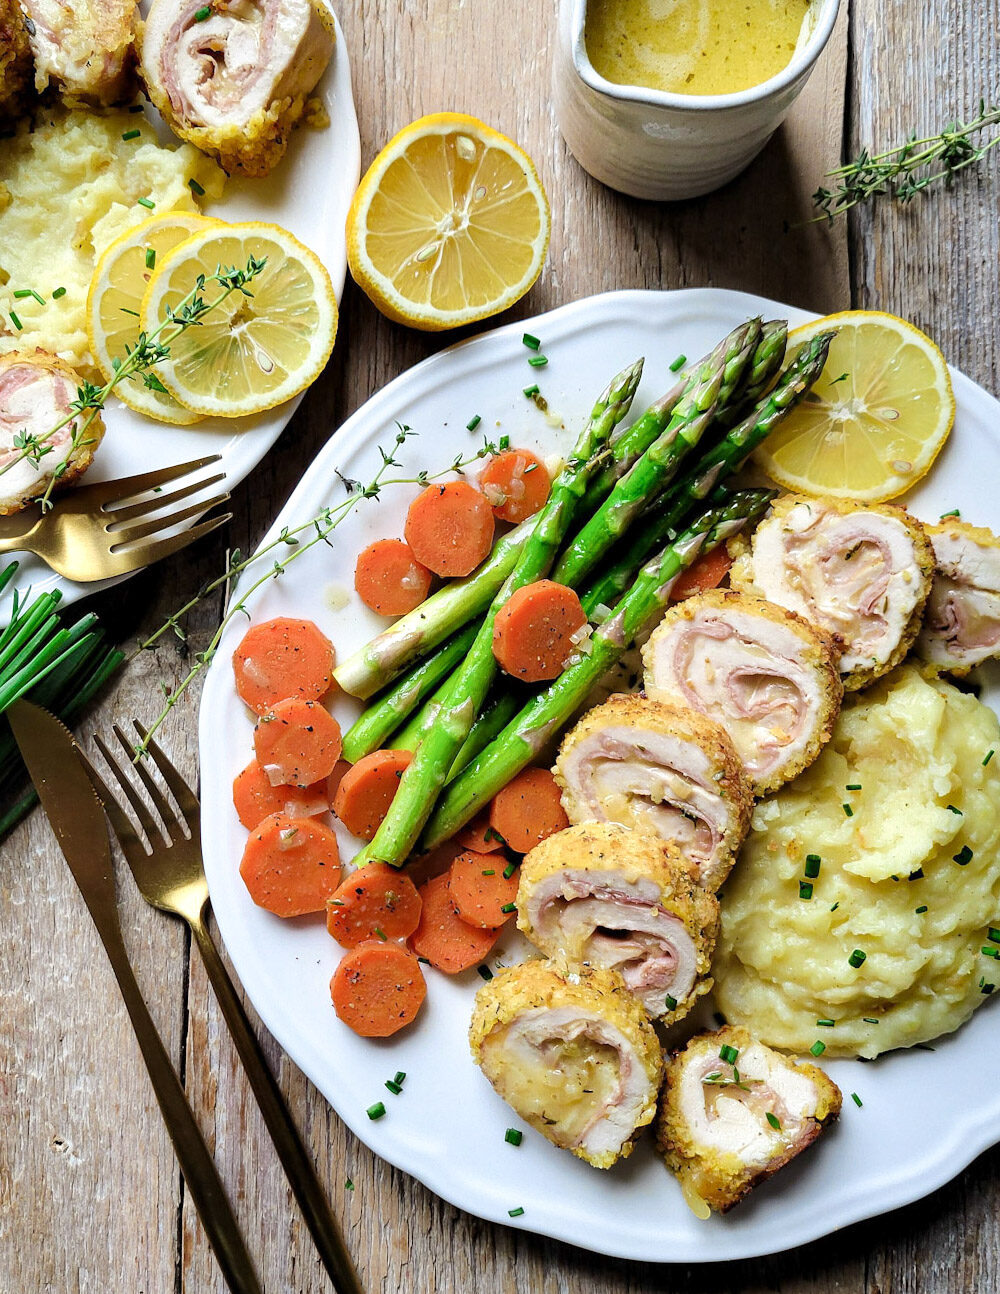
Once the chicken rolls have rested to allow the filling to settle, slice into pinwheels and plate. Drizzle the Lemon Butter Sauce over the sliced rolls just before serving. Garnish with chopped chives if you like.
Chicken Cordon Bleu is best served with mashed potatoes, rice or small pasta like orzo. Fresh asparagus or green beans, sliced carrots, or broccoli also make lovely sides to this chicken dish.
Trouble Shooting
- If you find that the chicken has some small tears in it from when you pounded it out, just gently overlap the chicken to cover the holes. Once wrapped up, they should be fine.
- Fold the chicken edges up around the cheese as you roll it up. This will help reduce the amount of cheese that could ooze out while baking. Also, a Swiss or Jarlsburg cheese will melt but still maintain its integrity, so less oozing with those cheeses.
- Make sure to dredge the ends of each roll completely. This will help form a seal to keep the cheese from escaping in baking.
- The chilling time in the fridge is necessary to help the chicken rolls maintain their shape while baking, so don’t rush this step.
- Having a thermometer is best for testing to achieve the 165F in centre of each chicken breast. Slicing would expose and allow the cheese to escape.
- If you find that the Lemon Butter Sauce has separated somewhat, you can reheat on low, whisking in one more tbsp of butter which will help grab the rest of butter and return it to a silky sauce.
Final Thoughts
Making Chicken Cordon Bleu takes a bit of time. So why not do a double batch and freeze some right away?! The plastic wrap around them will help them hold their shape. Place the wrapped rolls into a freezer bag. Then just thaw in fridge, and continue with dredging and baking as described above.
The Lemon Butter Sauce is amazing over schnitzel, salmon, steak, roasted or steamed vegetables, or for dipping (eg, steamed artichoke leaves and hearts) It even works great over rice or pasta for a simple dish. Include some pan seared shrimp for a fantastic meal!
For other great chicken dishes check out One Pot Lemony Spring Chicken and Orzo, Shrimp and Chicken Scampi, Low Country Chicken Bog, Crispy Baked Chicken Tenders, Classic Crispy Chicken Parmigiana
If you make this Classic and cozy Chicken Cordon Bleu, please be sure to leave a comment and/or give this recipe a rating! It’s always lovely to hear from you guys, and I always do my best to respond to each comment or question. And of course, if you do make this recipe, and you post it on Instagram, don’t forget to also tag me so I can see! Looking through the photos of recipes you all have made is such a treat.
Love Jen

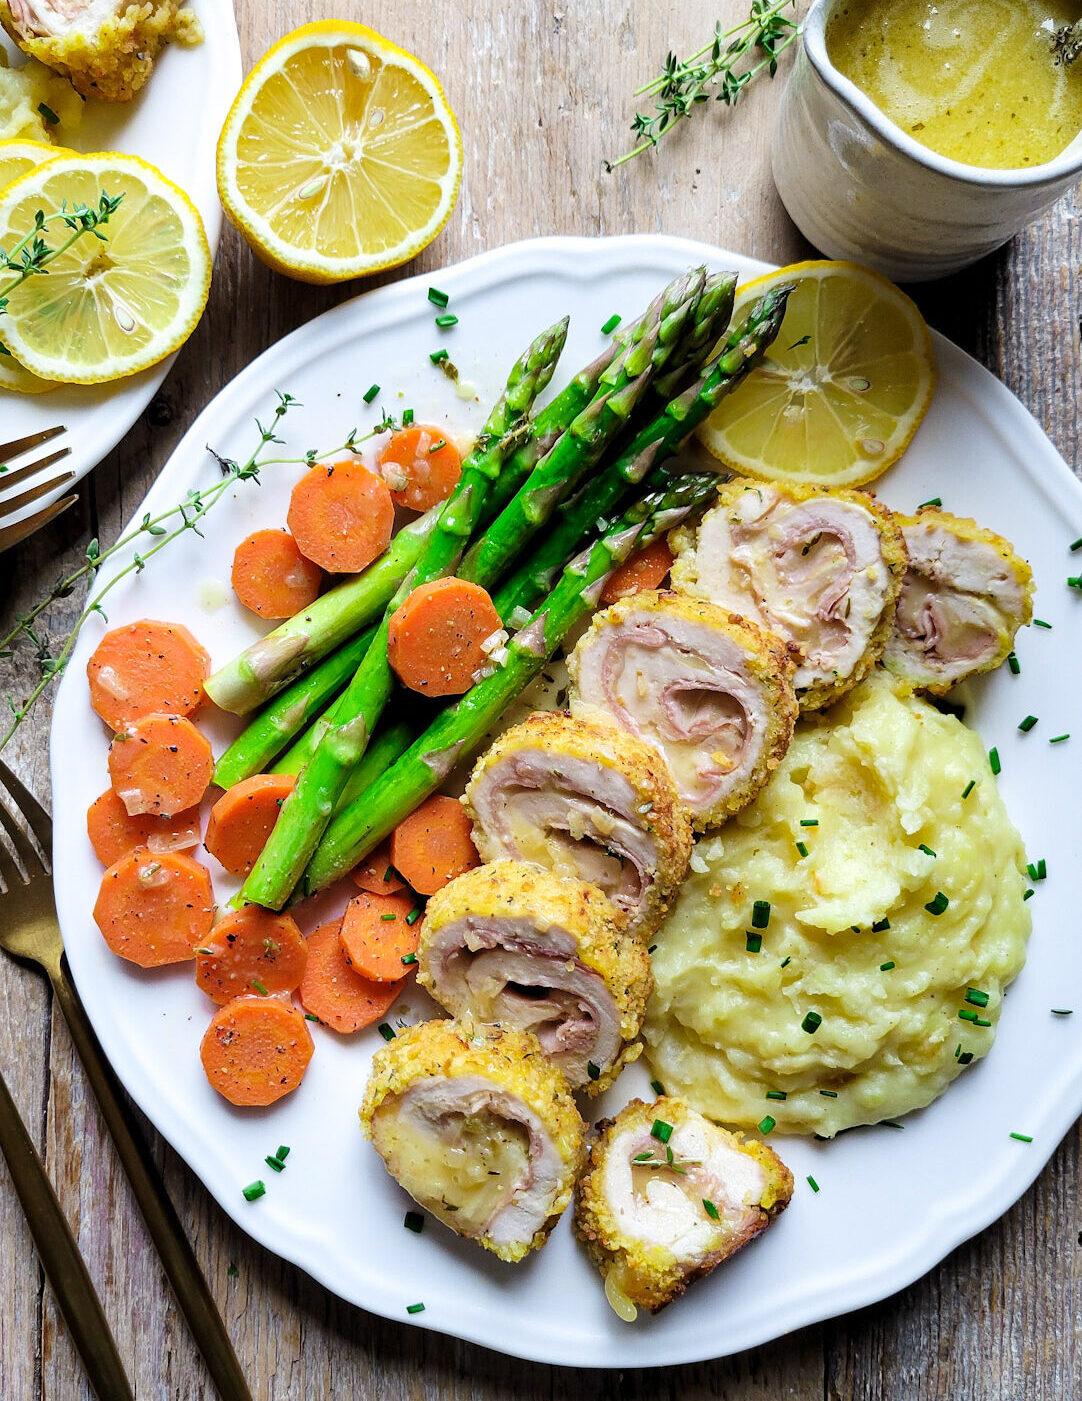
Chicken Cordon Bleu
Ingredients
- 4 average chicken breasts, about 6-7oz (200g each, skinless and boneless
- Dijon mustard
- Kosher salt and White pepper
- 2 tsp fresh chopped thyme leaves
- 8 thin slices French ham (~155 g)
- 16 very thin slices Gruyere or Swiss cheese roughly 3 oz (100 g)
Dredge
- 1/4 cup (35 g) flour
- 2 eggs
- 2 tsp water
- 1 cup (105 g) panko bread crumbs
- 1 1/4 tsp olive oil
Lemon Butter Sauce
- 6 tbsp (90 g) butter, divided
- 1 small shallot
- 2 medium cloves of garlic
- 2 to 3 lemons, depending on their size
- 1 cup (250 ml) low sodium chicken broth
- 1 tsp kosher salt, or more to taste
- 1/4 tsp freshly ground black pepper
- 3 tbsp finely chopped fresh parsley or thyme
Instructions
Assemble
-
Lay each of the 4 chicken breasts between 2 pieces of plastic wrap. Make sure that the bottom layer of wrap is large enough to completely wrap around each chicken slice, with enough on the sides to twist tight.
-
Using the flat side of a meat mallet, gently pound the chicken to 1/4-inch thickness, taking care not to pound so hard that tears occur.
-
You should now have four flat chicken pieces each on their own piece of wrap. Remove the top layer of wrap. Spread a thin layer of Dijon mustard on each chicken piece. Sprinkle some salt and pepper over the mustard. Scatter the 2 tsp of thyme leaves evenly between the four chicken pieces.
-
Lay 2 slices of ham on each chicken breast, and follow with 3 oz of Swisss cheese evenly between the four chicken breasts, leaving a 1/4 inch margin on all sides to help seal the roll.
-
Tuck in the sides of the breast and roll up tight like a jellyroll, using the plastic wrap under each breast firmly but gently roll up the chicken breasts tightly. Squeeze the log gently to seal.
-
Place all four rolled chicken breasts into the fridge to firm up. At least 30 minutes, or up to 5 hours.
Dredge and Bake
-
Preheat the oven to 400F (200C)
Place the 1/4 cup flour into one shallow dish or pie plate. Repeat with the 2 eggs, and 1 cup panko breadcrumbs. Season each with 3/4 tsp each salt and pepper.
-
Beat together the eggs and 2 tsp water, the mixture should be fluid.
-
Mix the seasoned breadcrumbs with 1 tsp thyme and 1 tsp oil. The oil will help the crust brown.
-
Remove the plastic wrap from each chicken roulade.
-
Lightly dust the chicken in the flour, then dip into the egg mixture. Make sure to get all sides and ends. Gently coat in the bread crumbs.
-
Carefully transfer the roulades to a greased baking pan and bake for 30 minutes until browned and cooked through. If you would like a bit more colour on the breadcrumbs, place the baking pan under the broiler for a few minutes, keep an eye on it all.
-
Let the chicken roulades rest for 10 minutes. Cut into pinwheels before serving with the Lemon Butter Sauce.
Lemon Butter Sauce, can be made while the chicken bakes and rests.
-
Divide the butter into 6 tbsp (15 g) portions.
-
Finely mince the shallot, you should get around 1/4 cup. Mince the garlic cloves. Zest one whole lemon. Juice both till you have 3 tbsp juice (45 ml)
-
Melt one tbsp (15 g) butter in a large skillet over medium heat. Add the shallot and cook, stirring till starting to soften, about 1 minute. Add in the garlic and cook, stirring till both the shallot and garlic are a light golden, about 2 minutes more.
-
Add the lemon zest and 3 tbsp (45 ml) lemon juice to the pan. Then add the 1 cup (250 ml) chicken broth. Increase the heat to medium high and bring everything to a boil. Let it cook, and reduce by half, about 3 minutes or so.
-
Reduce the heat to low and continue whisking while you add the individual portions of butter one at a time. Whisk continuously till the butter is completely blended in and incorporated.
-
Add 1 tsp kosher salt and 1/4 tsp fresh black pepper. Stir well.
-
Add the chopped thyme or parsley and stir through. Taste and re-season if desired.
-
Serve immediately over the sliced chicken roulades.
-
If you are not ready to serve the sauce yet, keep it on the back burner over very low heat. If it will be a while, it can be stored in the fridge in an sealed container. Re-warm gently over low heat, all the while whisking to re-incorporate any butter that may have separated.
-
See blog post for more details and suggestions for storing, freezing etc.

yum, thank you for this, an old favorite, so old in fact that I haven’t made it recently enough to have a good recipe or even memory of one, so this works well for me
Hi Sabrina, yay, so happy to have brought this back into your world. It really is one of those retro classics. Enjoy, Love Jen