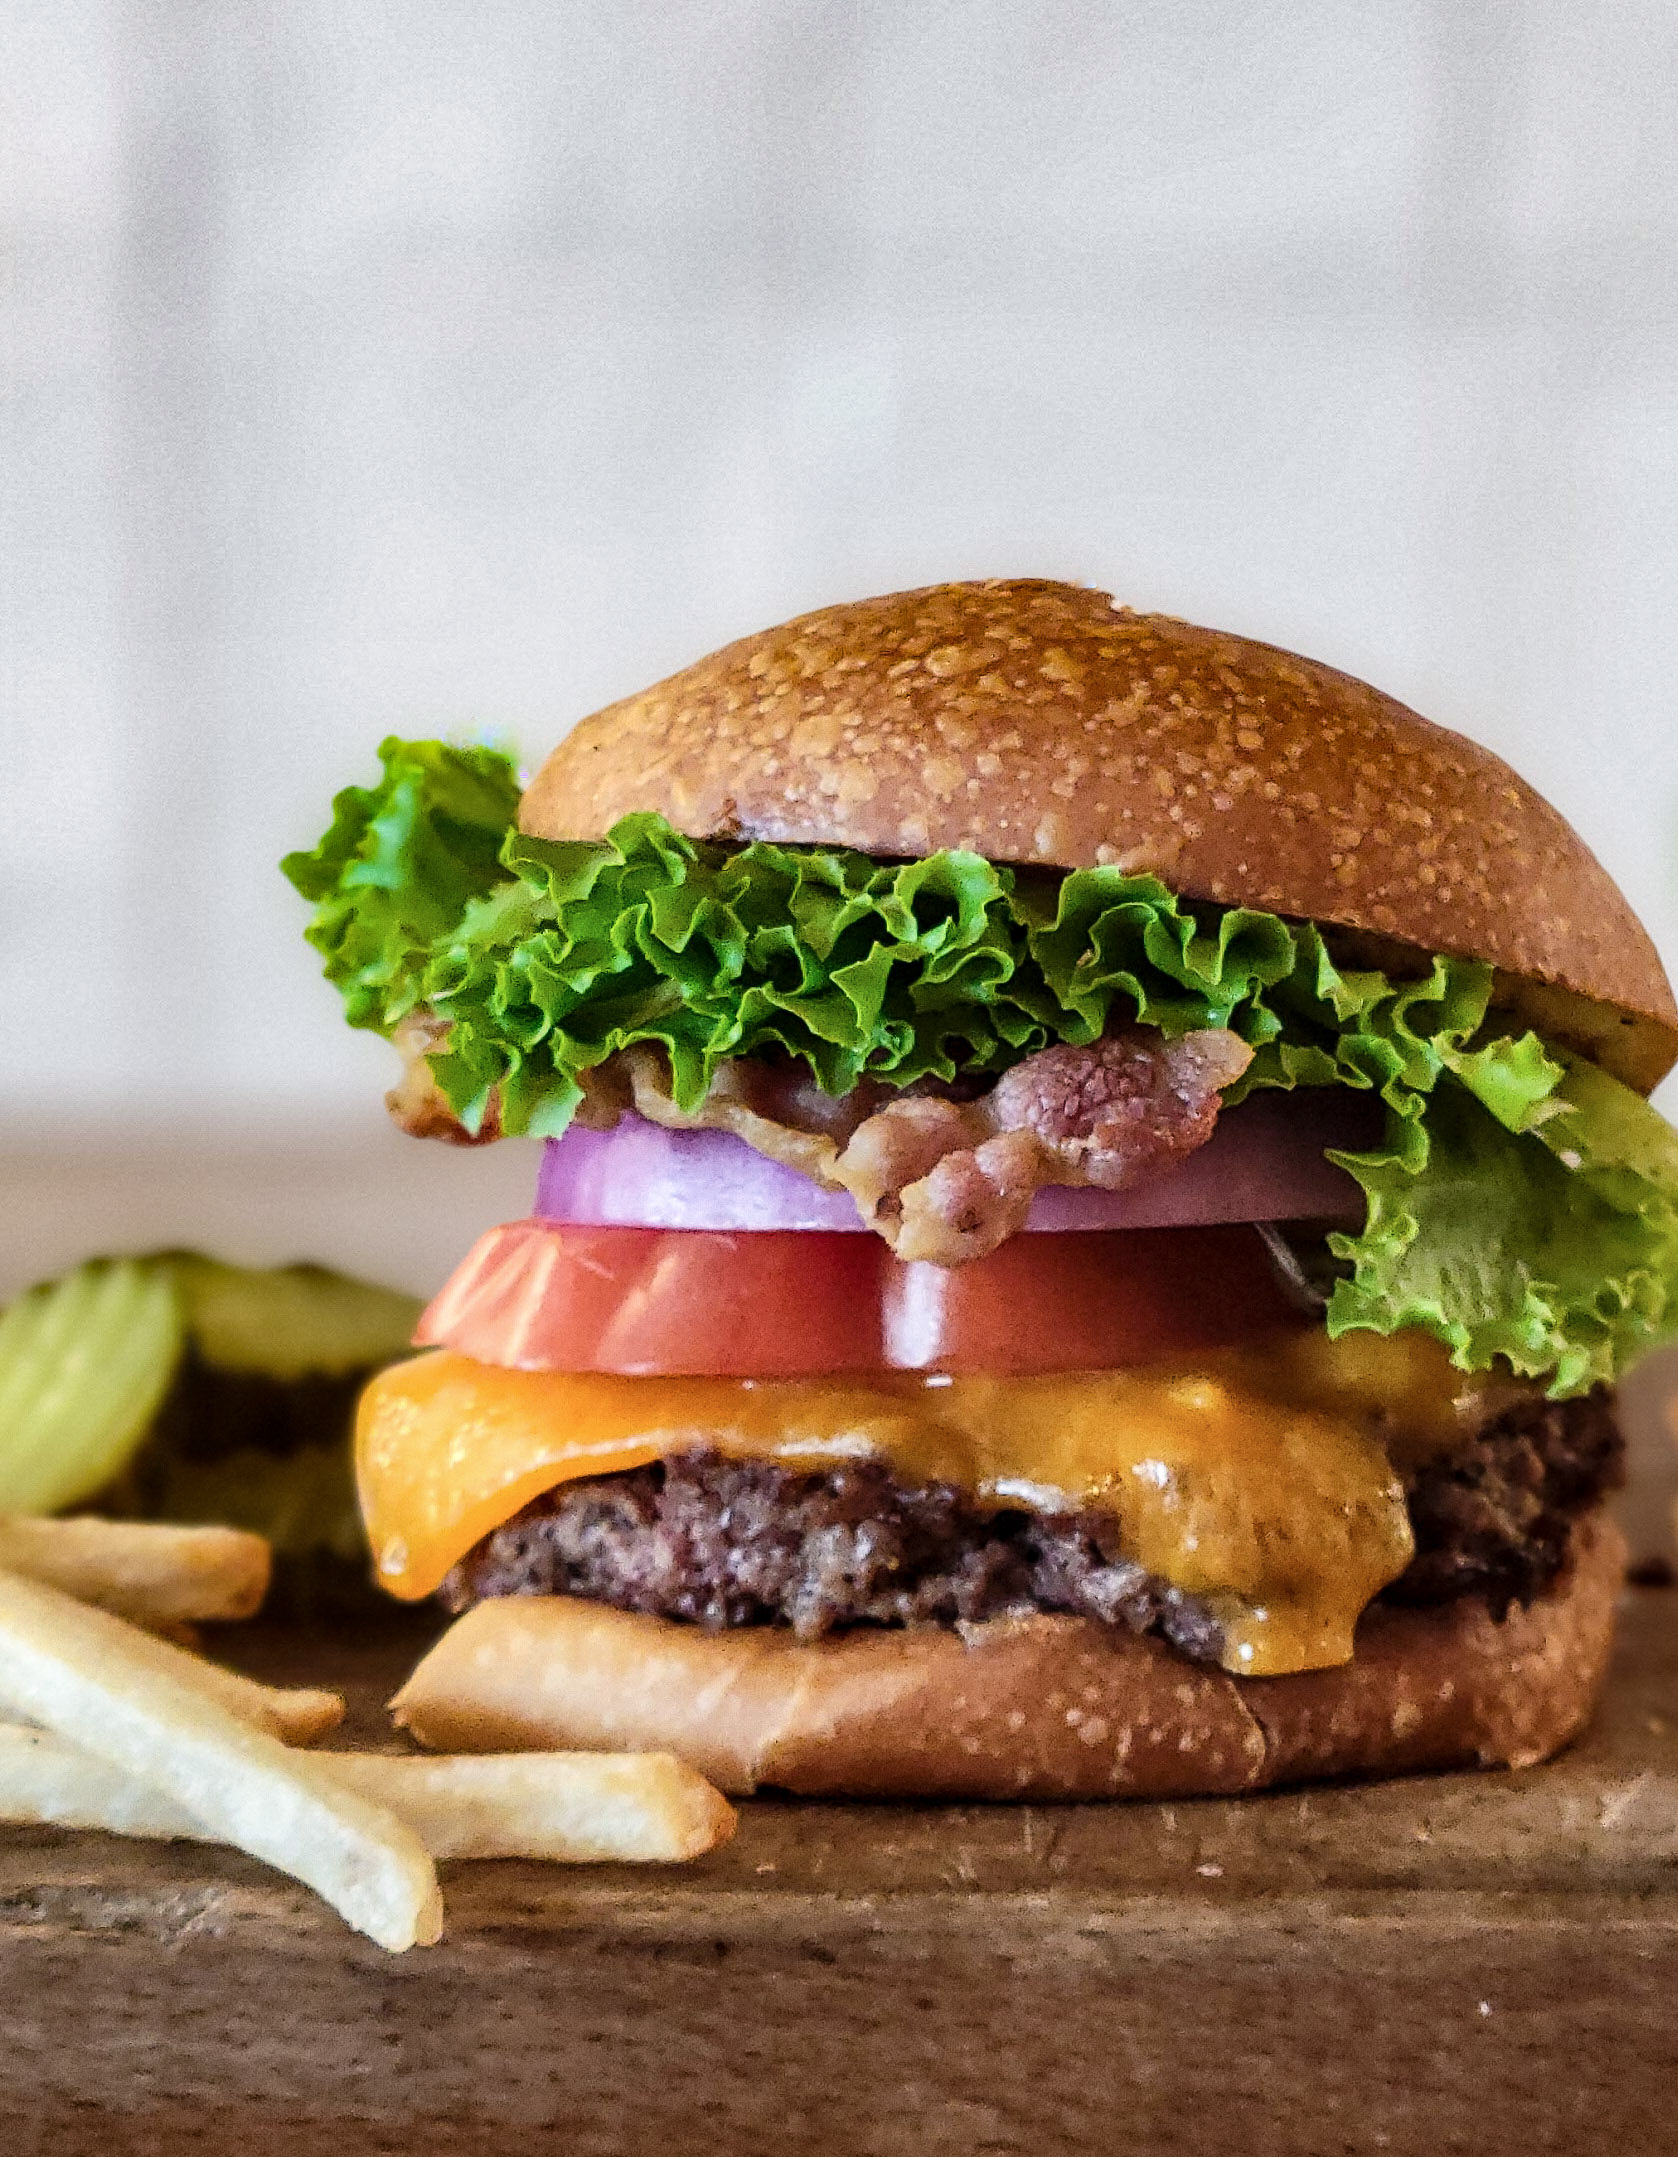
This is just a good old fashioned hamburger. No fancy toppings, no exotic meat or bun, just the best juicy burger you’ve been craving.
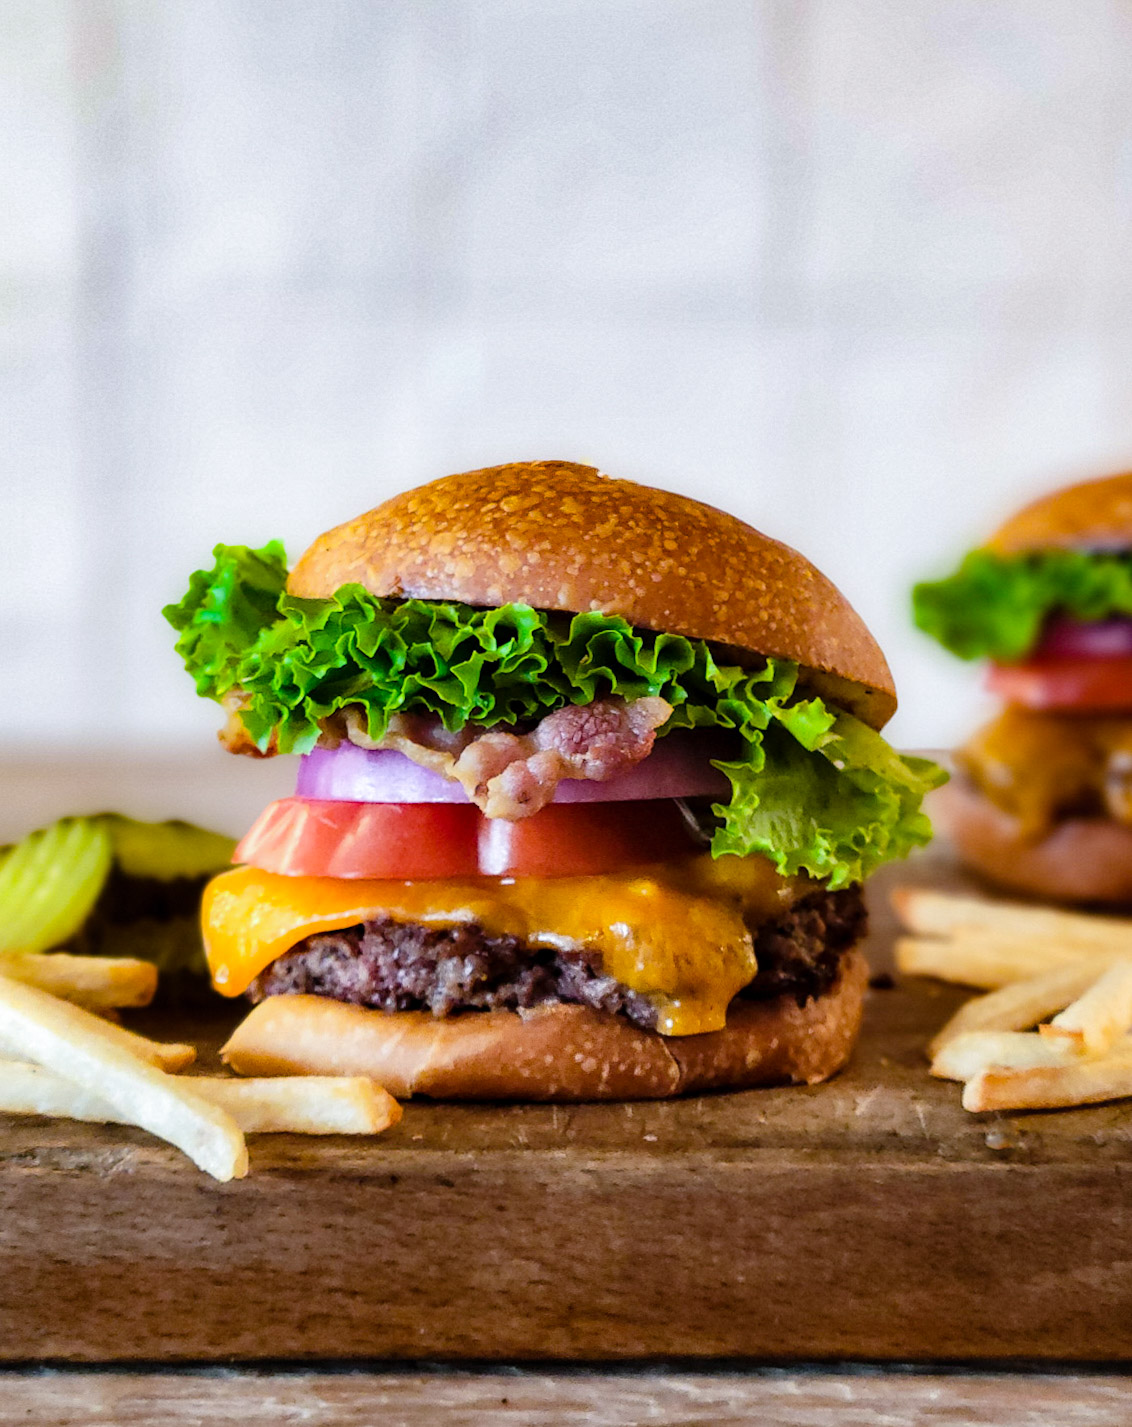
I think we overthink, and over-dress our burgers. It gets to the point where no flavours stand out because there are just too many components involved. This is the burger of our youth, the burger we’d order when we hit our local diner, and it came to the table with crinkle fries and a side of pickles.
Why is it Called a Smash Burger?
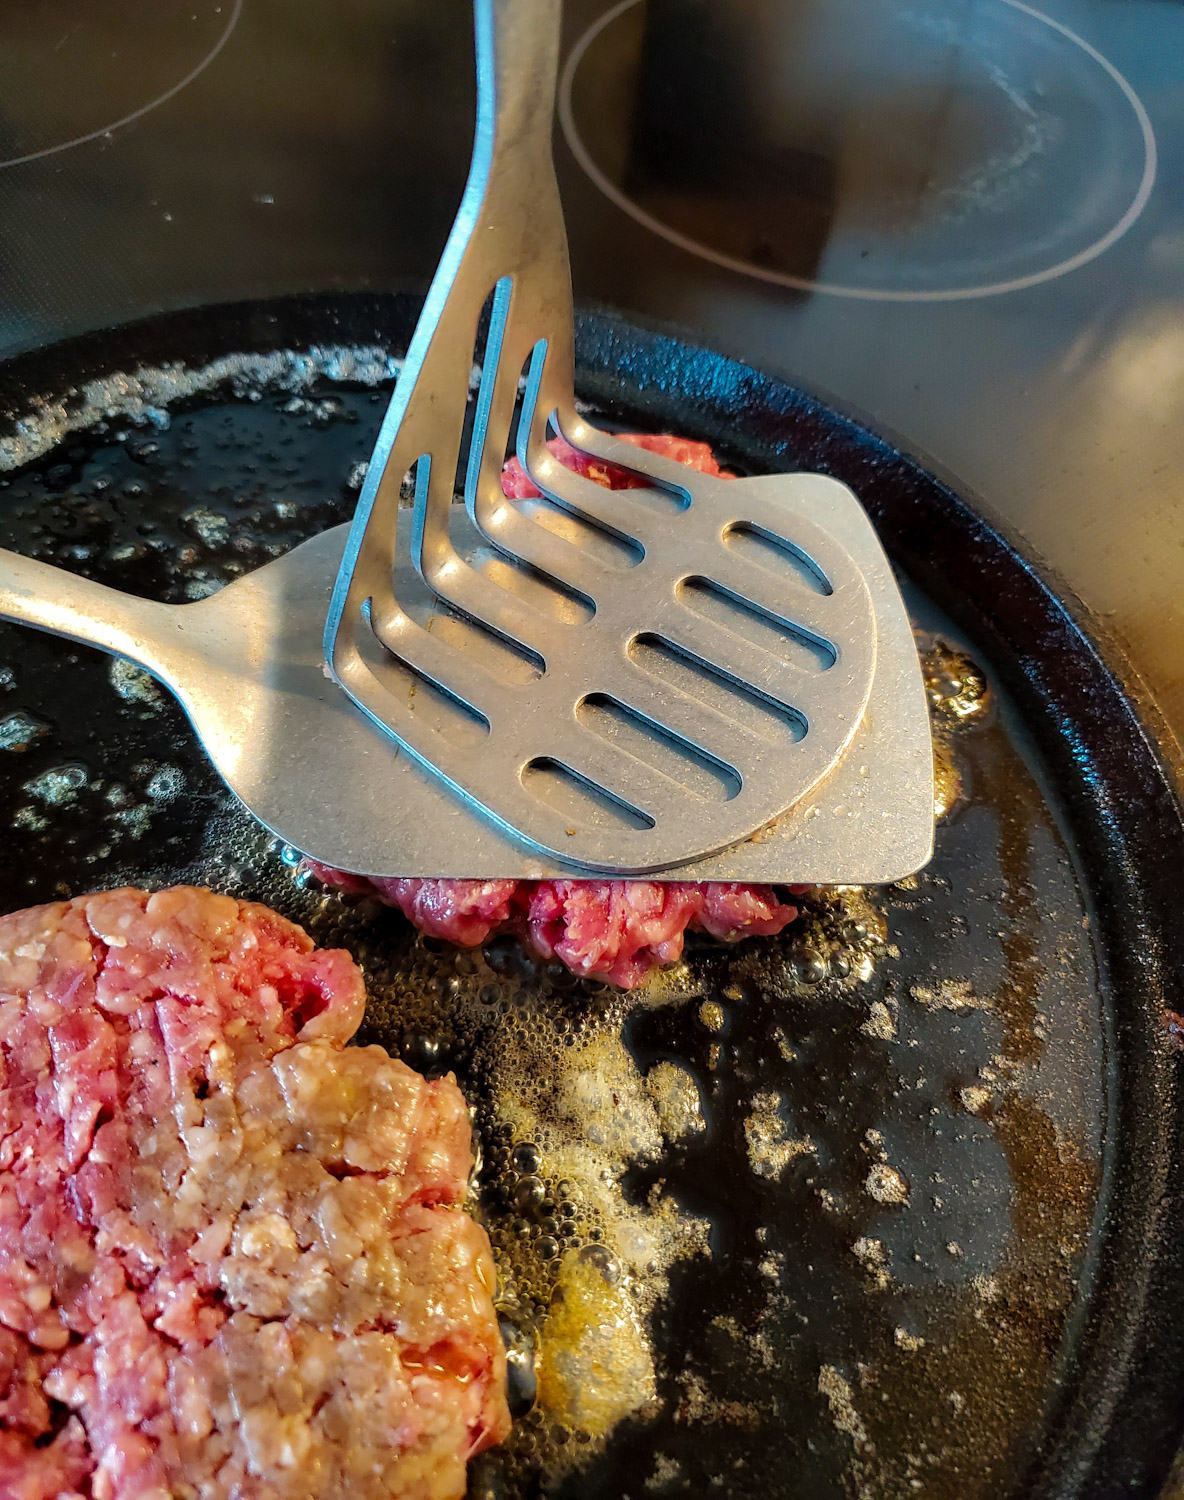
Because you get to smash it, once! Not the constant squishing of the burger while it is cooking, which really only releases the juices and dries it out. But when the meatball shaped burger meat hits the buttered hot cast iron skillet, you are allowed to press down firmly on it, once (or twice) to get it to spread out as thinly as possible. This instant impact of meat to skillet causes the best char and formation of flavour umaminess. Because the meat has been spread out quite thinly, it really only requires 1 1/2- 2 minutes per side. For more on why this Maillard Reaction is so appealing and desired, here is a fabulous understanding of the process over at Serious Eats.
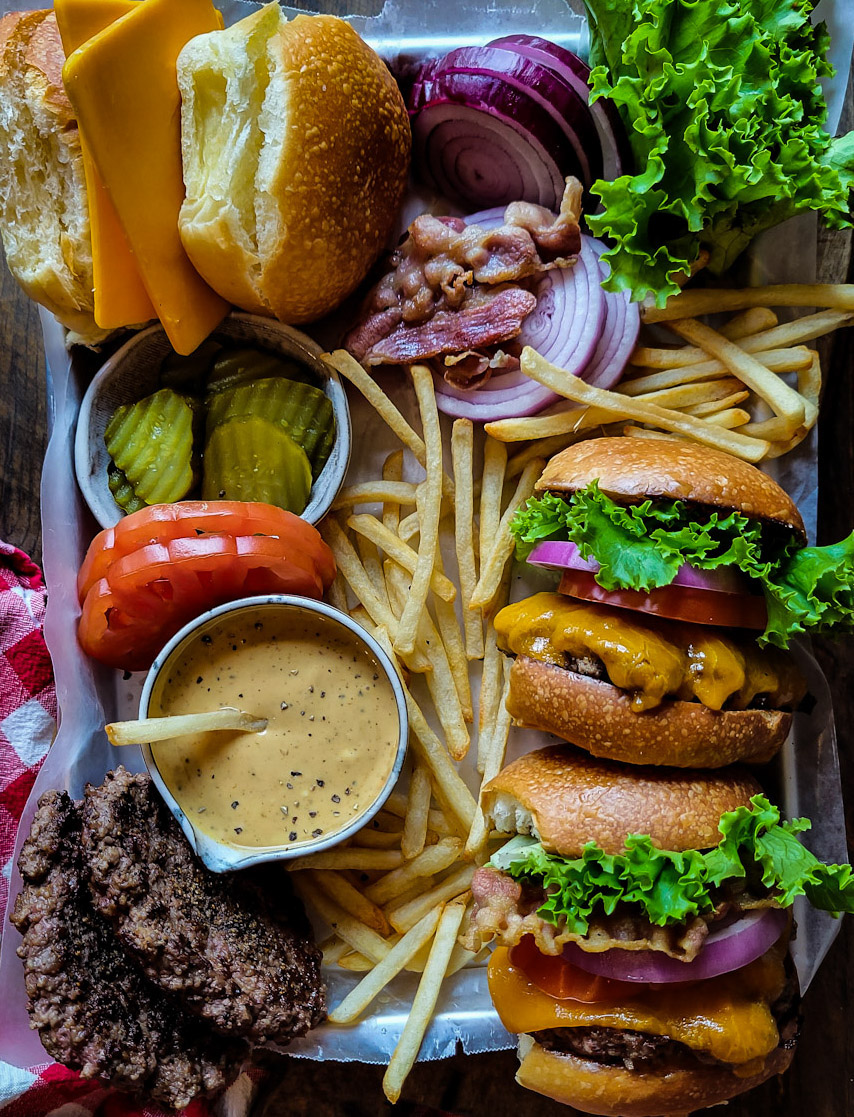
What You Will Need
Meat: go for the classic 80-20 ratio of protein to fat in your beef for burgers. Anything leaner, and you will end up with a very dry burger. You will use 1 lb of chuck or lean beef for four burgers.
Bacon: Yes, the bacon is not only a key component in a Bacon Cheeseburger, but after the bacon is cooked to a perfect balance between crisp and chewy, we will quickly toast the sliced side of the burger buns with a brush of the bacon fat, it gives the best flavour to the buns.
Cheese: Duh! I like to use thick cut slices from our local deli. And keeping it simple with good ole cheddar cheese. Sure, the Brie, Gorgonzola, goat cheese etc are all fine, but today we are making a humble burger!
Bun: go for fluffy potato bun or brioche style bun. They won’t be so tough and chewy that they will distract from the eating process. And yes, I will say it now, if you are keeping the carbs low, a ruffly leafy lettuce bun is just dandy!
Burger Sauce: This is kind of like the Special Sauce from a Big Mac, and really finishes a good burger. I don’t like my sauce to be too sweet, so my ratio of mayo to ketchup to mustard and Worcestershire Sauce is skewed to the mustard, not the ketchup. Plus a smidge of heat.
Add Ons: Keeping it simple today, no fancy caramelized onions, sliced truffles, avocado slices etc. Lettuce, Tomato, Onion, and Pickle (sweet or dill) I hope you’re good with this!! ;D
A Smashing Tool: Sure, you could purchase a cast iron smasher, but only if you are going to be making burgers quite regularly. I just use the largest spatula I have, with a second tool to push down on it. The extra tool actually gives you leverage to push down further than if you were only using the spatula.
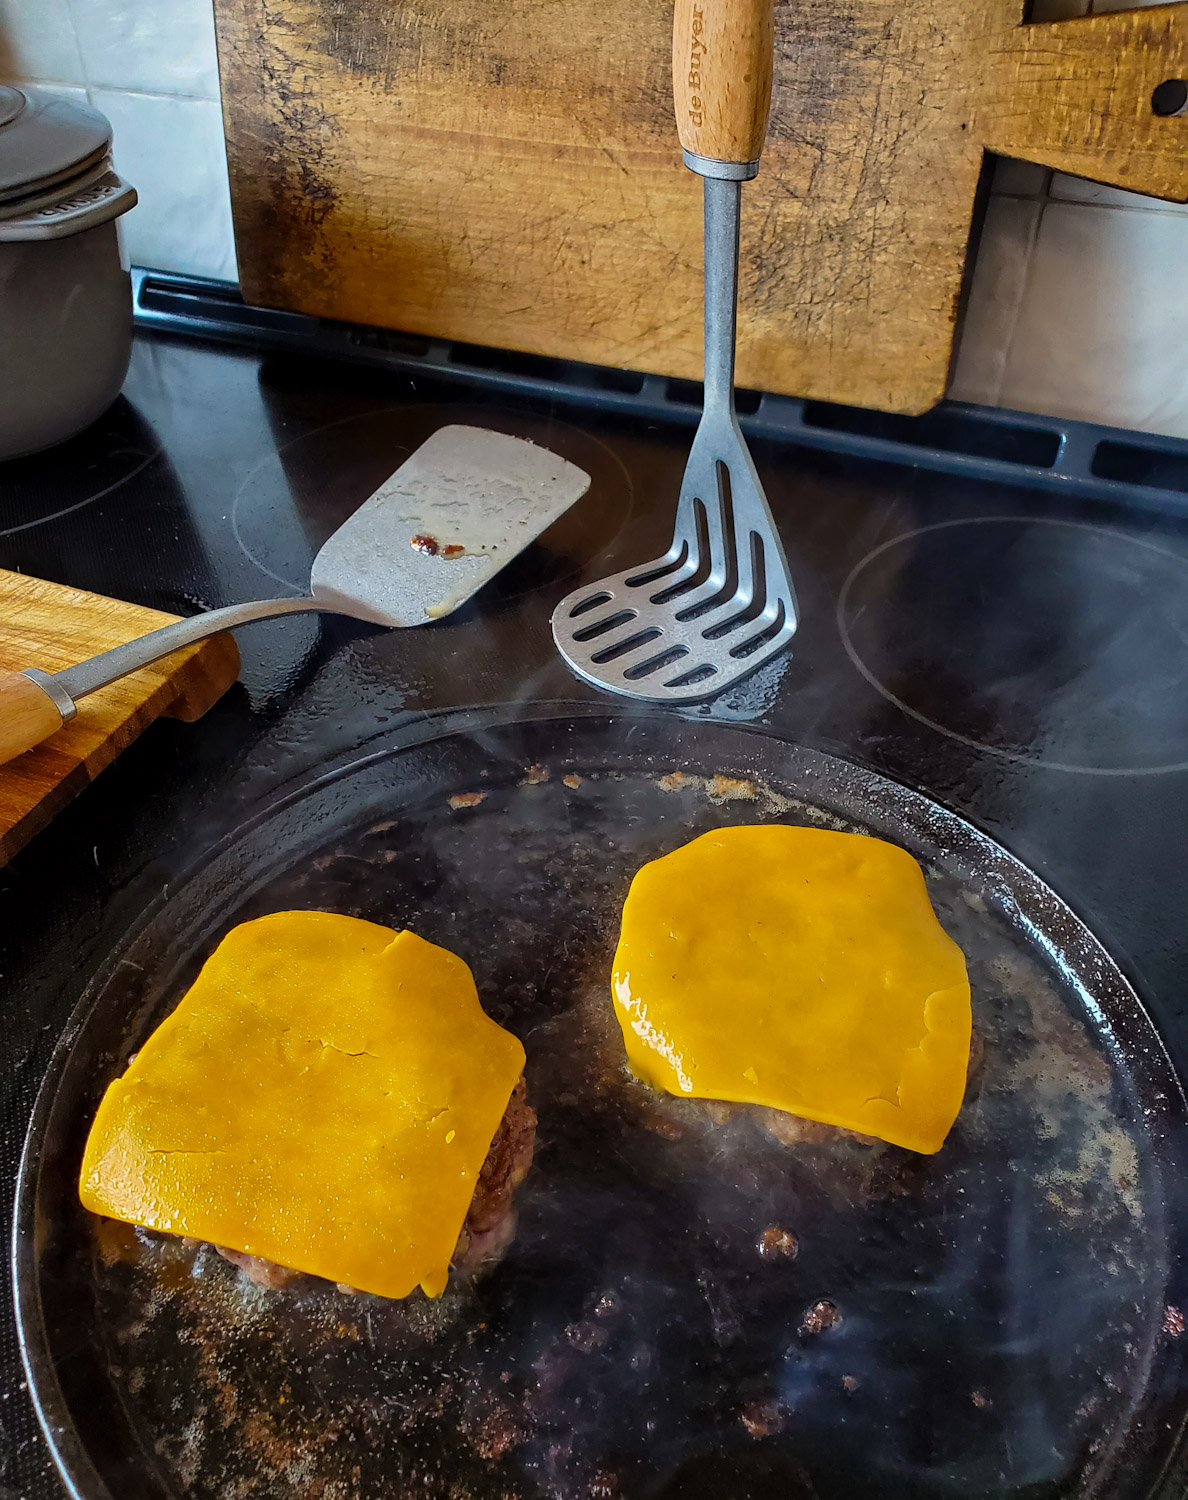
Domed Lid: A metal domed lid from a stock pot is a great way to trap the heat and help the cheese melt faster. Optional, but very handy.
Method
Start with making the sauce, it’s as easy as whisking together the mayonnaise, mustard, ketchup, Worcestershire sauce, hot sauce and black pepper. Set it aside it the fridge while you prepare the burgers.
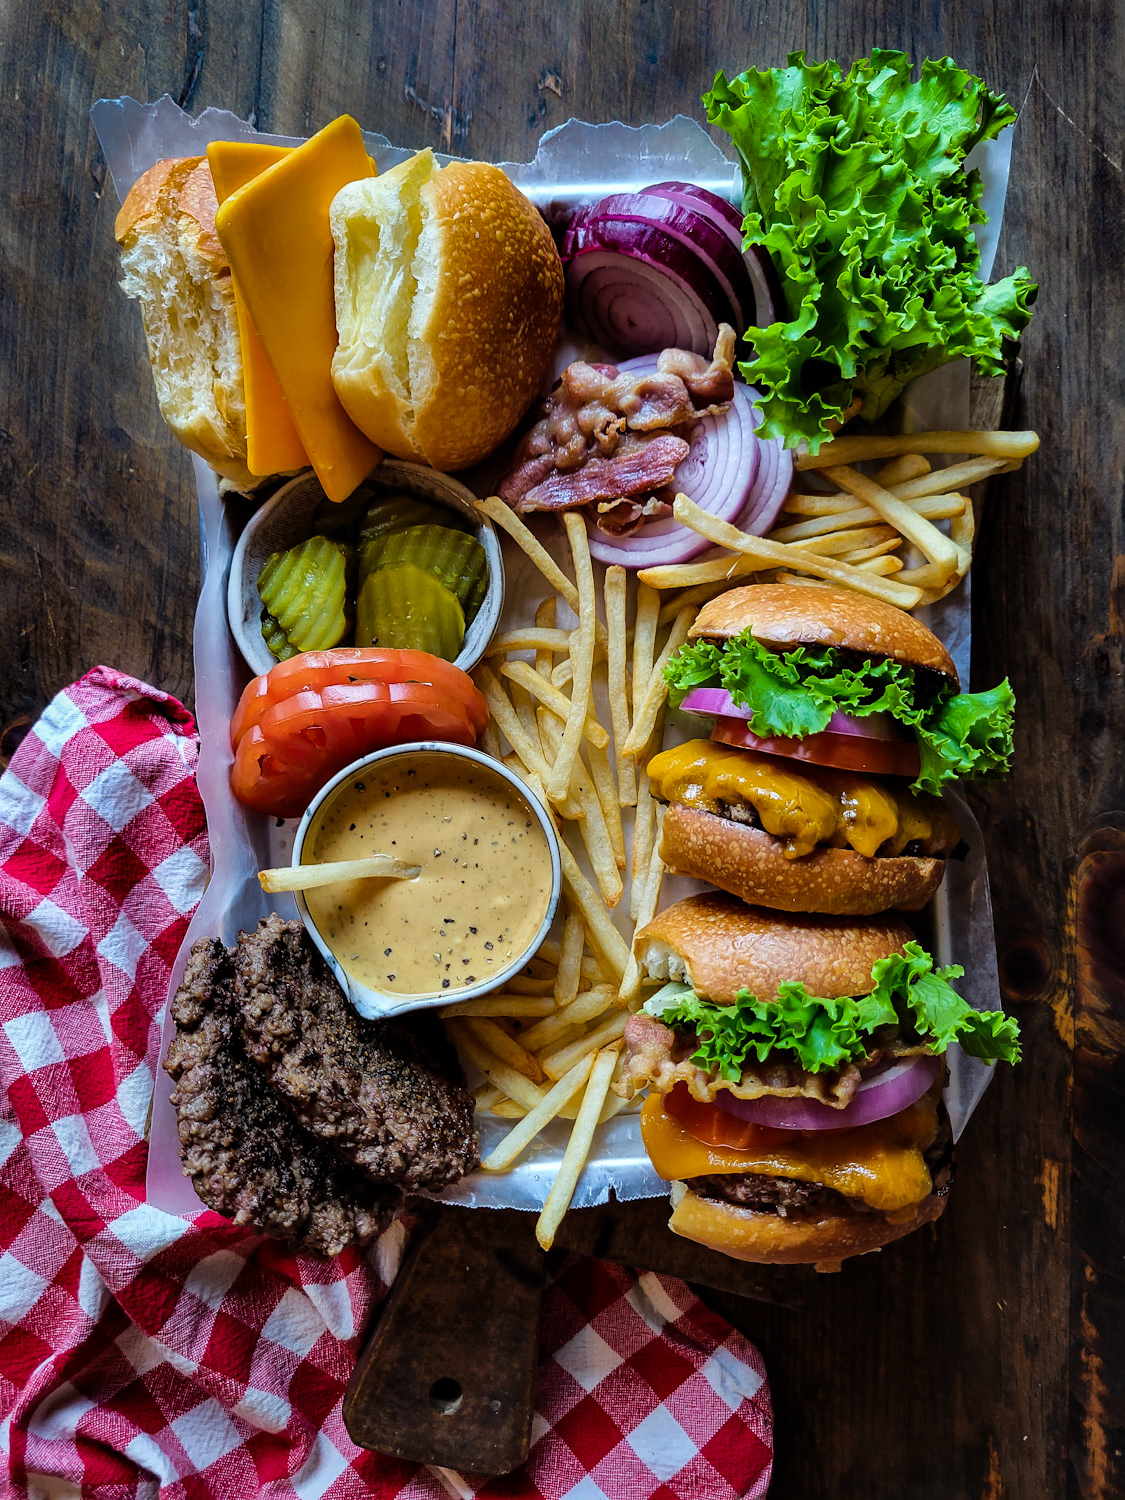
Have all your toppings ready to go, because once the burgers are done, they are ready to eat. So slice the onions, tomatoes and pickles; prepare the lettuce, and slice the buns. And have the burgers formed into balls. Have some salt and pepper, and butter ready as well. Have a large cast iron skillet or griddle ready as well. And have the broiler on to toast the cut sides of the buns with the bacon fat.
First you will cook the bacon until that perfect balance of chewy and crispy in a frying pan. Don’t go to dry and shattering! Set it on paper towel, and use a brush to coat the cut sides of the buns with a light coating of the bacon fat, and place them cut side up on a baking sheet. Discard the rest of the fat.
Cooking the Burgers
Heat the cast iron skillet or griddle over medium high heat. Have the vent fan ready to go as well, there may be a bit of smoke! Have the burgers on a plate ready to hit the skillet. Place 2 tbsp of butter on the skillet and immediately place as many burgers that can fit with plenty of room between them. You may need to work in batches. Immediately smash the burgers down firmly until they are as flat as you can possibly make them. The irregular edges will take on extra crispiness, which is the goal! Season with salt and pepper.
Cook for about 1 1/2 to 2 minutes, until the edges are crispy, and they release easily. Turn over. Cook for another 30 seconds or so. Add the cheese, and place the lid from a stock pot over the burgers. This will help the cheese cook quickly. After a minute they are done. Remove to a platter and place on lower rack in the oven. Repeat if you have to with the remaining burgers. Place the baking sheet of buns on a rack set in the upper third of the oven and broil for about 45-60 seconds, or until getting nicely browned.
Assemble by smearing both sides of the crisped bun with burger sauce, and add the burger, and all the add-ons you want.
Method for the Grill
Get the grill and the griddle pan you are using on it nice and hot: 550F or so. Have the patties formed into loose balls so that they will smash easy and out wide. Place them onto the griddle and smash with a large spatula, using a second tool to push down on the spatula. Tip: slide the spatula away from the patty, don’t lift it straight up, it may grab some of the meat with it. After two or three minutes, flip and immediately cover with cheese. Use a metal domed stock pot lid to trap the heat and help the cheese melt faster. If you have oven gloves, you may want to use them for this method, the griddle gets hot, and you want to be as protected as possible.
Final Thoughts
This is as easy a meal to make during the week, as the weekend. I will make these in the summer for when it is just too hot outside to stand by the bbq. And for those of you who live in condos without a balcony, this may be the best and only burger you’ll make at home! What’s great about this recipe, it works all year round, whenever the burger craving strikes. There’s nothing fancy or pretentious about this burger, it is the burger of the Every Man (or Woman!) Just add fries. Or onion rings!
For the best onion rings you can make at home, check out my Classic Beer Battered Onion Rings recipe. And if you really want a salad on the side, here are some delicious options: Retro Sloppy Joes with Honey Mustard Cole Slaw, Lebanese Cabbage Salad, Master Vinaigrette and Slaw Prep

Diner Burgers, aka Smash Burgers
Ingredients
Burger Sauce
- 1/3 cup mayonnaise
- 2 tsp ketchup
- 1 tbsp mustard
- 1/2 tsp Worcestershire Sauce
- 1 tsp hot sauce
- 1/2 tsp paprika
- 1/2 tsp salt
- 1/2 tsp pepper
Burgers
- 8 strips bacon
- 4 brioche or potato buns, sliced (or lettuce 'buns')
- 1 lb chuck or lean ground beef, 80-20 ratio of meat to fat
- 2 tbsp butter
- salt and pepper
- 4 slices Cheddar cheese
- Toppings
- Lettuce
- Tomato slices
- Onion slices
- Pickles
Instructions
Burger Sauce
-
Combine all the ingredients in a bowl with a spoon or whisk. Store in the fridge till needed. Can be made in advance.
Burgers
-
Place one rack on the lower third rung in the oven, and the other in the upper third. Have two baking sheets ready.
-
Form the beef into 4 equal sized balls. Place on a plate till ready to cook. Don't pack the meat tightly, a bit looser will help them spread out when you smash them.
-
Have all the toppings prepared and ready to go.
-
Start with the bacon, by sautéeing it in a frying pan till just crispy. Transfer to a paper towel line plate. Use a brush to coat the insides of the buns with a thin layer of the fat. Set them on one baking sheet with cut sides facing up. Set aside. Discard the remaining fat.
-
Preheat the oven to broil.
-
Preheat a cast iron skillet or griddle over medium high heat. Add 1 tbsp of butter to the pan (if using a griddle you can use all the butter at once) Immediately place two balls (or more if there is still room to smash them to spread out further) onto the foaming butter. Use a smasher or a wide spatula and a second tool like a potato masher to push down firmly on the ball till it spreads out as far as it can go. Repeat with the second burger. Sprinkle with salt and pepper.
-
Cook for 1 1/2-2 minutes till the edges are seared and the burger releases. Flip and cook for 30 seconds. Add the cheese over each burger and cover with a large stock pot lid or other lid. After 1 minute the burger should be done and the cheese melted. Transfer the burgers to the other baking sheet. Repeat with the remaining butter and burgers. Place the baking sheet onto the lowest rack in the oven.
-
Place the baking sheet with the prepared buns onto a rack set in the upper third of the oven.
-
As soon as the buns are toasted, about 1 minute, keep an eye on them, remove the buns and the burgers from the oven.
-
Spread the burger sauce on both sides of the buns. Lay one cheeseburger on the bottom of each bun. Assemble as desired.
-
Serve with fries or onion rings.
-
See blog post for more details including how to do this on an outdoor grill.

Smash burgers are a cold or rainy day burger fave around here and we even made them the other night. I’m so glad you posted your method/recipe, as it will really take ours to the next level. The sauce sounds amazing! And I appreciate your idea of how to get more leverage on the smashing. Brilliant, Jennifer!
Hey Kristin! So happy I was able to enhance your ‘I’m sure already fabulous’ burger! Every little trick helps, right. Happy weekend, Love Jen