I have baked hundreds of scones through the years. This by far, is my most tender recipe ever!
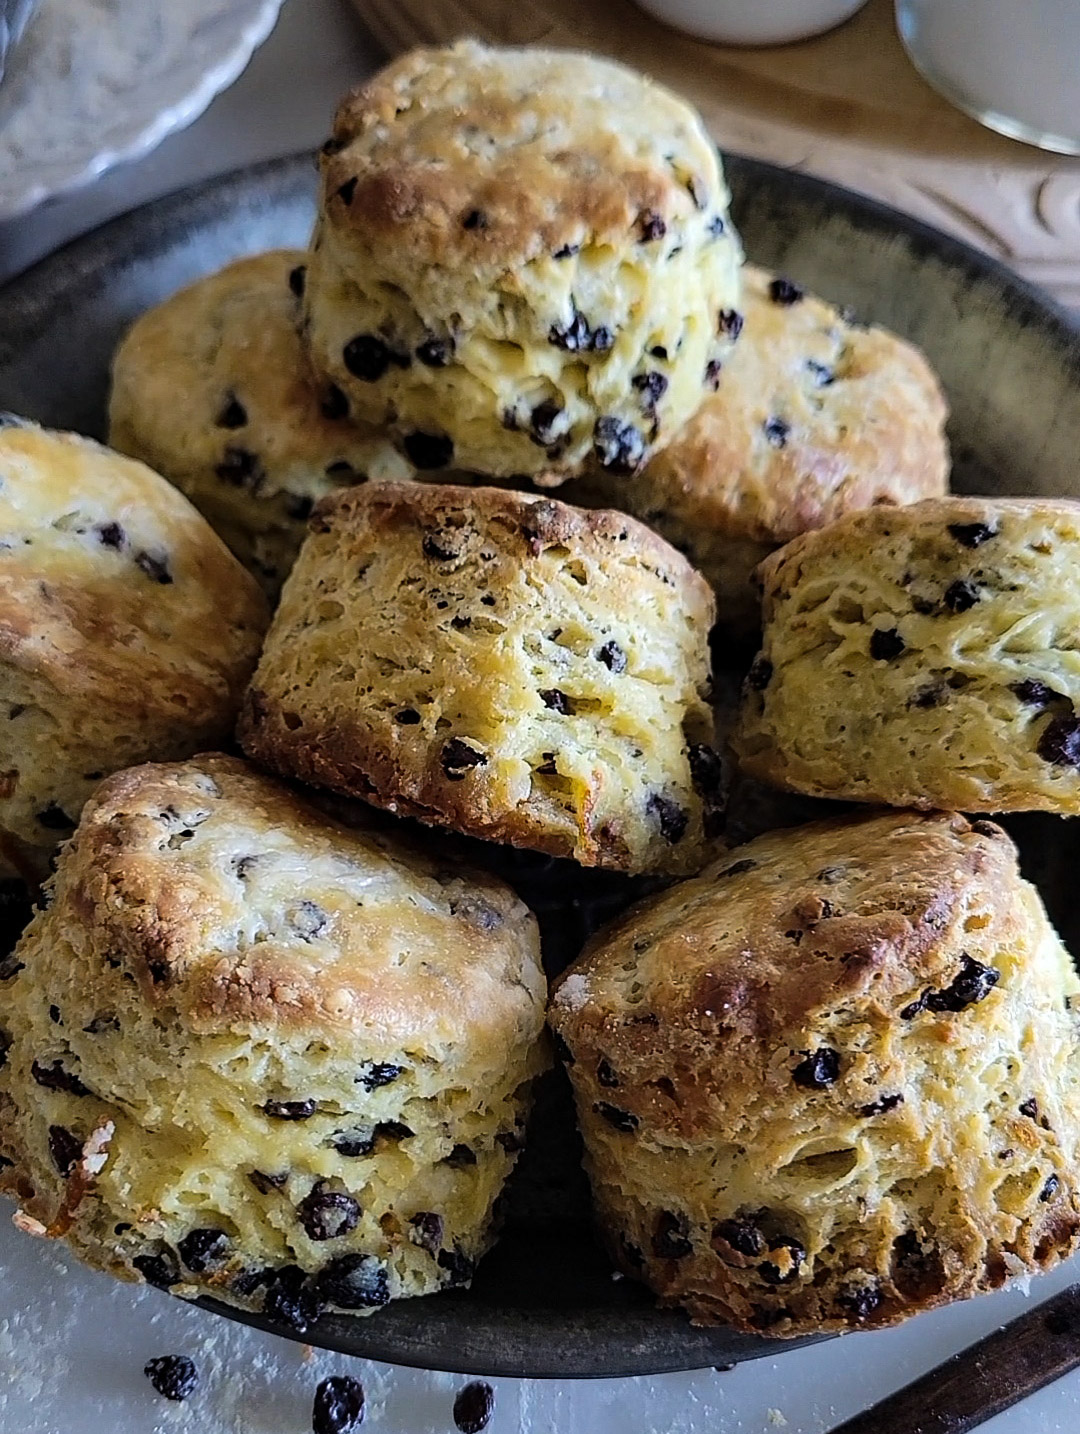 Baking scones is one of those pastimes that has almost immediate return on investment. No proofing, overnight chilling, or long time in the oven. Simple, everyday ingredients that we all have in our pantry and fridges. And the result is a tender, flakey treat that can be either sweet or savoury, perfect as a breakfast carb, or a coffee break indulgence.
Irish Soda Bread
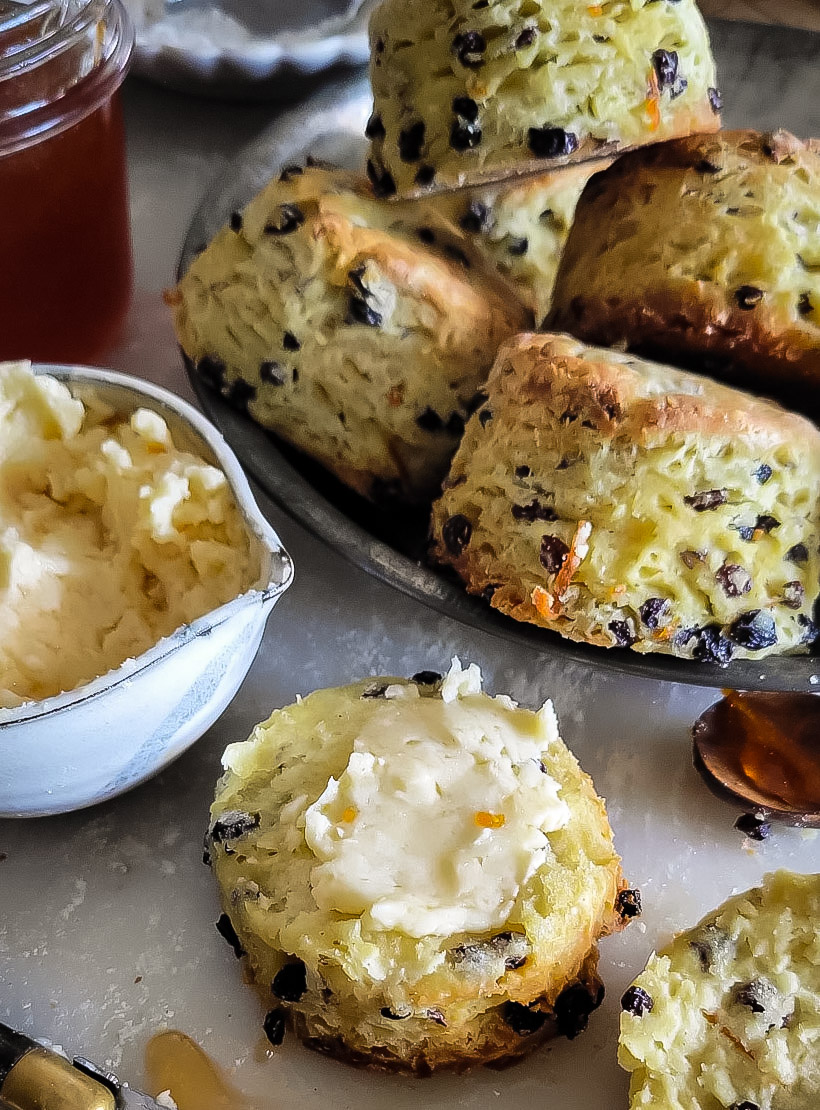
If you’ve ever made a classic Irish soda bread, you know that the add-ins to the iconic simple bread dough are usually currants, orange zest, and caraway seeds. Brought together, they create an aromatic, and ever so gentle sweet/savoury flavour combo. This bread works just as good with a slather of fresh salted butter, as it does with a chunk of cheddar and shaved ham. So I have taken these ingredients and turned them into a scone. The classic no-yeast bread is often baked in a cast iron pan, and creates a slightly dense but still tender tasty bread.
Why a Scone over the Bread?
Scones are just so immediate, and versatile, and can be baked off, and enjoyed throughout the week. Yes, they are best the day they are baked, as are most baked goods, but with careful storage, and correct re-heating, they can still taste mighty fresh even on day three. If you bake off a batch and realize that you probably won’t be eating them all within a few days, just freeze them. Thaw and re-warm in an oven (not a microwave, and they are as good as new. They are portable, can be wrapped with a tea towel and gifted to a neighbour or friend, and just give off all the cozy vibes.
Scone vs Biscuit
Let’s address the other elephant in the room. Is it a biscuit or a scone? While both are made up of the same ingredients, it is often the amounts of each that determine the final texture. Trivia: what we in North America know as a biscuit actually started off as a scone recipe, brought by the first British settlers way back when. It was availability to certain ingredients that brought about the change. Southern American style biscuits usually rely on butter, lard and buttermilk to create the iconic biscuit with the fat there for all those layers. British Scones traditionally rely on an egg, cream, and even more sugar to create the cakey interior and sugary crusty exterior. Some recipes call for just laying out the dough and cutting them out to bake. I actually like the layers, call me a rebel! While there most assuredly can be layers (if you want them), there should also be a slight delightfully cakey texture. Usually it is scones that get all the fun stuff like dried fruit etc added in. But in the end, the method and base ingredients are basically the same. Call them whatever you like!!
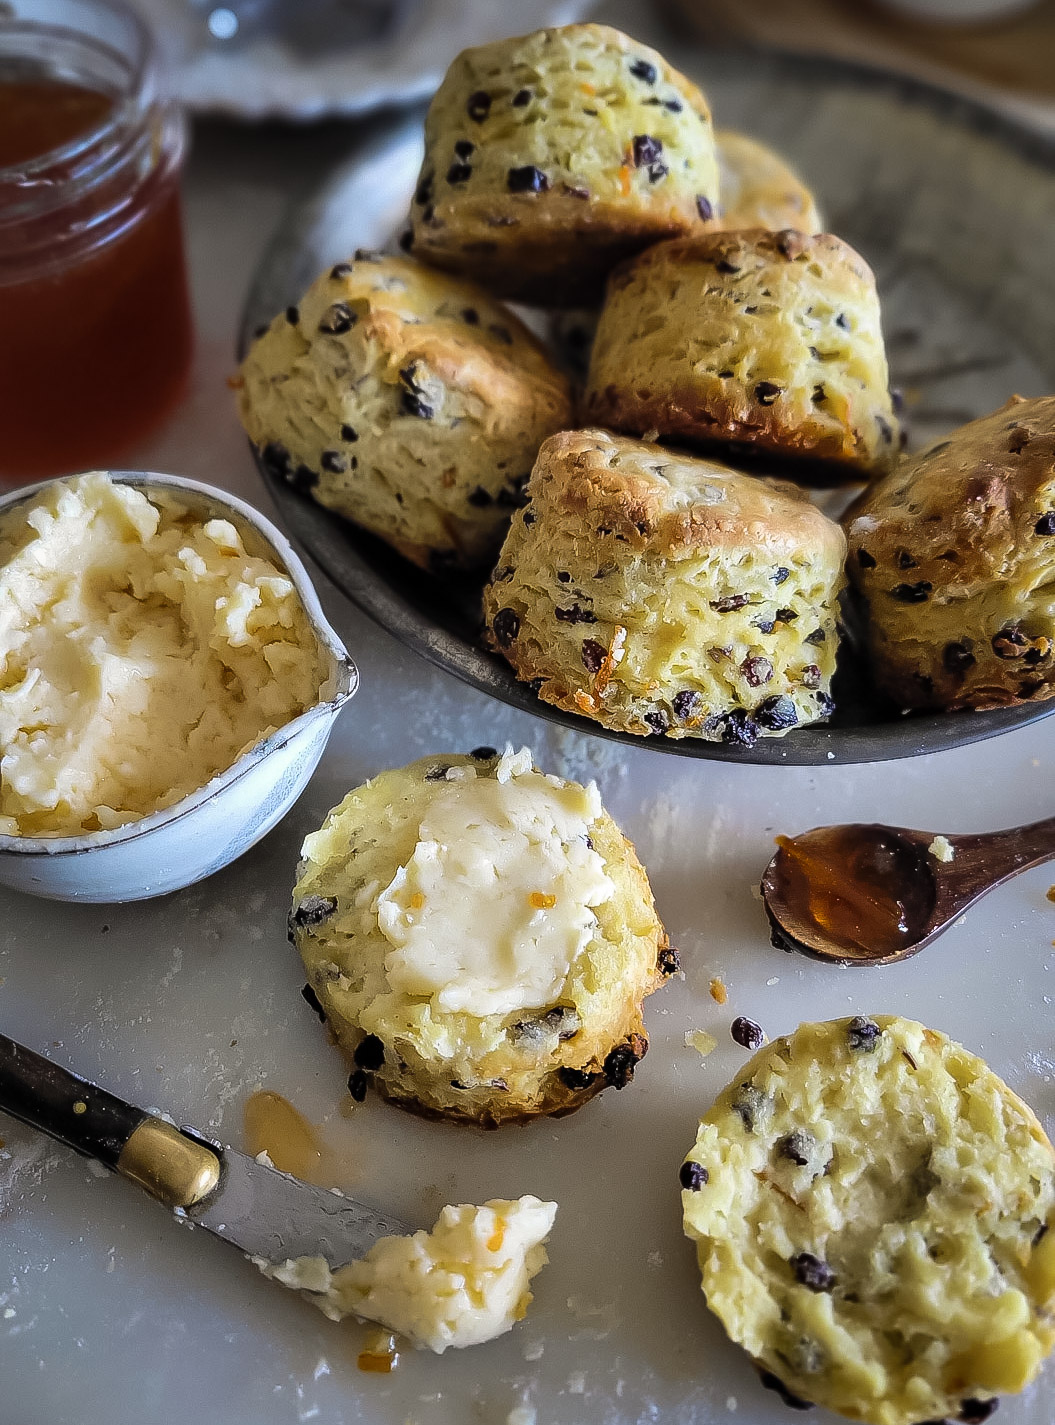
Scone Making Essentials
Always work with chilled ingredients. If possible, try and use butter from the freezer which you will grate into the dry ingredients. Have the kefir or buttermilk and the eggs chilled as well. I like using kefir, since I always have plain kefir in the fridge for drinking anyways. Of course buttermilk will work great as well. This will help the butter from warming up as you work the dough. It is the chilled solid butter pieces hitting the heat of the oven which will cause the steam inside the scone (or biscuit) that you want, for the best layers to form.
For traditional un-layered scones: Once you have formed the rough dough formed in the bowl, transfer the mass to a floured surface and use your hands to gently finish bringing it all together. And then just use your hand to gently press it down into a rough triangle about one inch thick. Cut out as described below, or use a knife to cut into 8 equal squares.
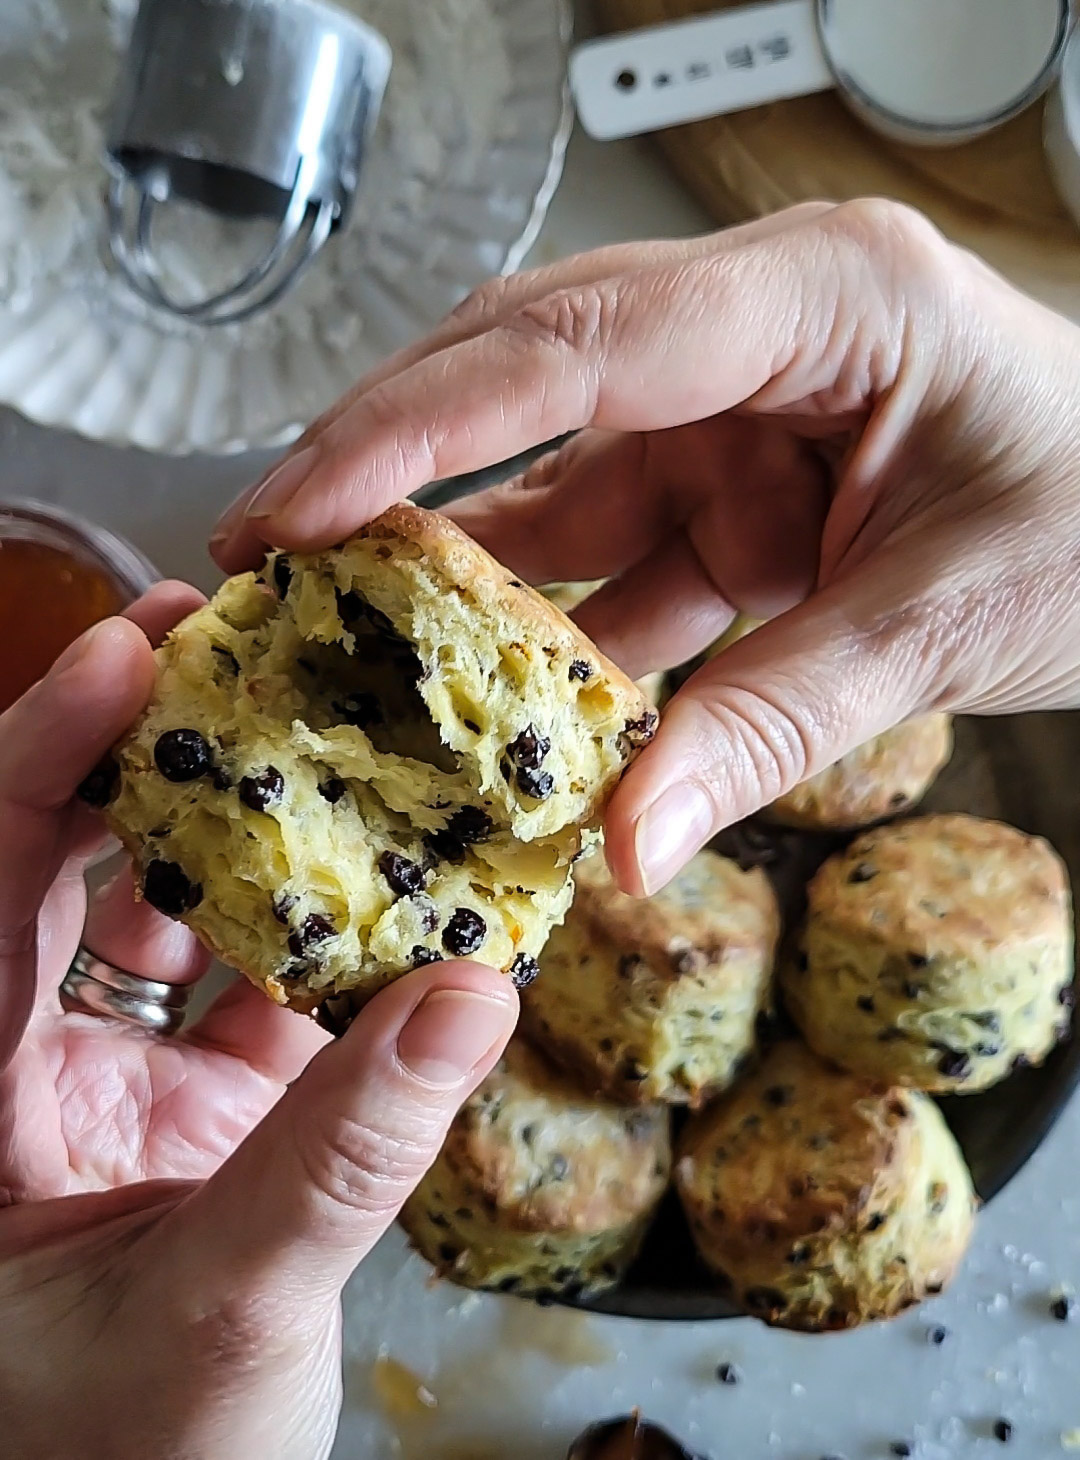
For flakey layered scones: Form the dough into a rectangle about 2/3 inch thick. Fold it in half, and turn it a quarter turn. Repeat with the spreading and folding. No need for a rolling pin. Keep this up for at least four folds. Five if you are feeling extra ‘foldy’! This will give you the flakey layers everyone desires.
The final rectangle should be about 1 inch (2.5 cm) thick. Cut out with floured biscuit cutters, but do not twist the cutter as you push it down into the dough. This would sadly close off the layers in the dough, and would inhibit the layers from forming as they bake.
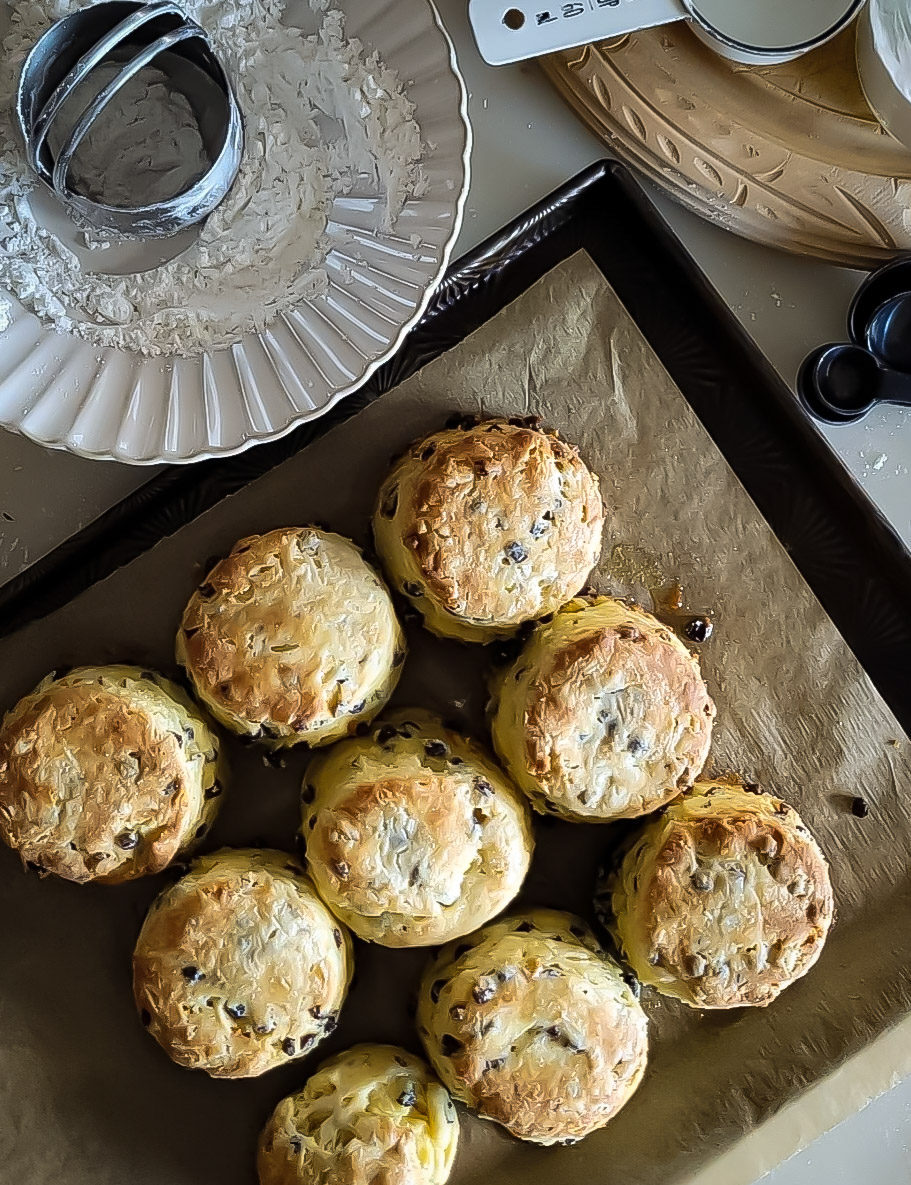
Lay them close together (almost kissing each other) on a parchment lined baking sheet, and chill in the fridge while the oven warms up. Placing them close together helps them rise up, instead of spreading out. It’s like their neighbours help them all rise up together.
What you see here is a batch made with a gluten free cup for cup flour blend. And yes, you will still get all those layers. It’s all in the folding. Of course, you can make this recipe with traditional wheat flour.
Soak the currants. Since I am already making ribbons of orange zest with a bar zester (get one if you don’t already have one, one like this). I then juice the orange to use for soaking the currants. This won’t be enough liquid, so using whiskey, rum or even bourbon makes up the difference. The juice and liquor are heated up first, so most of the alcohol burns off, so the final currants aren’t that tipsy, no worries. If you don’t want to use liquor, just use more juice. And as to why these scones are so tender, I’m sure it is in no small part to these plumped up currants and orange zest! You could replace them with raisins (but for some reason I’m just not a huge raisin lover, plus currants are more Irish, and European, so I am definitely team currant! And while the remaining liquid is lovely, you don’t add it to the dough, drain the currants through a strainer before adding to the batter.
The caraway seeds adds a lovely savoury and slightly anise or liquorice dimension. But definitely not overpowering. Being German, any time caraway seeds are added to a bake, I’m a happy camper.
Marmalade Butter
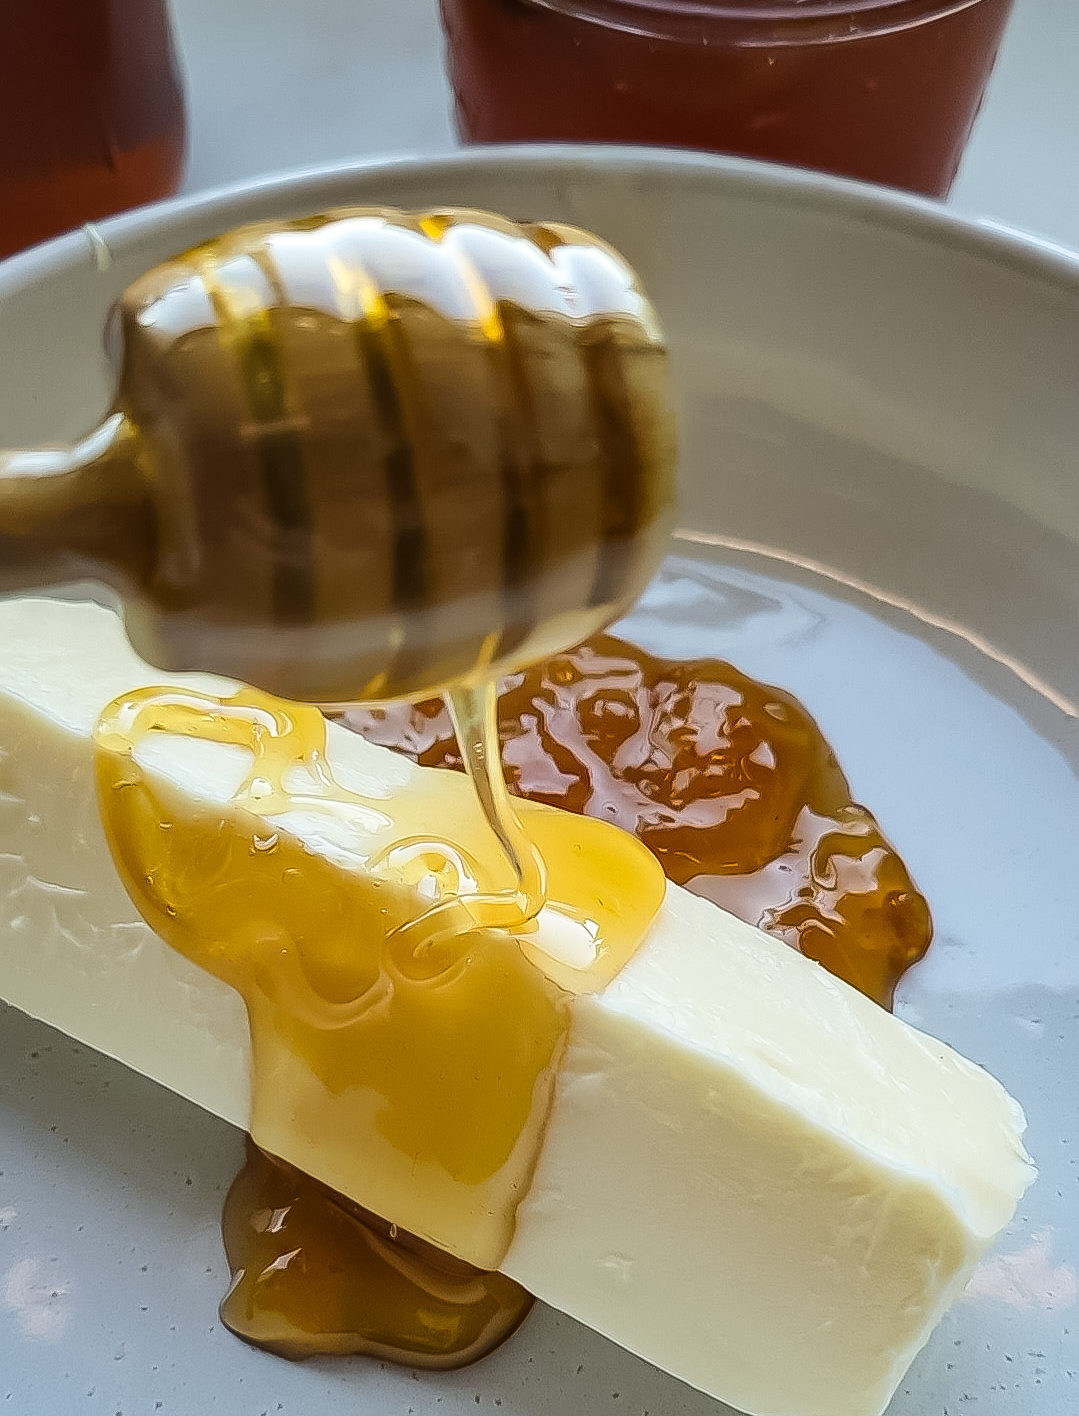
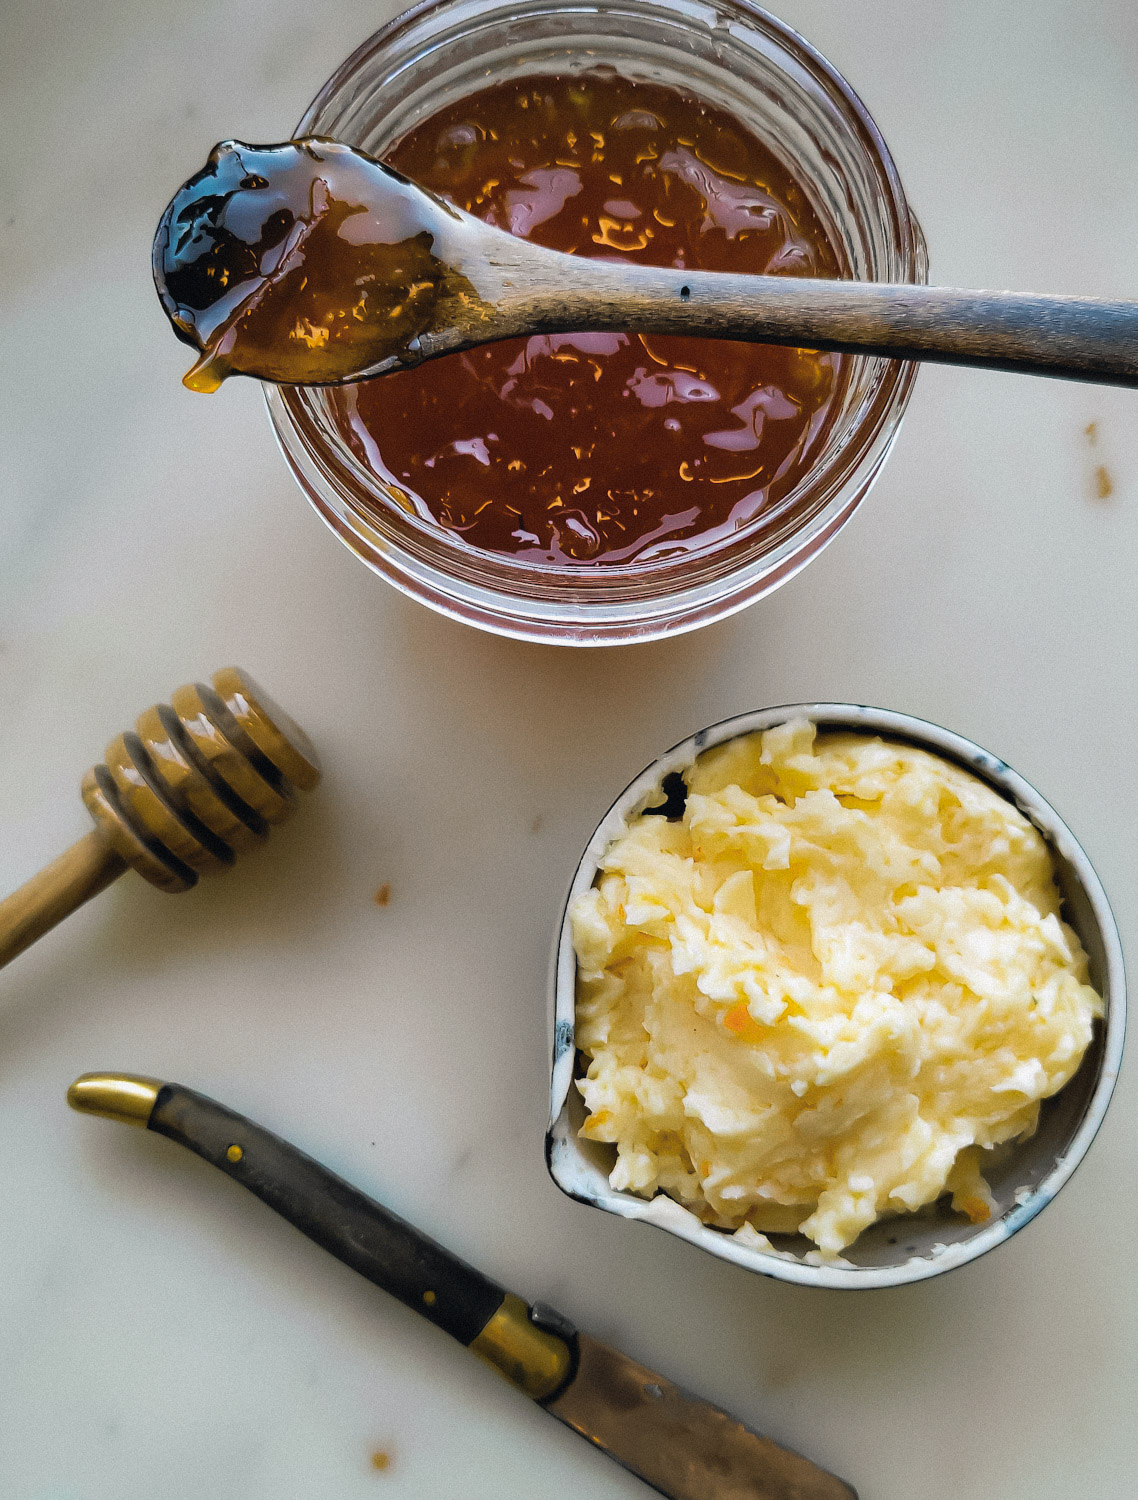
As I mentioned, a slather of butter on a warm scone is pretty well a perfect moment for me. So why not go all out, and make a compound butter that really suits these scones?! I use my homemade Seville Orange Marmalade (based on my Blood Orange Rosemary Marmalade) but purchased marmalade will work perfectly fine. Softened butter, a couple of tablespoons of marmalade, and two teaspoons or so of honey are easily smooshed together till combined. Chill till needed, but bring it out in plenty of time for it to be able to soften for spreading.
Final Thoughts
Yes, these make a perfect breakfast treat. But if you are visiting a sick friend, or having a few over for coffee and catch-up, bake up these scones, prepare the butter, and make a pot of coffee or tea. You and your company will have a lovely time!
Feel free to prepare the dough and refrigerate till the morning. Take out, lay on the prepared baking sheet and cut up the scones. Bake as directed.
To re-heat scones: Wrap in foil and place in a 325F oven or toaster oven and bake till warmed through, about 4-5 minutes. Don’t use a microwave, you will find that the texture is never as flakey this way. You don’t need to wrap them in foil, but then they may brown up a bit as they warm up.
To freeze unbaked scones: lay out on a wax paper lined baking sheet and place in the freezer. Once frozen you will transfer them to a freezer bag. Use within one month or so.
To freeze baked scones: once cooled, lay them out on a wax paper lined baking sheet and place the sheet in the freezer. Once frozen, place them in a freezer bag. They are best up to two months.
Feel free to use the butter on pancakes or waffles, that would be amazing!
Irish Soda Bread Scones with Marmalade Butter
Ingredients
Irish Soda Bread Scones
- 3/4 cup (105 g) currants
- 1 orange, zested and juiced, see Notes
- whiskey, rum or bourbon, optional, see Notes
- 2 1/3 cups (315 g) all-purpose flour, or your favourite cup for cup gluten free blend, see Notes
- 2 tsp baking powder
- 1/2 tsp baking soda
- 1/2 tsp salt
- 1/4 cup (50 g) granulated sugar
- 1 tsp caraway seeds
- 1/2 cup (115 g) unsalted cold or frozen butter
- 3/4 cup (175 ml) kefir or buttermilk, plus more depending on the flour you are using, see Notes
- 1 large egg
- 1 tbsp kefir, for brushing on the scones before baking, optional
Orange Marmalade Butter
- 8 tbsp softened butter, or 1/2 cup
- 2 tbsp orange marmalade, see Notes
- 2 tsp runny honey
Instructions
Irish Soda Bread Scones
-
Place the currants and orange zest in a small bowl. Place the orange juice into a measuring cup. Top up with whiskey, or more juice to reach one cup's worth. Warm this liquid in a small sauce pan over medium heat till boiling. Adjust heat and let it simmer for one minute. Remove from the heat and pour this over the currants. Let them soak for at least 30 minutes. Drain through a strainer and set aside.
-
Preheat oven to 400F. Line a baking sheet with parchment paper.
-
In a large bowl, combine flour, baking powder, baking soda, salt, sugar and caraway seeds with a whisk.
-
Grate the butter into the flour mixture, and work into flour with your fingers or a pastry cutter. The butter should be well coated and evenly distributed. Fold in the drained currants and orange zest.
-
In a medium separate bowl, whisk the kefir and egg until smooth. Pour this into a well made in the centre of the dry ingredients. Gently stir with a wooden spoon it starts to come together. It should look shaggy. If your dough is on the dry side (on a winter day with the heat on this may be the case) add a bit more kefir, 1 tbsp at a time till a shaggy texture is achieved.
-
Turn the shaggy dough and all leftover bits onto a well- floured surface.
-
Gently knead several times until dough comes together (stop before you overwork the dough or the scones will be tough) Flour your hands if needed.
-
Press out the dough into rough rectangle about 2/3 inch thick. Using flour on the counter and your hands, fold it in half, and then turn a quarter turn. Press out into another rectangle, and fold again. Repeat the pressing, folding and turning two or three more times. Finish with a rectangle about one inch thick.
-
At this point you can refrigerate the dough and continue in the morning to bake them up.
-
Use a floured biscuit cutter (I like one about 2 inches wide) and cut out as many scones as you can from this rectangle. Press the remaining dough together, and fold once more. Cut out more biscuits. You should be able to get 8 or 9 scones, depending on the size of your cutter. Keep flouring your cutter so that it will go through the dough easily, and make sure you don't twist the cutter as you press down.
-
Place them all the prepared baking sheet, close together. Chill these in the fridge for at least 15 minutes.
-
When ready to bake, brush the tops of the scones with a bit more kefir or butter milk.
-
Bake for 18-22 minutes, or until golden brown on top, with the layers puffed up.
-
Cool for about 5 minutes before serving. You should be able to gently pull them open, with the layers opening up easily.
-
Spread with Orange Marmalade Butter and enjoy!
-
See blog post for more details.
Orange Marmalade Butter
-
Combine the softened butter, marmalade and honey in a small bowl. A fork will work fine to work everything together. Store in a sealed container till needed. Bring out to warm up so that it is soft enough to spread on warmed scones, or toast!
Recipe Notes
To add a lovely depth of flavour, soaking the currants in the heated orange juice and whiskey is key. If you would rather skip the whiskey, feel free to use all orange juice.
If using cups to measure out the flour, use the fluff, scoop and level method: fluff up the flour, use a spoon to fill the cup, and then a knife to level off the flour. Pushing the cup into the flour will actually capture more flour than required. Many countries have their own versions of what a cup of flour weighs. The weight you see stated above does not use any of those charts. The weight I show is the from measuring my flour on a scale, so this is what will work for this recipe.
Wheat flours absorb liquids differently from gluten-free blends, so start with 3/4 cup of the kefir, and add more if needed for gluten free blends, to create a shaggy but not overly sticky dough.
Store bought marmalade will work great in this application. But if you want, to make your own Orange Marmalade, just click here.
Store leftover scones in a sealed container for up to three days. Re-warm any leftover scones in a 325F oven till warmed through. Do not use a microwave for best results.
Freeze unbaked for up to one month, for best results.
Freeze baked scones for up to two months.

Looks wonderful can’t wait to try it!
Just curious if you incorporate the leftover liquid from soaking the currants into the batter?
Hi Lorraine, thanks for catching that! I’ve updated the recipe to show that they should be drained before adding to the dough. Thanks!! Love Jen
I make scones all the time … but this recipe is the bomb. Truly the most tender, flavorful and delicious scone ever. I cannot wait to make again.
Hi Bernadette, Yay! Thanks so much my dear. So happy you like these as much as we do! Love Jen
I could not do the folding version! It was way too sticky I would have had to add more flour to be able to pat, fold and turn. It just stuck to my hands. And all of my ingredients were cold, the butter frozen and grated.
Hi Laura, your dough was fine. It was my fault for not including the step to flour the counter and your hands as needed. After the first couple of folds you wouldn’t need anymore flour on your hands. But even if you didn’t fold the dough at all, but just patted and cut out, the scones themselves should still be tender and tasty. The folds are added bonus, but not necessary, as per my blog post! Hope this helps, Love Jen
Hi Laura, I have updated the recipe, to show weighted measurements, and adjusted the liquid amount of the kefir needed (it was too high in the original recipe, I was basing that amount on someone using gluten free flour in a dry climate) I think you will now find that the recipe will work like a charm, and no sticky fingers will happen! Love Jen
Tried the folding method, worked like a charm.
Question, can I make this with frozen blueberries and lemon zest? or would it be better to use dried blueberries?
Hi there, so happy you like the folding method, it really makes a difference, doesn’t it! Hmmm, I have never made them with frozen berries, but if you have made other scones with frozen berries, straight from frozen, with good results, then I would assume they would work in this recipe as well. Love the lemon blueberry idea though! Dried blueberries would be more traditional to an Irish Soda bread style. Let me know what happens, either way! Love Jen
I would love to be able to get my scones to raise like yours, mine will only barely rise, I have checked everything to make sure I am doing it properly but to no avail, it just doesn’t work for me unfortunately
I had very high hopes for these, but I really think there is something amiss in the measuring here. I’m a pretty experienced baker and use weight measurements for flour so, using the common 125g per cup standard, I added 281g of flour. Nowhere NEAR enough, as it turns out. I ended up having to add at least another half cup to get something even remotely workable. My butter was straight from the freezer and the weather where I live is cold and dry right now so I really do think the stickiness is just due to too little flour. Any way you could give your flour a weigh the next time you make these? Would be curious to know how much you actually use, and it would be helpful for others who also rely on weight measurements rather than volume.
Hi Ella, I am actually thanking you for this comment. It forced me to go back and measure everything with my scale. I made the recipe again, and the only thing that had to change was the liquid measurement! I was basing the amount on using gluten free flour which tends to absorb more liquid, therefore I missed typing out that you should start with 3/4 cup kefir, and only go up to a cup if needed. All of this has been adjusted, and when I just baked them again, using the measurements I updated, they turned out perfect! As for using a standard measurement, I have found through the years that none of them agree. I weighed and re-weighed the flour, using the fluff, scoop and level method, and I kept getting 140 g per cup on more than one scale. So this is what I am sticking to for this recipe! I hope you try the recipe again, and have the success that I know you can! Love Jen
Wow, thank you so much for addressing this! I really appreciate your taking the time to add the measurements. Good to know that GF flour absorbs more liquid; I’ve never used it before so I had no idea! I thought the flavors were a hit so I’m absolutely going to try these again. Is there any way to update my star rating once I’ve remade them?
My pleasure Ella! Thanks for caring!! I’m not sure if you can click on a previous comment and change the rating. How’s this, if you are happy with the updated version, I’ll remove the initial comment, and you can post a new one with your thoughts. Love Jen
I tried the recipe and LOVED the results! First time doing the folding process and it builds great layers. Shared with neighbours and they enjoyed the scones too. Thanks
Hi Leah, Yay, so happy you love the process, it really does make for flakey scones or biscuits. Thanks so much for your feedback, Love Jen
your scones look amazing and made me want to try the recipe! mine did not rise as high, but they still tasted delicious. (instead of all-purpose flour, I subbed in a blend of pastry flour and whole wheat flour.) instead of currants, I subbed in diced bits of (trader joe’s) candied dried orange and lemon slices, soaked in irish tea. so they tasted like barmbrack scones, which I loved. I used kerrygold butter in the scones, and to slather on with marmalade…every mouthful was bliss! thanks for your lovely recipe and the inspiration 🙂
Hey Wanda, it sounds like you have created a wonderful new scone that I will need to try as well! So happy that you enjoyed the original recipe. Love Jen
*WHAT TO DO WITH THE SOAK JUICE!*
Just made these and YES! So good… thankful for gram measurements, I weighed things out since often cup measurements are not quite the same (my currants ended up taking the better part of a whole cup when weighed). And, just in case anyone needs to know, dried currants as labeled here in the US are actually tiny raisins (Zante grapes), not Ribes (the genus of currant).
BUT what I’m here to comment on, is what to do with the leftover, luscious SOAK JUICE as I’ve dubbed it… I used rum (Pusser’s, an excellent brand) and a little additional OJ to get the full cup, and so with the soaked currant dimension, there was this sweet, complex liquid asking to be added to something! So, I made a cocktail (several, actually!)! A shot of soak juice, a shot of rum, and a little soda water, and BAM! What a tasty little drink!
Cheers, y’all!
So good! Thanks for the suggestions! Jen
***** and 5 stars!
Hi Jenny, Yay! so happy you love these as much as we do! All the best, Jen
These scones are soooo delicious! I can’t wait to make them again. They turned out exactly like your photo! I love scones and these are the best I’ve made so far. Thank you so much for sharing!
Hi Bec, Yay! So happy to hear! Definitely my favourite as well. Enjoy, Love Jen
So I tried these a year ago and they ended up a little too sticky when using regular, non-GF flour. Since then the recipe has been updated to note that, and so I gave them another try. Absolutely perfect!! I used buttermilk and they were delicious and tender. I also subbed whole wheat flour for about a quarter of the white flour because I love the combo of whole wheat and buttermilk, and had excellent results. These are so flavorful and will absolutely be going into my regular rotation. PS–if you don’t have orange marmalade on hand, my family loves these with apricot jam as well!
Hi Ella, so happy you re-visited the recipe, and are happy with the results. These are definitely my favourite Scones, and yes, apricot jam would be amazing as well. Thanks so much, Love Jen
Excellent recipe. I subbed lightly ground anise seed for the caraway and added a bit of vanilla. Will definitely be making again.
These scones turned out delicious! The orange marmalade butter was a great complement to the scones. I added a bit of apricot jam to the combo and that was a nice touch. The 9 scones were moist and tasted great with the corned beef, cabbage and mashed potatoes in celebration of St. Patrick’s Day tonight. Thank you.
These scones taste delicious! The orange marmalade butter was a great complement to the orange flavored scones. Soaking the currants in oj was brilliant! We enjoyed the moist and tender scones. It made our St. Patrick’s Day dinner last night even more special.
These are awesome, just wondering if I could prep them and bake the next day when company arrives
Hi Nancy, for sure, just chill the dough, and then cut them and bake in the morning. Enjoy, Love Jen
Can these be refrigerated overnight before baking?
These are excellent scones. They’re crisp on the outside with a moist, tender crumb. I’m an obsessive scone tester, and prefer the texture without an egg. To compensate for the lost liquid from the egg, I increased the buttermilk. The only other tweak was to add a pinch of nutmeg, chopped toasted walnuts, and sprinkle the tops with cinnamon sugar. The dough wasn’t sticky and handled nicely. Thank you for a great recipe.
Hi Sadie, Love the addition of the nuts and cinnamon sugar. They must have smelled amazing as they baked! Thanks for your kind feedback, Love Jen
This recipe is by far my favorite scone recipe! I see your instructions for freezing unbaked, but no specific instructions for baking. Should I pull them out to thaw in the fridge and then bake as directed in original recipe? Or if they were baked from frozen, should I adjust the oven temperature and time?
Hi Amy, all the directions for baking from frozen etc, are in the blog post itself, towards the end before the recipe begins. Thanks for your feedback ;D