I used to think that making sauerkraut was a lot fussier than it really is. That was due to so many books and websites being over-technical, demanding that we use expensive specialty crocks, lids, weights and airlock valves, and muddlers.
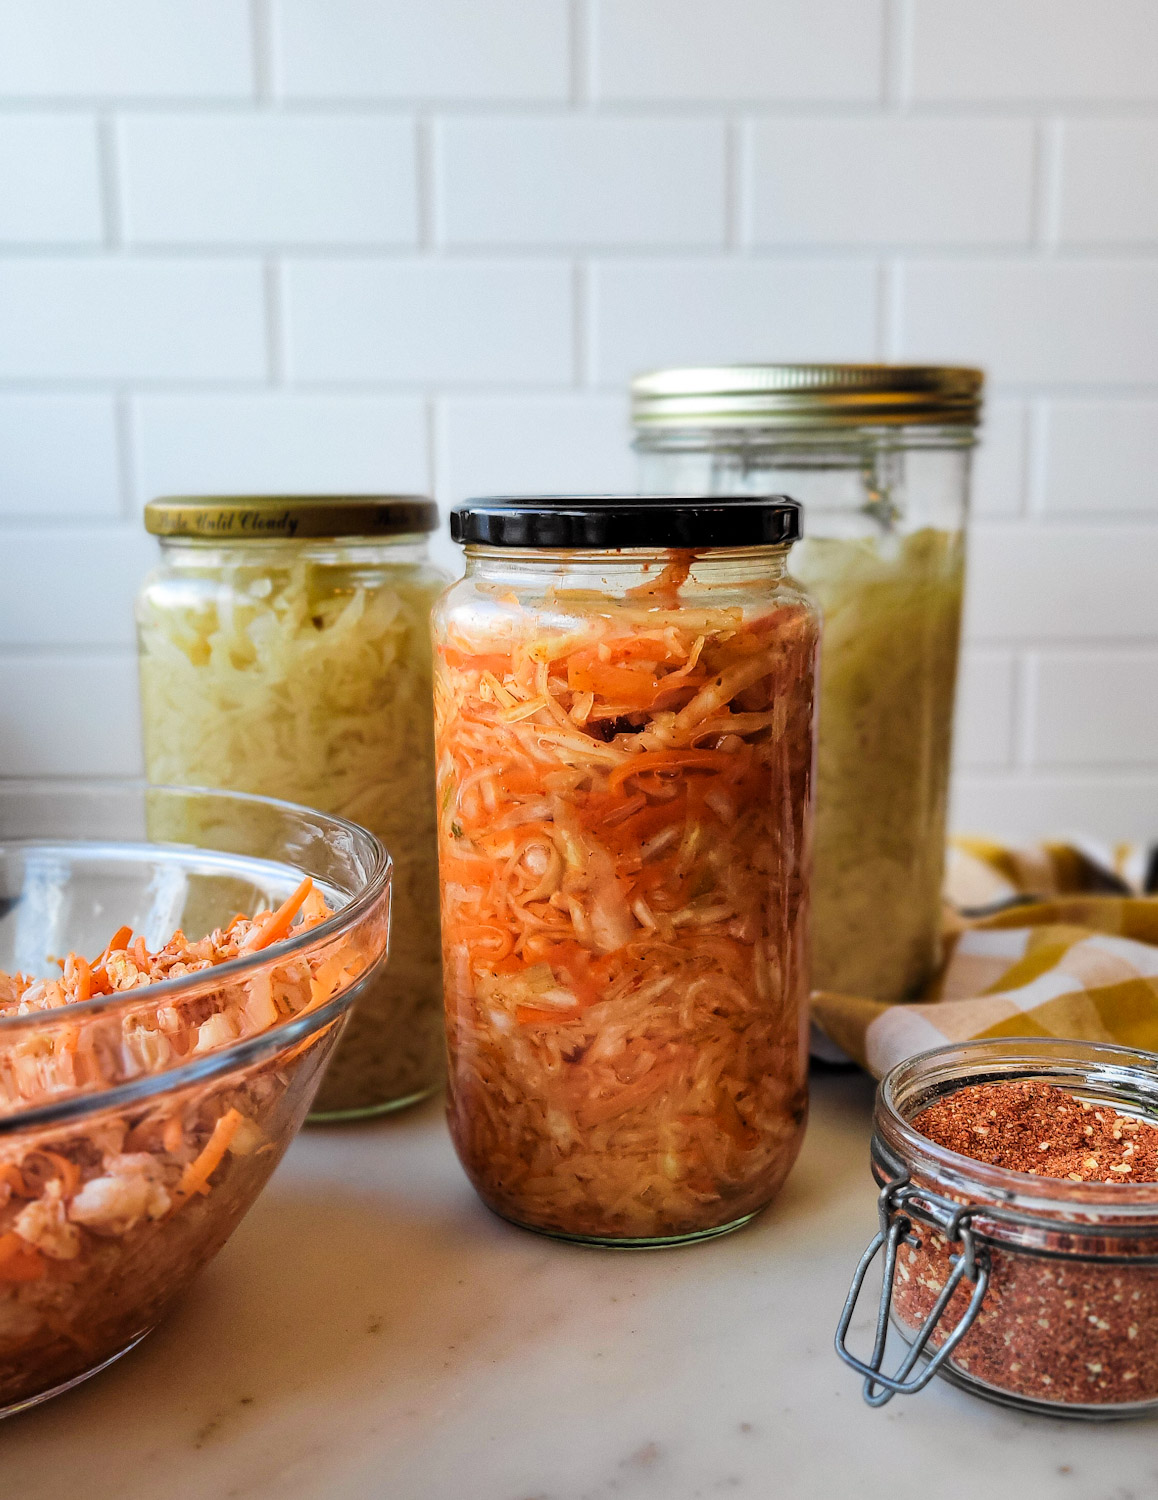
You don’t need any of the above. All you need are some large mason jars with lids… and that’s it. Yep, equipment you probably already have in the cupboard.
And when I started doing the math, it only made sense that I started making our own sauerkraut. Jim goes through at least a jar a week (one of his favourite snacks). Bubbies (or any good deli sauerkraut found in the refrigerated section of your grocery store) can cost around $8.00 Canadian for one jar. I can purchase a large head of white cabbage for $4.00. This is enough to make four similarly sized jars of Bubbies. So, you do the math…
Sauerkraut Basics
What is sauerkraut? All it is, is fermented cabbage. The fermentation happens naturally as the shredded cabbage and salt combine creating a brine. This brine is what allows for the growth and acid production by a succession of lactic acid bacteria. This is why they need to be packed into an airtight container. The bacteria produce carbon dioxide (replacing any last amount of oxygen in the jar) and lactic acid. Eventually the conditions in the jar become too acidic, and those first bacteria are replaced by a heartier Lactobacillus (a friendly to human) species. These further ferment any remaining sugars in the cabbage. Once the sauerkraut reaches a pH of 3 the lactobacillus stop fermenting and the sauerkraut can be stored in the fridge and enjoyed.
The enemy to making sauerkraut is oxygen. This is why the cabbage needs to be submerged under the liquid brine. More on this below. And while oxygen is the enemy, you do need to open the lid (burp) from the jar each day, to release the trapped gases in the jar. A brief moment is all that is required. Once the bubbles formed during the fermentation process stop forming, become dormant or disappear, you will know that the sauerkraut is ready.
Why Include Sauerkraut in Your Weekly Diet
As with all fermented foods, the benefits are many. The first is improved gut health. Cabbage already has natural prebiotics. The fermentation process also creates lactic acid bacteria which help feed the healthy gut microbiome of our stomach lining. Fermented foods can help promote greater gut bacteria diversity and protect against inflammation. Sauerkraut also contains Vitamin E, Vitamin C, allyl isothiocynate, and indole-3-carbinol which all help reduce inflammation.
Sauerkraut can help regulate the immune function, as the microbes and compounds in sauerkraut can activate different aspects of the immune system’s functions.
Sauerkraut contains certain lactic acid bacteria which may help protect against cancer and hardening of the arteries. The more sauerkraut and raw cabbage eaten from an early age may also result in significantly lower risk of breast cancer in adulthood. All this information can be found in this Medical New Today article.
Method
You will need a scale. I could give you volume measurements, but everyone will pack their cups differently, which can result in an incorrect ratio of cabbage to salt. This can effect the success of the fermenting process. A scale is quite reasonable these days, here is one I use, but there are many more options. You will use it for baking as well, so it is always good to have one or two scales on hand.
Finely shred cabbage, by hand or mandolin, or even your food processor. You will need 1000 grams of shredded cabbage. Save a few of the outer leaves for the jar to cover the cabbage. Place the cabbage in a large bowl, along with 20 grams of kosher salt. Sprinkle the salt evenly over the cabbage. And now you will start squeezing. Mix well, kneading and squeezing the shredded cabbage between your fingers, pressing firmly, massaging the cabbage. Eventually you will find that the salt draws out the liquid from the cabbage. Soon a small pool of liquid will be at the bottom of the bowl. Rest, let the liquids come out, and then continue massaging and resting for up to 2 to 3 hours, till you have a good amount of liquid in the bowl. When you push down on the cabbage it should easily be submerged in the liquid. What started out as a full bowl of shredded cabbage has now been reduced to much less actual cabbage.
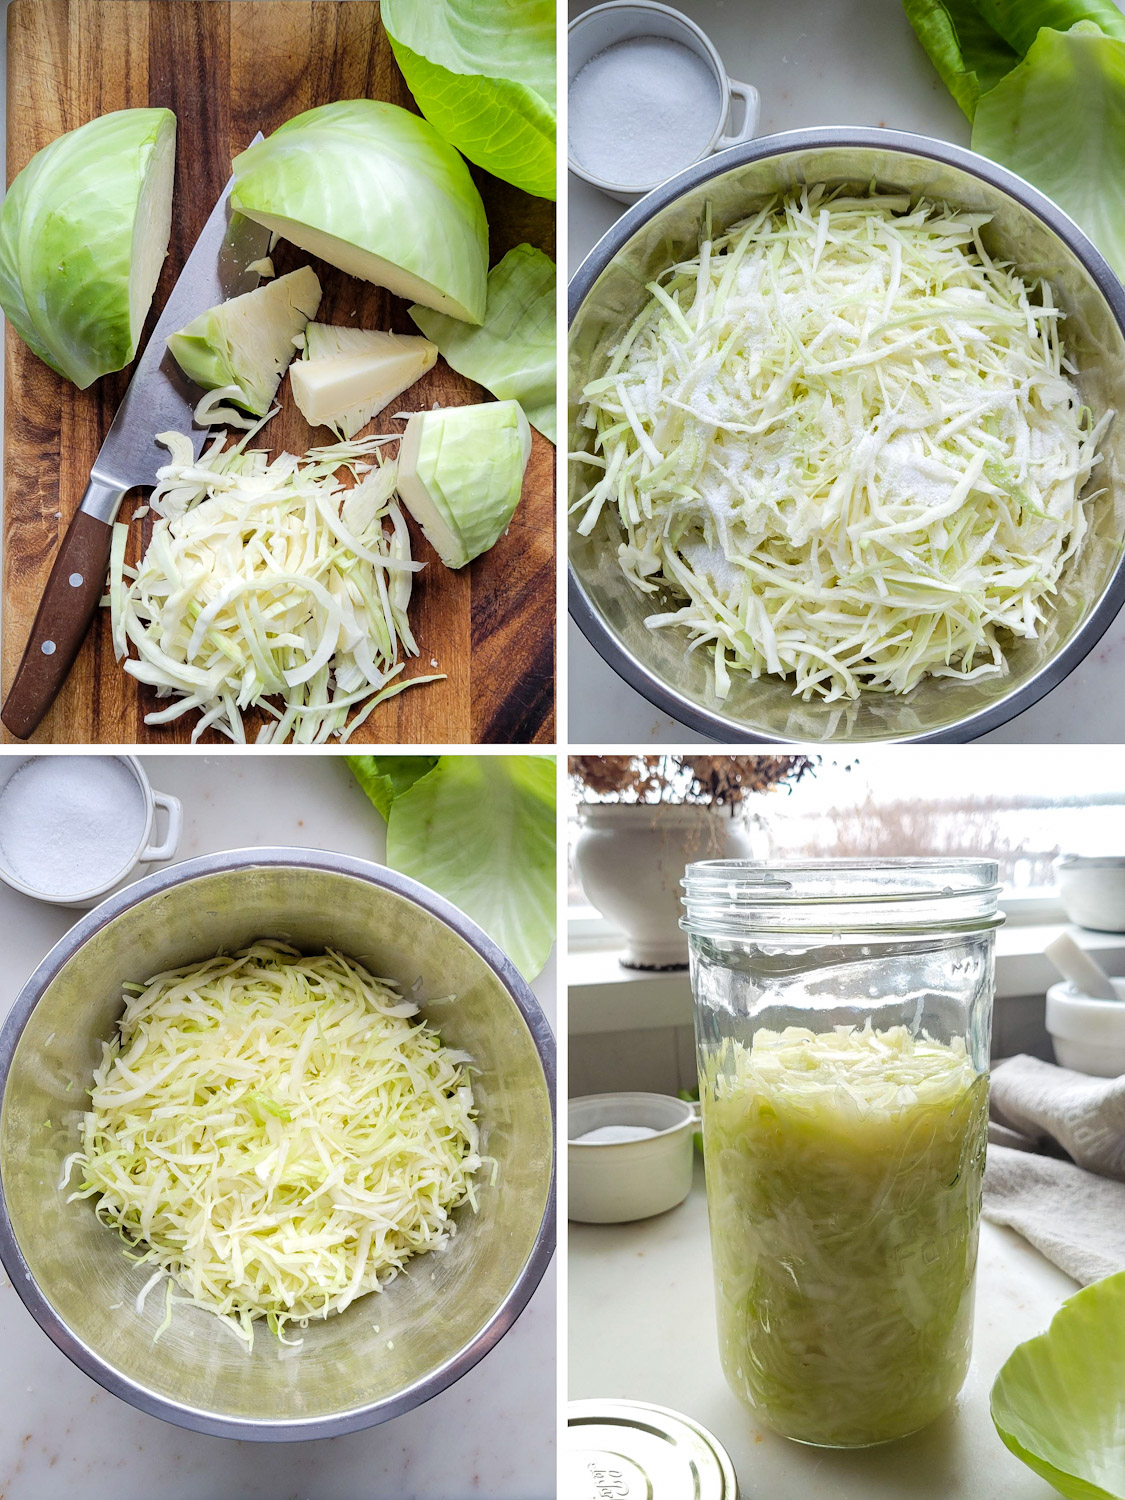
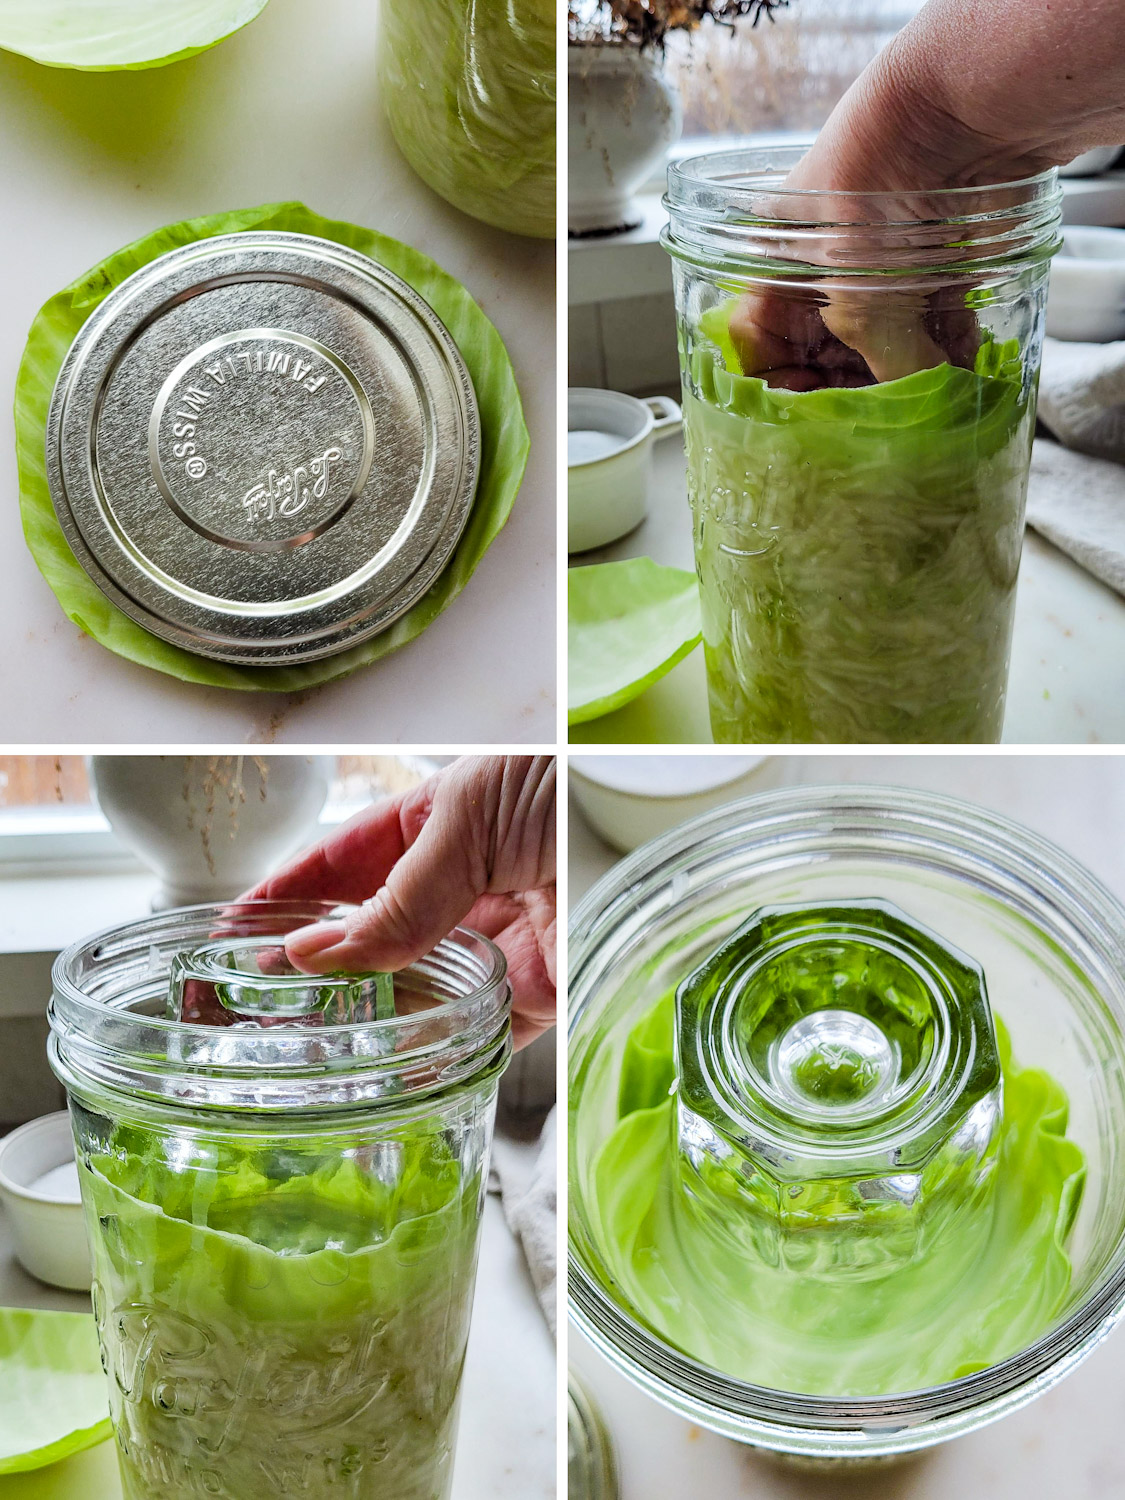
Transfer everything to a cleaned very large 40 oz mason jar (or you can use two slightly smaller ones, or even large Weck Glass jars without the rubber casket for the lid) Lay the reserved cabbage leaves over the shredded cabbage. Press down until the brine rises up above the cabbage by close to one inch. Now you can weigh down the cabbage leaf. I use the lid as a guide to cut it to a shape that will fit nicely on top of the shredded cabbage. If you have a weight or stone (wrapped in plastic) that’s great. I use a heavy shot glass that works great. Place the lid on, but not tightly. Store in a dark spot where the temperature is right about 65-70 degrees F. After a full day, open the lid for a second, and then return to close it on the jar. At this point, or for sure by day three, you will start seeing bubbles appearing around the edges at the top of the cabbage. Periodically push down to ensure that the cabbage stays below the brine. After a few days you can also taste to see how the tang is developing.
After a two week minimum, and up to three weeks, the sauerkraut will be ready to store in the fridge. It’s totally up to you how long you let it ferment. As long as it has that distinctive tang, it is good to go.
If a little mold develops at the top, don’t worry, it can easily be scooped away.
Then transfer to a sealed container or two and store in the fridge for up to six months. Make sure to transfer any brine left in the fermenting jar as well. Ours never lasts more than two weeks, so there is always more sauerkraut on the counter getting ready!
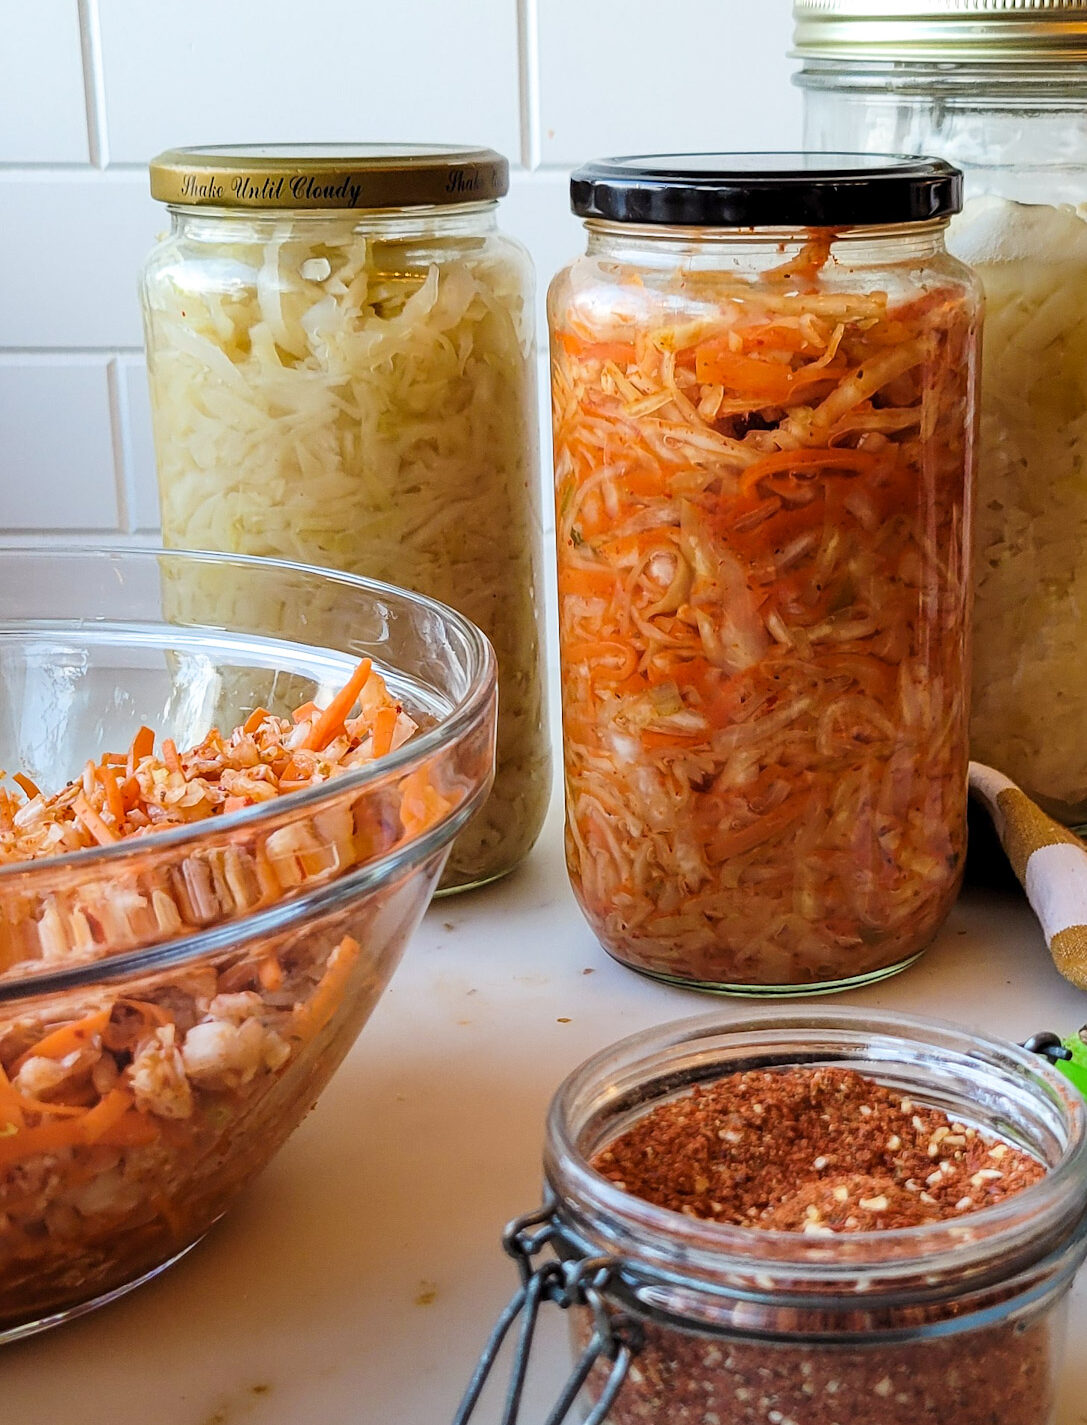
Kimchi Sauerkraut
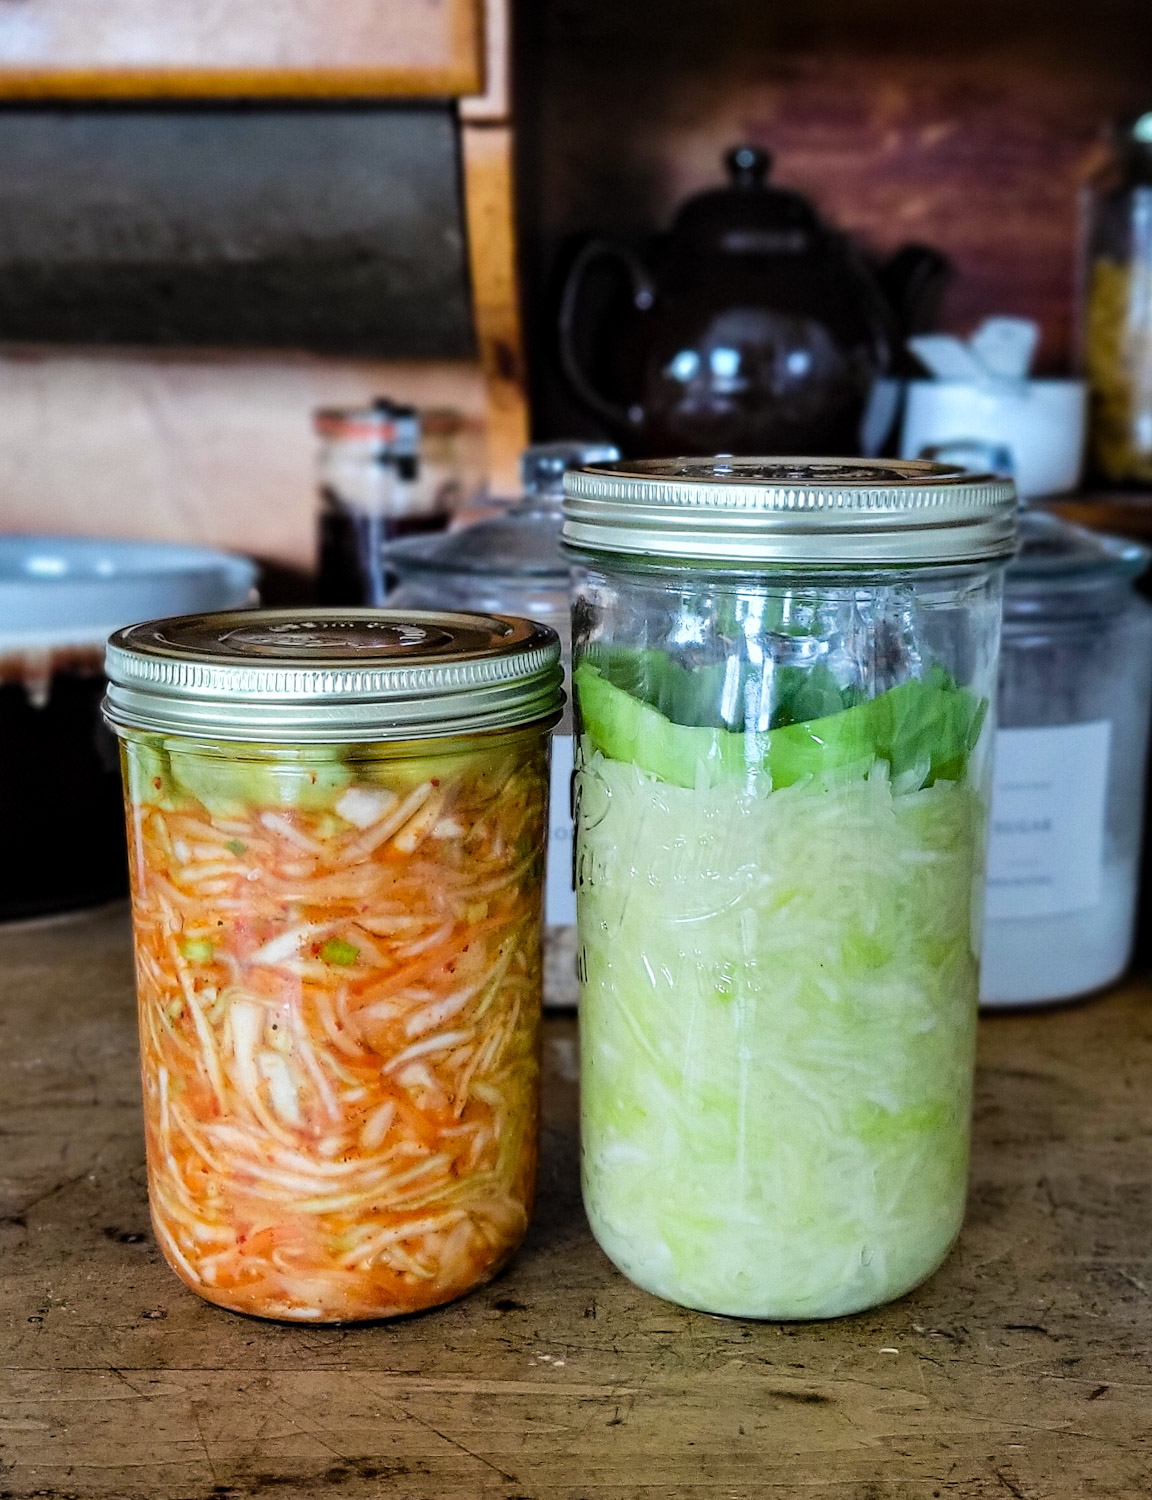
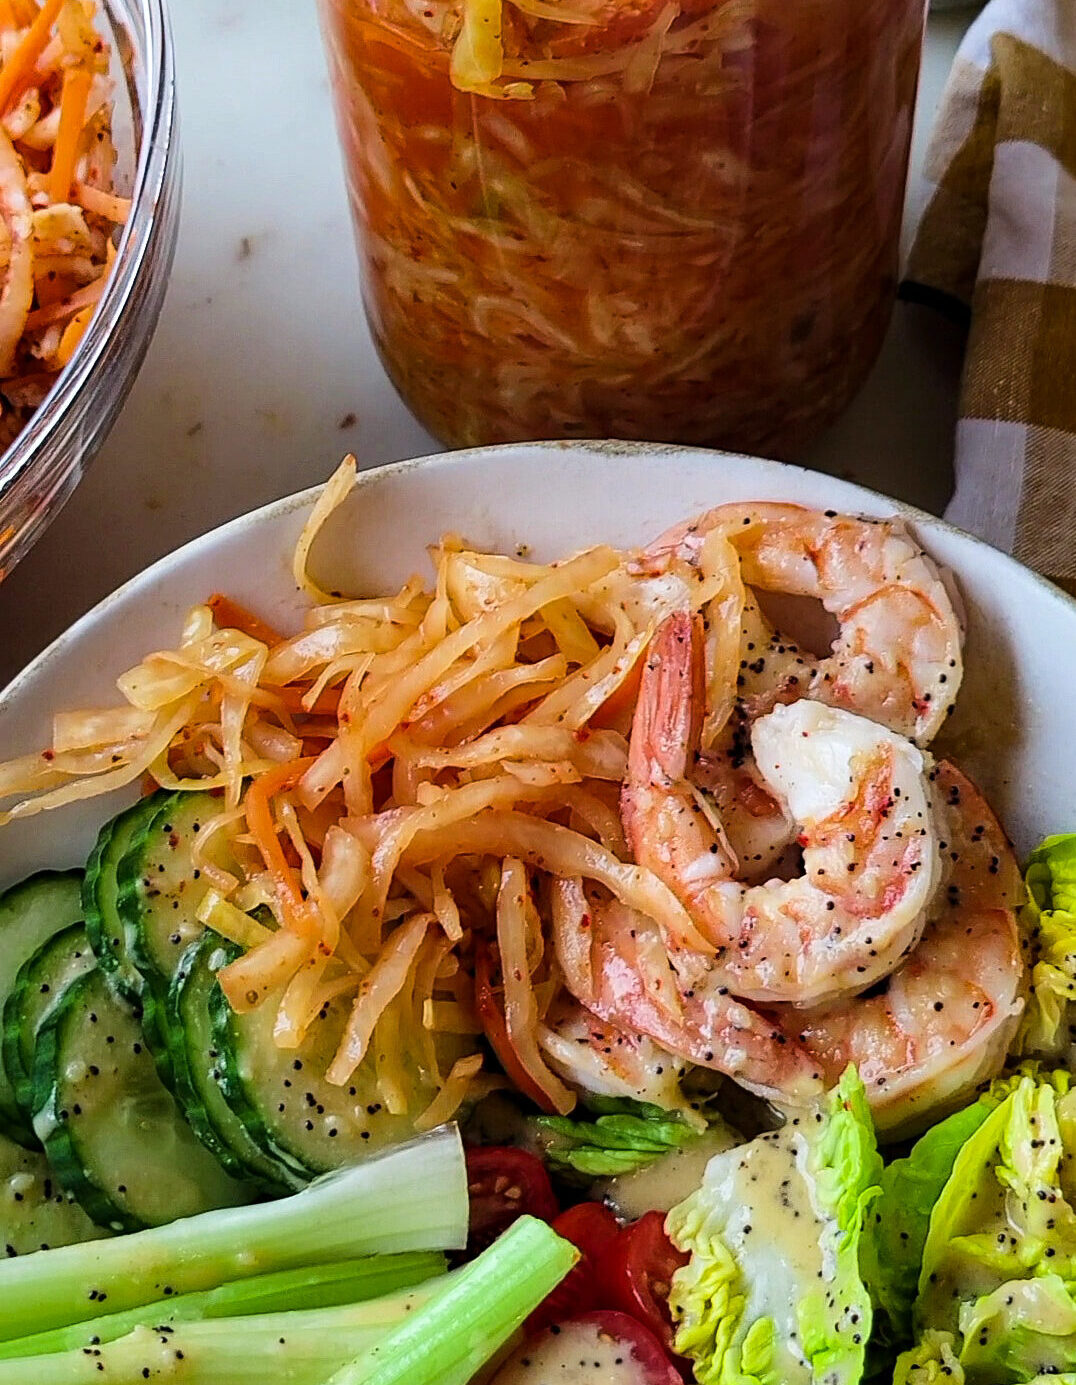
The only difference between the sauerkraut I described above and this second version, is the addition of shredded or julienned carrots, scallions, and a dry spice blend. I like shredded my cabbage for kimchi as opposed to roughly chopped because I just find it so much more versatile. But that’s just me. I use it all the time in kimchi burgers, to top baked salmon, in Kimchi Fried Rice, or just in a shrimp bowl.
You will follow the very same method I described above, with the addition of sprinkling the spice blend and some water in with the cabbage when massaging it in preparation for fermenting. You will also use sea salt instead of kosher salt. It will take at least 21 days to ferment, due to the addition of the extra vegetables, spices and water. But in the end, you will have a beautiful jar of umami, salted, and sour spiced sauerkraut to add to the fridge. All the details will be in the recipe card below.
The spice blend I use has been inspired by the recipe over at Cultured Guru. I make up a jar of the dry spice blend which will last many opportunities to make this kimchi sauerkraut. You will need Korean (Gochugaru) chilli powder or flakes (I find mine at the specialty grocer downtown), garlic powder, ginger powder, and kelp granules. I order the Organic Maine Coast Kelp Granules online.
I don’t find the final amount of spice overly heated or strong at all, so don’t worry, the final kimchi has a very balanced finish.
Trouble Shooting Sauerkraut
Usually one small head of cabbage will fill the capacity of the 40 oz jar required (1000 grams) Since you need 2% of salt to the weight amount of cabbage, 20 grams of kosher salt is what is needed (I use Diamond Kosher Salt) If you use a different brand, be sure you are using the weight measurement. If you are using smaller jars, just make sure to have two leaves of cabbage to cover everything with.
If for some reason you don’t have enough brine to cover the cabbage, create more brine by combining 100 grams of water with 2 grams of water. Use only the amount you need to totally submerge the cabbage.
If the cabbage leaf develops mold on it just remove it carefully, if the cabbage below looks fine, then proceed with fermenting. If there is a small amount of mold on the surface, just scoop it out and continue. I have never had mold develop on the shredded cabbage surface, only on the air exposed cabbage leaf, so don’t worry, thinking that this is a regular occurrence.
The more vigorous you are in massaging the cabbage, the softer the final sauerkraut. For a crunchier kimchi or sauerkraut, stop while it still has some firmness. If you are senstive to pepper when making the kimchi, you may want to wear gloves.
You can use white cabbage for both versions. For the kimchi you can also use Napa cabbage, a traditional softer cabbage to use for this version.
And now I want to go make some Kimchi Fried Rice!

If you make this healthy, tangy, and versatile Sauerkraut, please be sure to leave a comment and/or give this recipe a rating! It’s always lovely to hear from you guys, and I always do my best to respond to each comment or question. And of course, if you do make this recipe, and you post it on Instagram, don’t forget to also tag me so I can see! Looking through the photos of recipes you all have made is such a treat.
Love Jen

Sauerkraut, Two Ways
Ingredients
Sauerkraut
- 1000 grams white cabbage
- 20 grams kosher salt
Extra Brine, if needed
- 100 grams filtered water
- 2 grams kosher salt
Kimchi Sauerkraut
- 500 grams Napa, green or white cabbage
- 20 grams unrefined sea salt
- 75 grams carrots, julienned
- 30 grams green onions, chopped
- 15 grams kimchi spice blend, see below
- 200 grams filtered water
Kimchi Spice Blend, blend together and store in a sealed container
- 455 grams Gochugaru or Korean chili flakes
- 300 grams dry minced or powdered garlic
- 100 grams ginger powder
- 75 grams kelp granules.
Instructions
Sauerkraut
-
Ensure that your 40 oz jar, or two smaller jars are clean and dry.
-
Remove one or two outer cabbage leaves to be used later. Rinse with cool water and pat dry.
-
Shred the remaining cabbage using a knife, mandoline or food processor. Add 1000 grams to a large bowl. Sprinkle the salt evenly over the cabbage.
-
Using your hands, begin massaging the cabbage firmly. You want to crush the cabbage between your fingers so that the salt can help release the liquid. Pause periodically to let the salt continue doing it's job. Keep working the cabbage for up to two hours, with pauses, until a good amount of liquid is now in the bowl as well. The firmer you crush the cabbage the softer the final sauerkraut.
-
Transfer the cabbage and liquid to the clean fermenting jar. Press down to allow the brine to cover the shredded cabbage. If for some reason you don't have enough brine, prepare the extra brine by combining the water and salt. Pour this over the cabbage till you have up to one inch on top.
-
Use the lid to cut the outer cabbage leaves to an approximate size to fit over the cabbage and brine. Press it down to hold everything under it. Press a weight, stone covered in plastic or even a heavy shot glass on top of the cabbage leaf.
-
Twist the lid on the jar, without closing it all the way. Store on the counter out of the sun. The temperature should be between 65 and 70F.
-
After the second day, twist the lid off for a moment to "burp" the jar. Close again, but not tightly. You will now notice bubbles to start forming at the top around the cabbage leaf. This is good. Keep "burping" the jar once a day till the fermentation process is completed. This should be between 14 and 16 days. It should smell bright and tangy. Taste it, it should taste good! Once you are happy with the flavour, it is ready to transfer to clean jars that will fit in the fridge. Transfer cabbage and brine to those jars and store in the fridge for up to six months.
-
See the blog post for any more details and troubleshooting.
Kimchi Sauerkraut
-
Ensure that your 32 oz or smaller jar(s) weight, and lid(s) are clean and dry.
-
Remove a couple of outer leaves of the cabbage and lightly rinse with cool water. Using a knife, shred the cabbage. Shred or julienne the carrots, and chop the onions.
-
Place a mixing bowl on your kitchen scale and tare/zero the scale. It should read "zero, 0".
-
Add the designated amounts of chopped cabbage. Repeat with zeroing the scale and measuring out the green onions, and then the carrots, and kimchi spices.
-
Remove the full bowl from the scale and set it aside. Place a small, empty bowl on your scale and tare/zero the scale. Weigh out 20 grams of salt.
-
Add the 20 grams of salt to the bowl with the cabbage, and mix with your hands until the cabbage becomes wet. If you are sensitive to pepper, you may want to wear gloves. Firm massaging will result in softer kimchi. If you want it crunchy, be gentle. If using Napa cabbage you will not need to massage for as long. But if using white common cabbage, ensure that you massage it long enough to release liquid and soften well.
-
Place the empty, clean mason jar on the scale, and tare/zero the scale. Make sure your scale is still set to grams, and add 200 grams of filtered water to your mason jar.
-
Pour the 200 grams of water into the bowl with the cabbage and salt. Mix everything well.
-
Starting with the liquid, add the entire contents of the bowl into your clean fermenting jar, and pack everything down using a tamper, wooden spoon, or your hand. Push down till the cabbage is completely submerged in the brine.
-
Over the next 12 hours, the cabbage should release more liquid, in case you don't seem to have enough brine.
-
Use the lid as a guide to cut out a shape in the reserved cabbage leaf. Press this down into the jar over everything. Use a weight, stone wrapped in plastic or a heavy shot glass to push everything down. You want to ensure that the cabbage stays submerged.
-
Secure the solid lid to the jar without twisting it too tight.
-
Ferment for 21-28 days, not forgetting to burp the jar daily during the bubbly phase.
-
Transfer the kimchi and brine to a clean jar(s) and store in the fridge.
-
See the blog post for more details, and troubleshooting.
Recipe Notes
Scale terminology: Taring/zeroing the scale with a container on it, subtracts the weight of the container, allowing you to weigh only what is added to the container. After taring/zeroing the scale, the scale should read 0.0 with the container on it.
Thank you to Cultured Guru for the Kimchi assistance.

Regarding the regular kraut recipe, within the directions you say add 100g sliced cabbage to 20g salt, but in the printed recipe below, it lists 1000g cabbage to 20g salt. Please let me know which it is??
Hi Pamela, thanks for catching that! Totally a typo in the body of the blog post. The actual recipe is correct, 1000 grams of cabbage to 20 grams of salt. I will adjust the blog post. Thank you, Love Jen
I have made sarhreaut for years cabbage and carrot,but adding garlic celery chilli,flavourings makes even better,