If you’ve been hanging out with me for any length of time now, you know my absolute affinity towards gingerbread. In all forms.
For the Love of Gingerbread
I have my Gingerbread Granola recipe, there’s the Alsatian Gingerbread recipe, soft and chewy Gingerbread Chocolate Cookies, German gingerbread Pfeffernüsse, even Pumpkin Gingerbread Loaf. I will spice whatever I can to turn it into gingerbread: see my Heady Spicy Honey Cake. Cookies, cakes, lattes, candles, perfume…it is the aroma or fragrance that puts me into the best nesting, cozy, special mood. The fragrance and flavour of Hygge, as far as I’m concerned.
So when I came across the Dutch Speculaas recipe in ‘Sweet’ by Yotam Ottolenghi and Helen Goh, you knew I would be trying it out. This is a Dutch spice shortcrust cookie. In German they are called Spekulatius. The spices are very similar to gingerbread, but the ginger isn’t the predominant flavour. Also white pepper and anise seed are included. This is what sets European gingerbread apart from North American. So I thought, why not combine this spice blend with a great soft Gingerbread cookie recipe that I use? I’m not as much a lover of shortcrust or drier cookies. I love one that is more chewy or tender. Just doing me. And these cookies stay tender, even after a couple of days. But will they really last that long?!
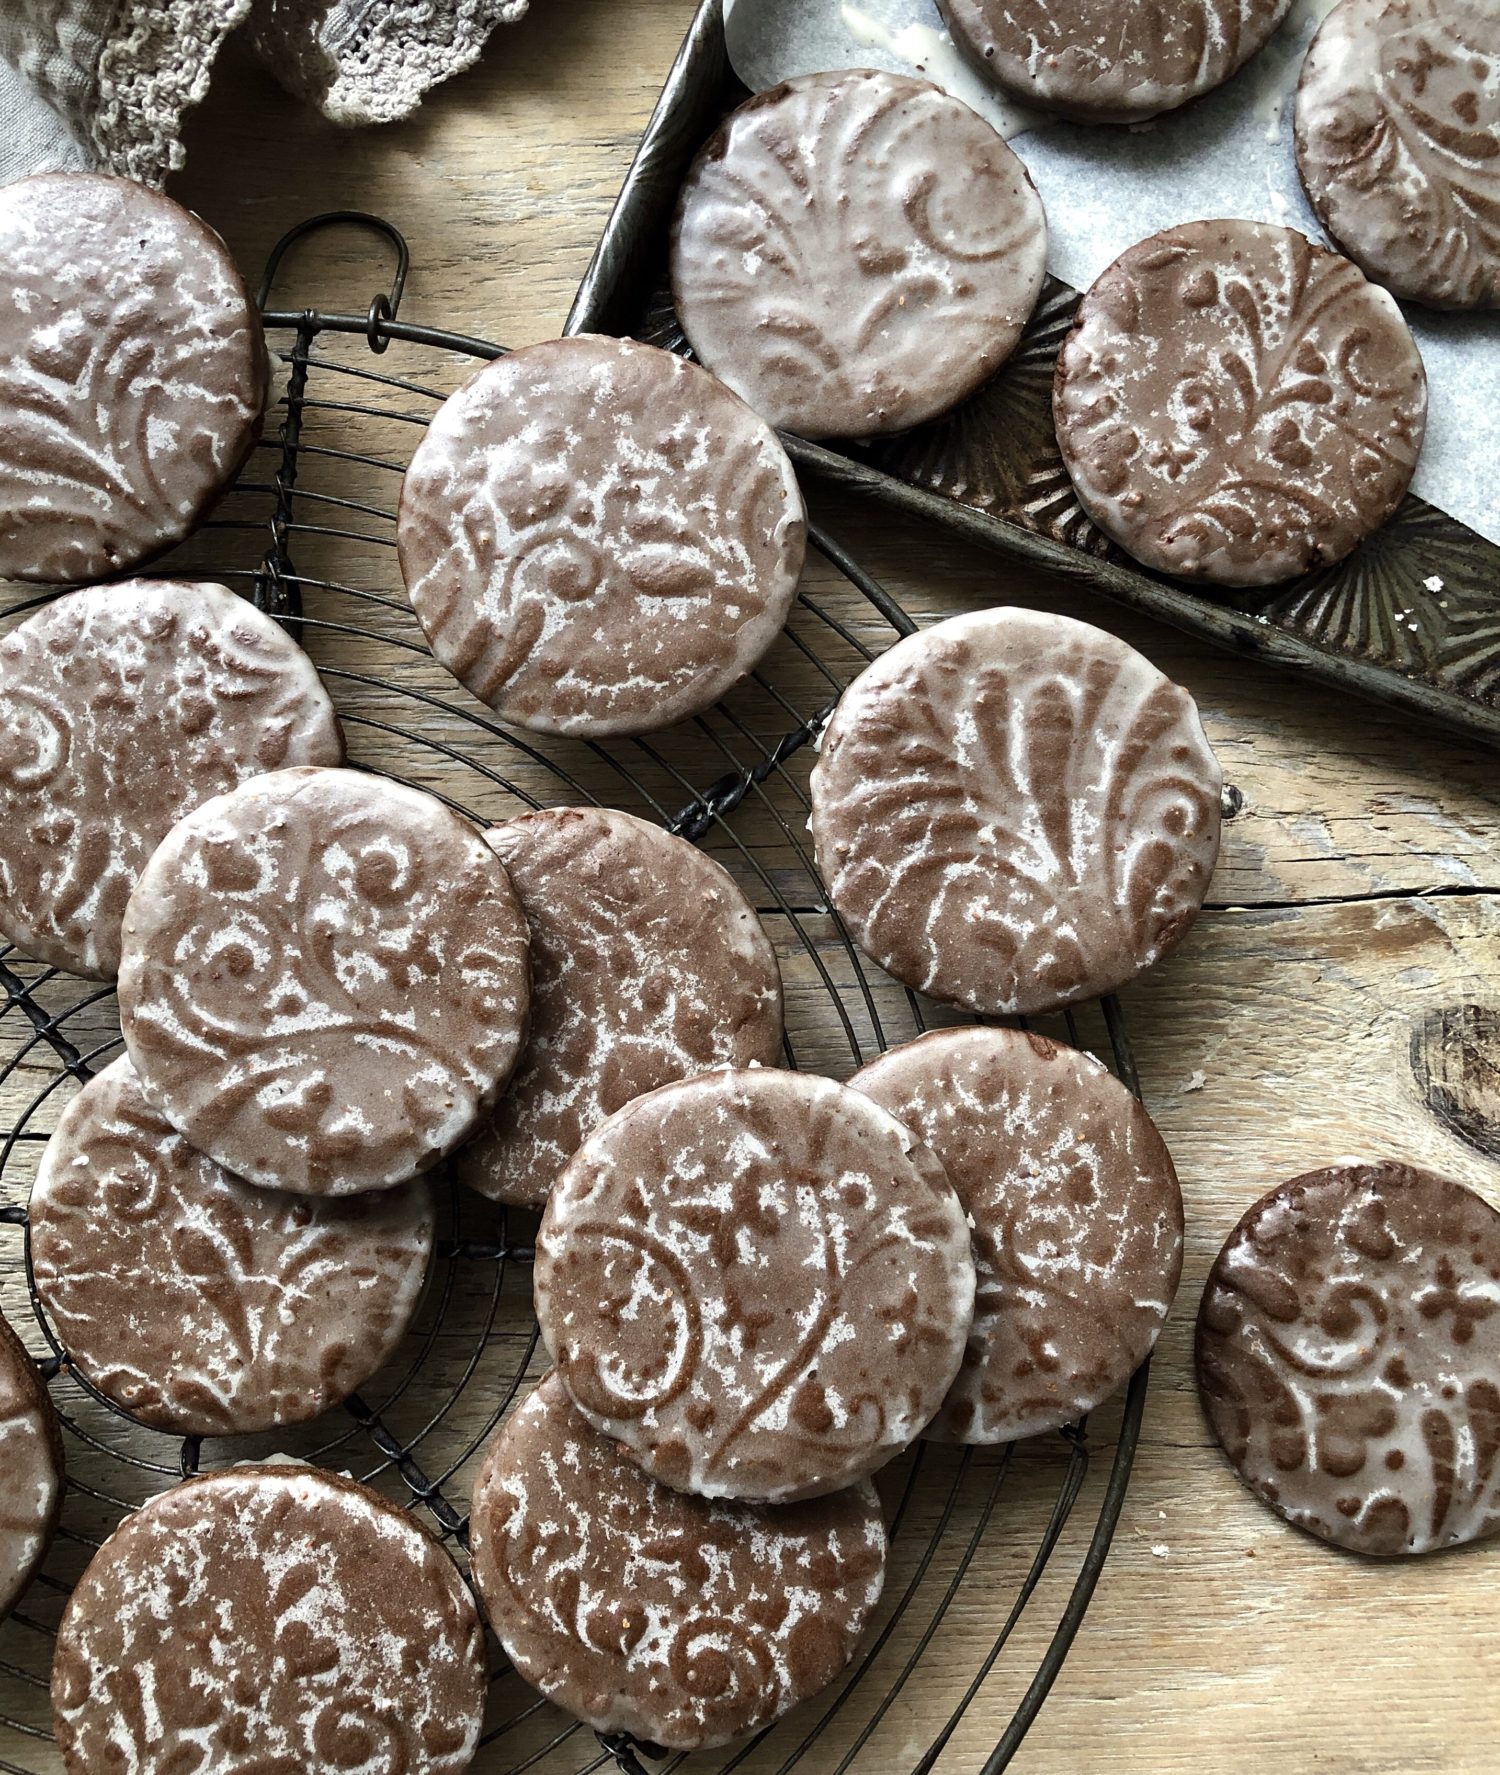
The other aspect of another gingerbread cookie recipe in Sweet that intrigued me was the rum glaze. Come on, it has melted butter and rum! But what makes the glaze such a key component to the recipe, is how the cookies are cut. In the book, they use a cookie stamp to create embossed patterns that the glaze can settle into. Once dry, not only are they delicious, but they are so pretty! So I had to try the glaze out as well.
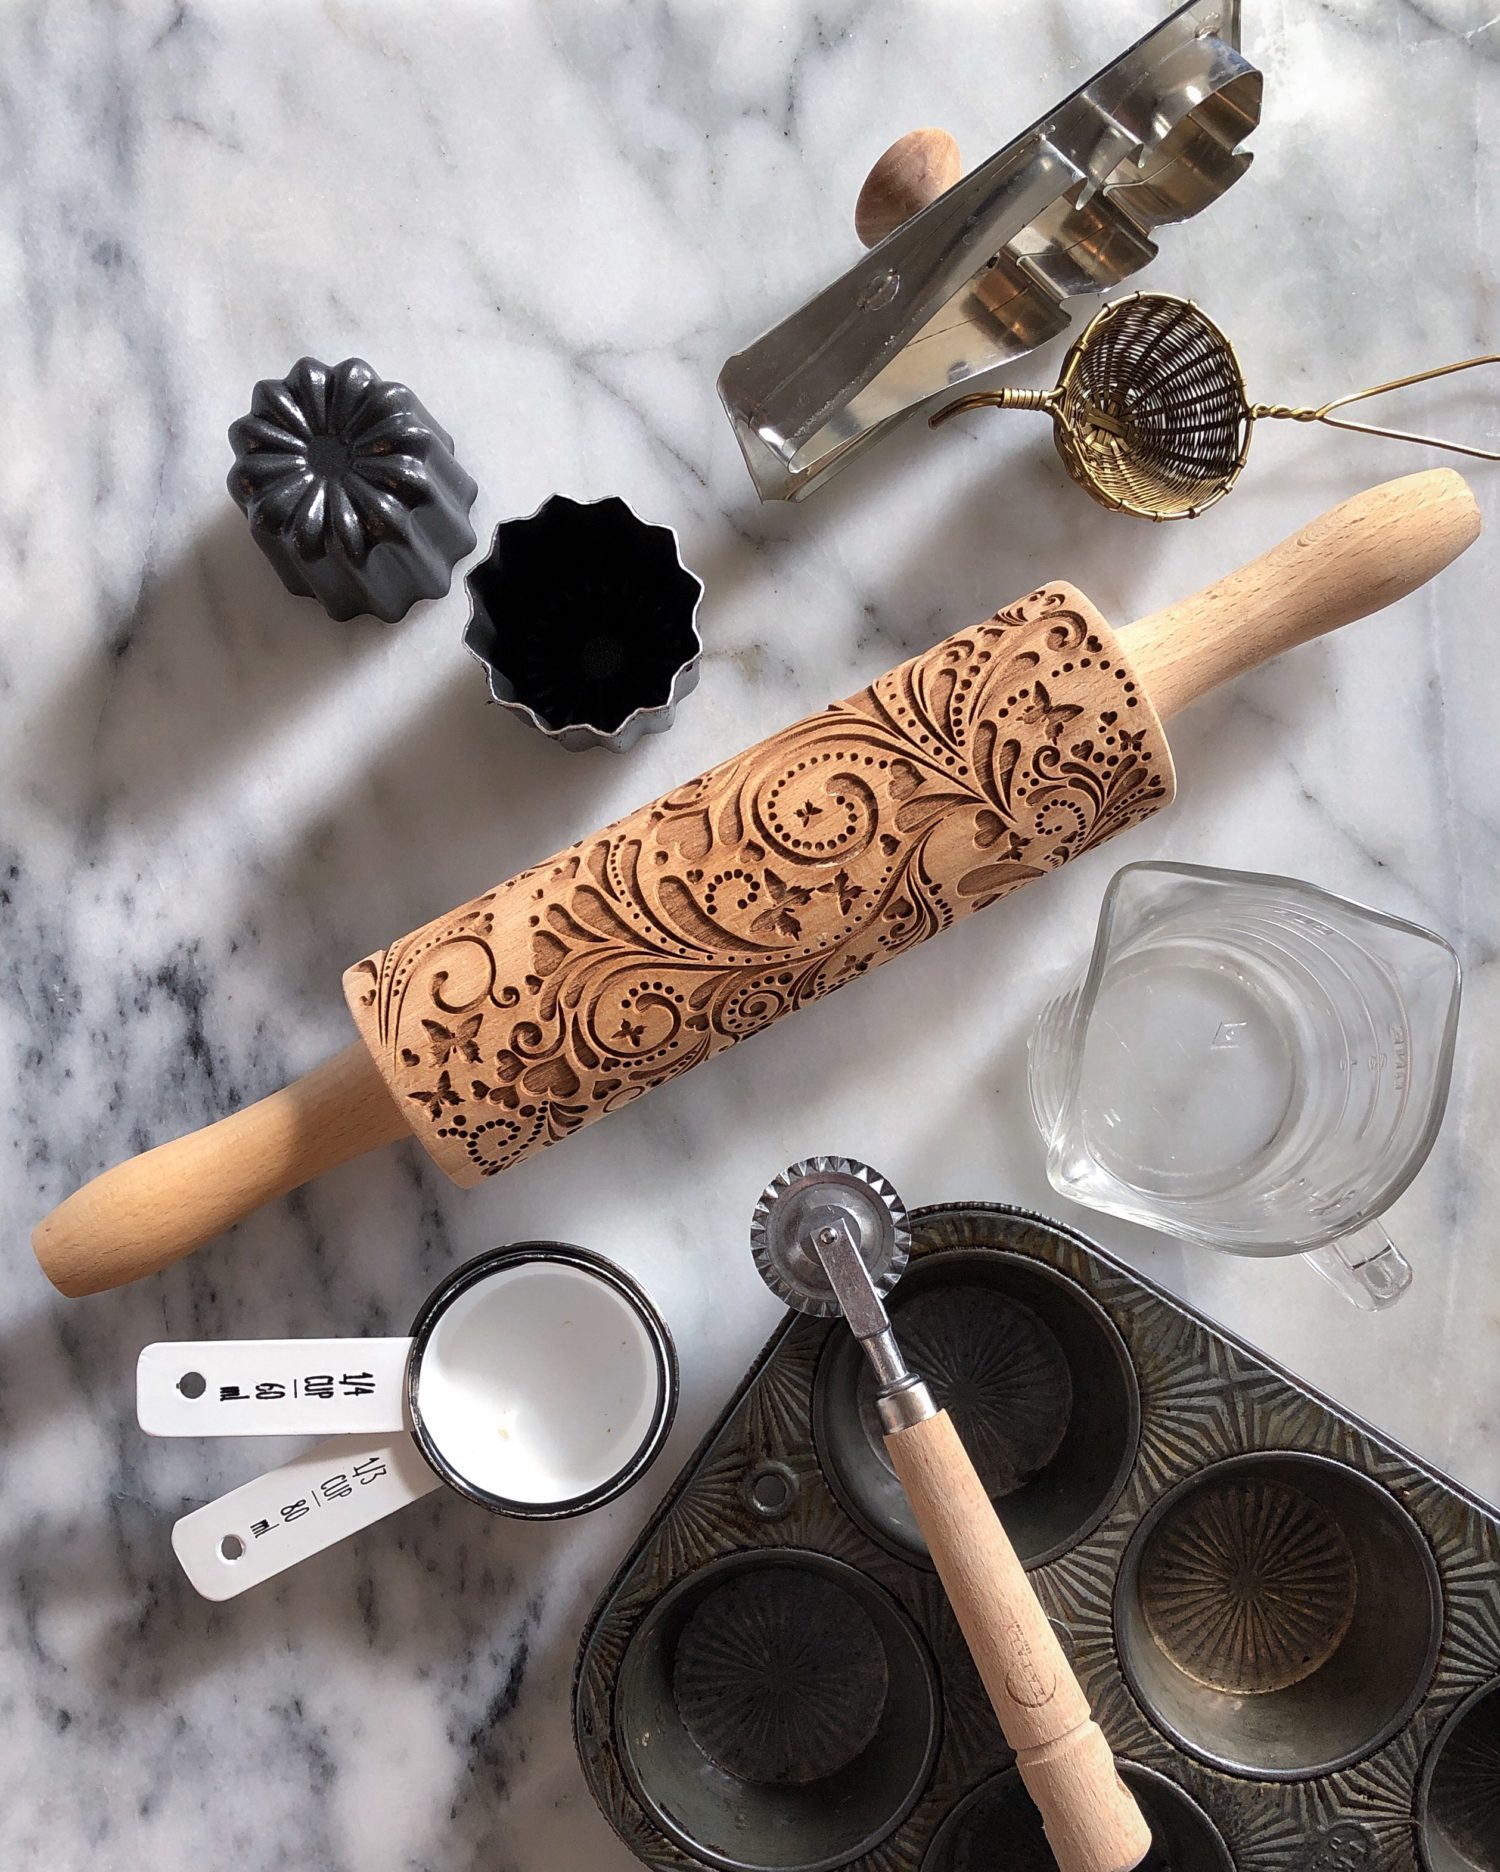
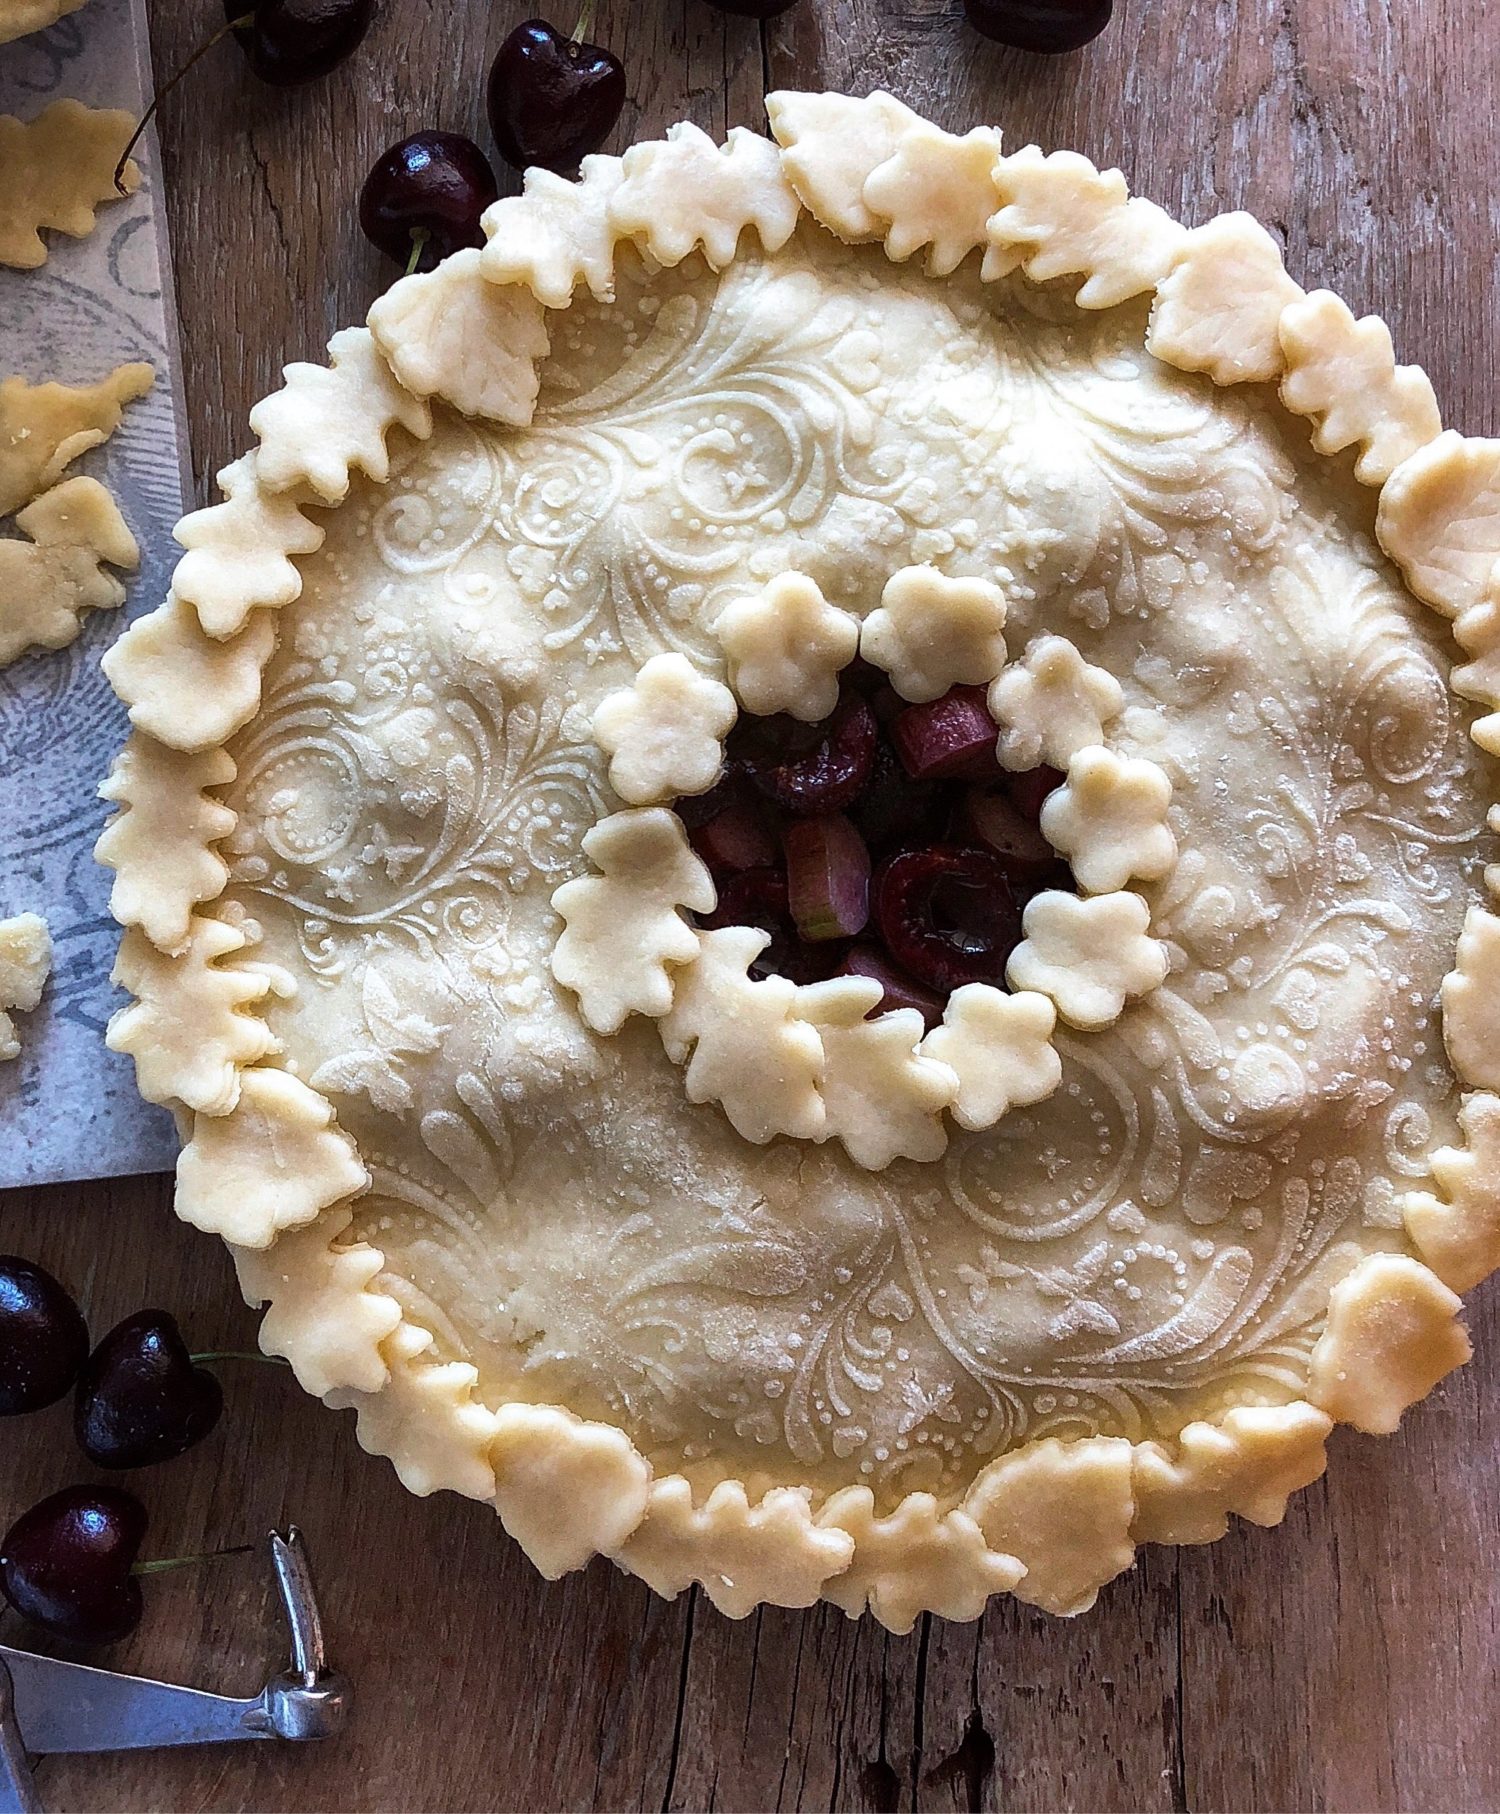
I guess I could use this recipe as an excuse to run out and purchase some cookie stamps. Nordicware has some lovely ones. Or check out Amazon. But I decided that instead of running out and spending some more money for kitchen gadgets, I would try and make use of ones I already have. Immediately I thought of the embossed rolling pin I had been using over the summer to create patterns on pie crusts. Surely this could work?
Tips for using the rolling pin with Pie Pastry
This is the one time you should have the butter and/or shortening incorporated into the pastry more evenly. Large chunks of butter will affect the pattern getting lost during the baking process. Roll the pastry thicker than you want the finished top to be, using a plain rolling pin. Then when you push down firmly with the pin, the pastry will flatten out a bit more and won’t be too thin and get stuck in the pin itself. Place the finished decorated pie in the freezer for at least 30 minutes. This will help set the pattern so that it won’t get lost in the heat of the oven.
The Embossed Rolling Pin
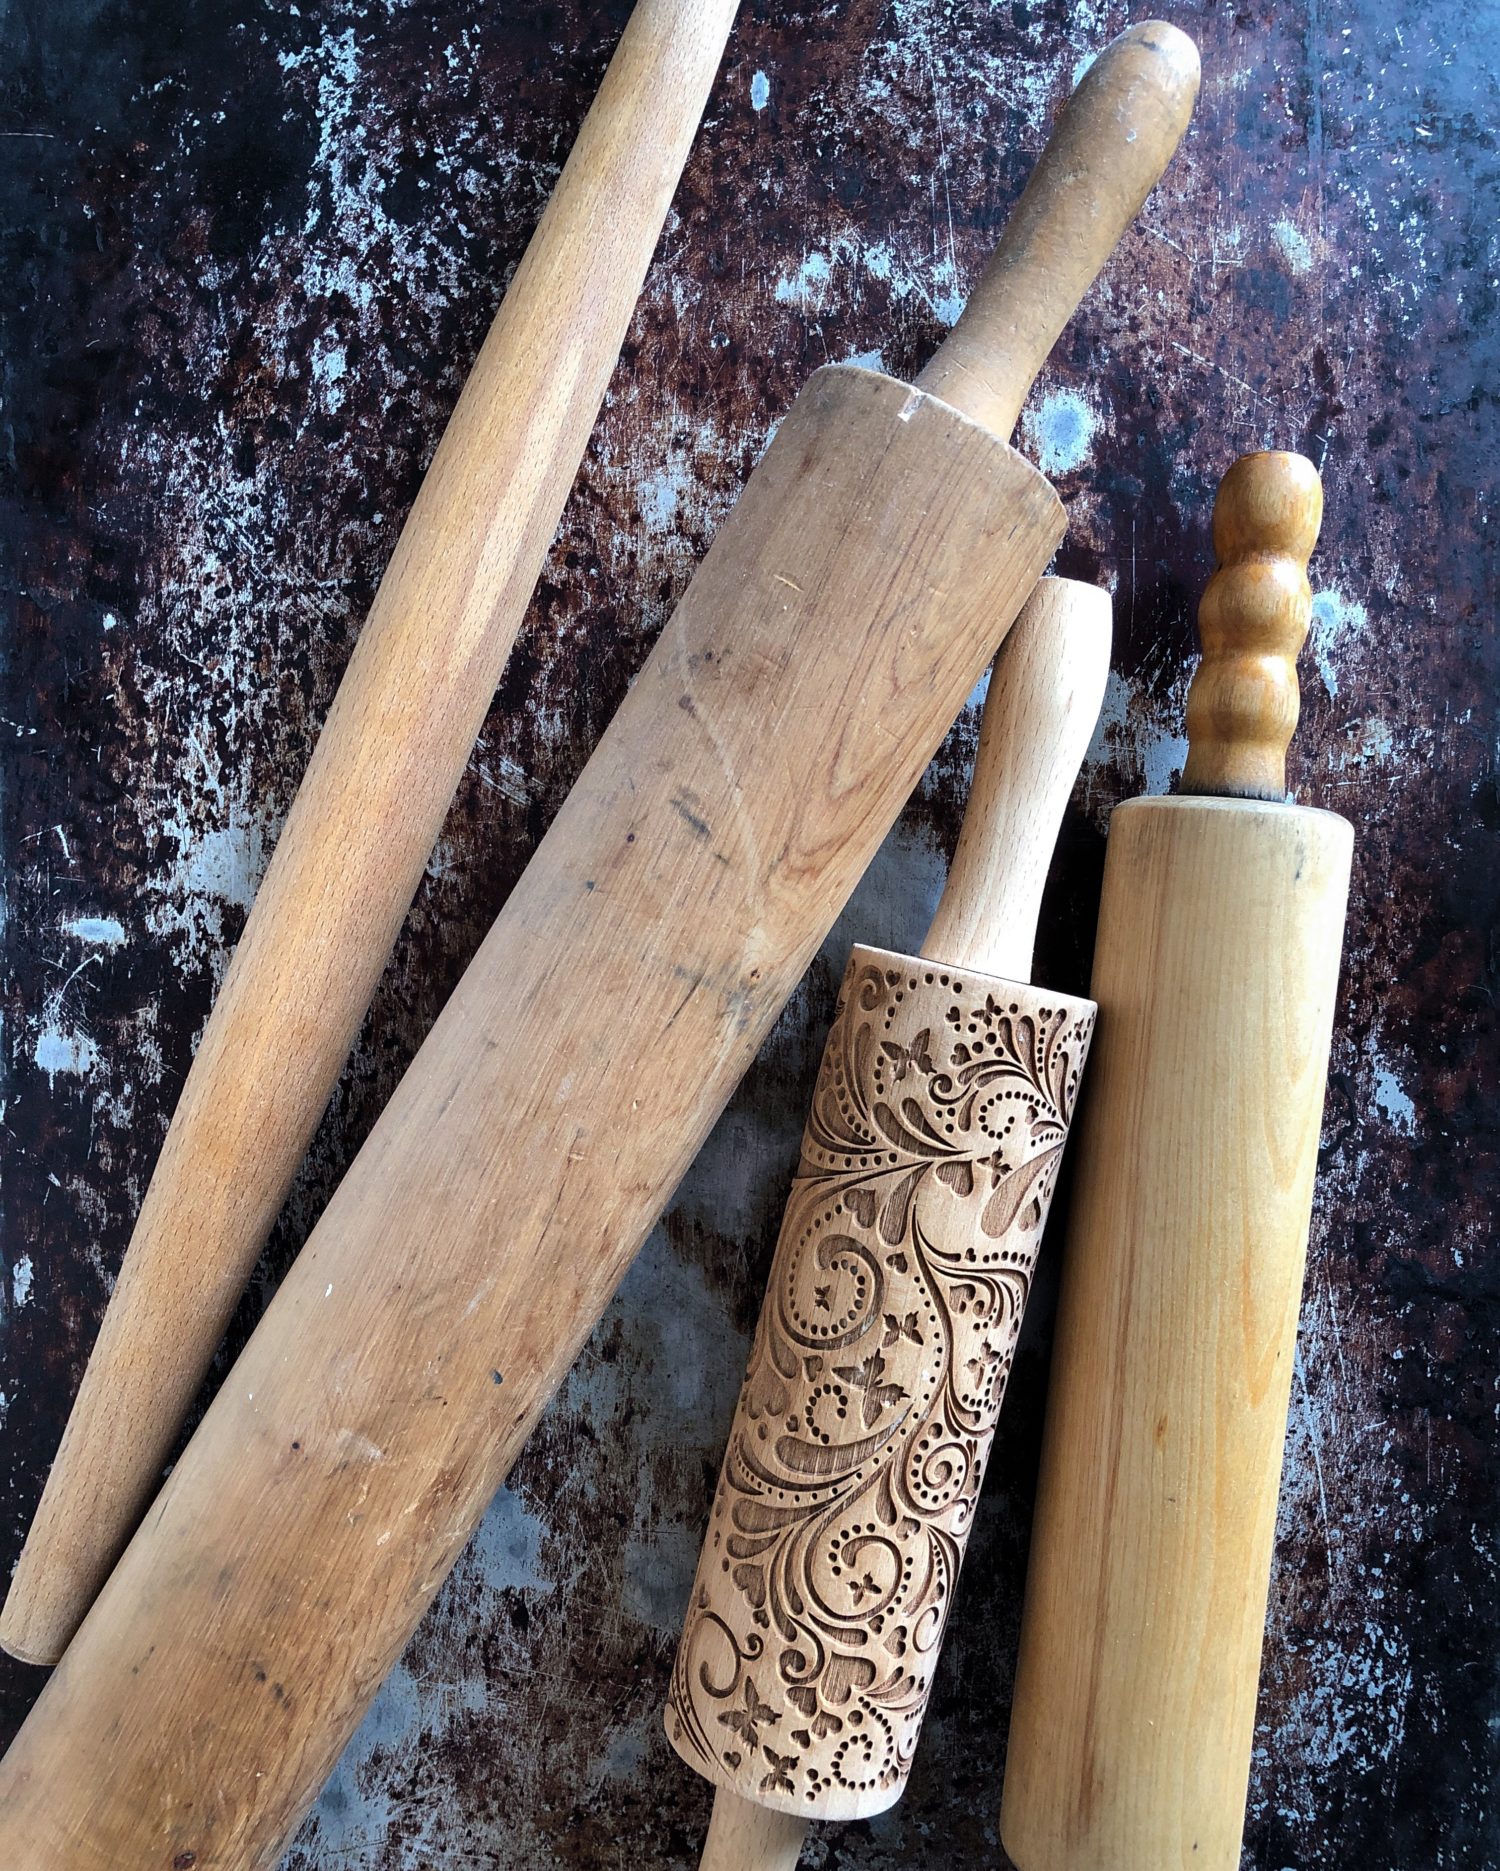
Speaking of rolling pins, isn’t there something so charming and old fashioned about such a rudimentary kitchen tool? It will forever remind me of grandmas in the kitchen, Downton Abbey, and all the other simple joys of being in the kitchen. I think part of the reason is that they are made out of wood. Such an organic material that takes on a wonderfully worn-in patina over the years. And each pin has a special use. Beveled edge French ones for the perfect pie crust. The simple cylinder for evenly rolled cookie dough etc. And the embossed one to make even patterns.
There are so many pins to choose from these days. Going to sites like Etsy will give you a great array of patterns to choose from. But of course, not all pins are created equal. I highly recommend reading the reviews before purchasing one. You can find patterns for every season. I chose one that lends itself for baking all year round, so that I don’t have more tools than necessary in the kitchen. I’m attaching a link to Lee Valley, as they now carry some lovely rolling pins to choose from.
To clean an embossed rolling pin, only use lukewarm water, hot will dry out the wood faster. Use a stiff brush to gently get into the nooks and crannies. A skewer will remove any final bits of dough from the tiniest grooves. Dry completely before storing.
Back to the Cookies
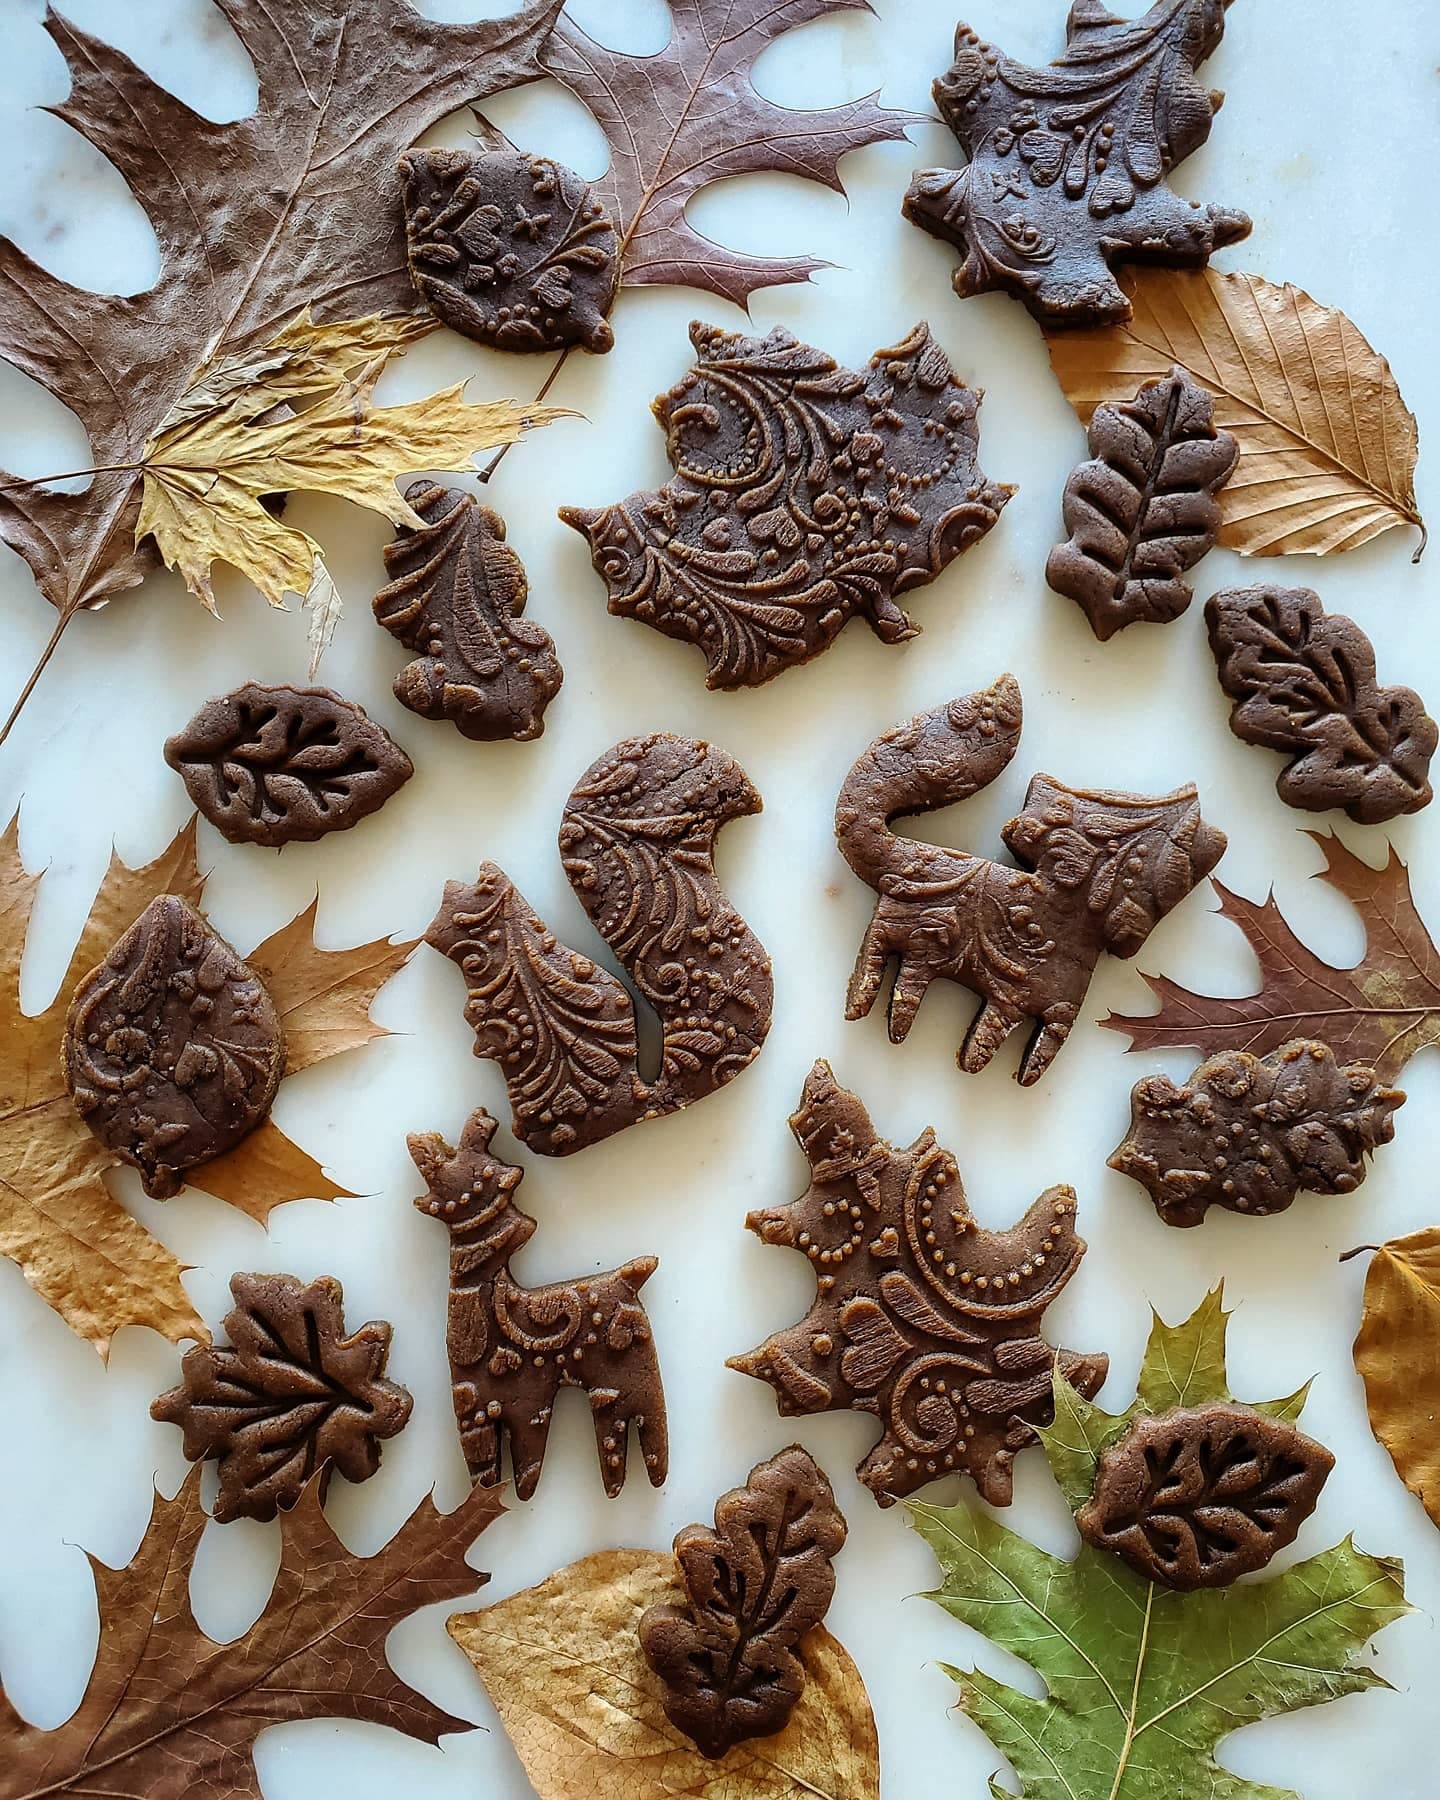
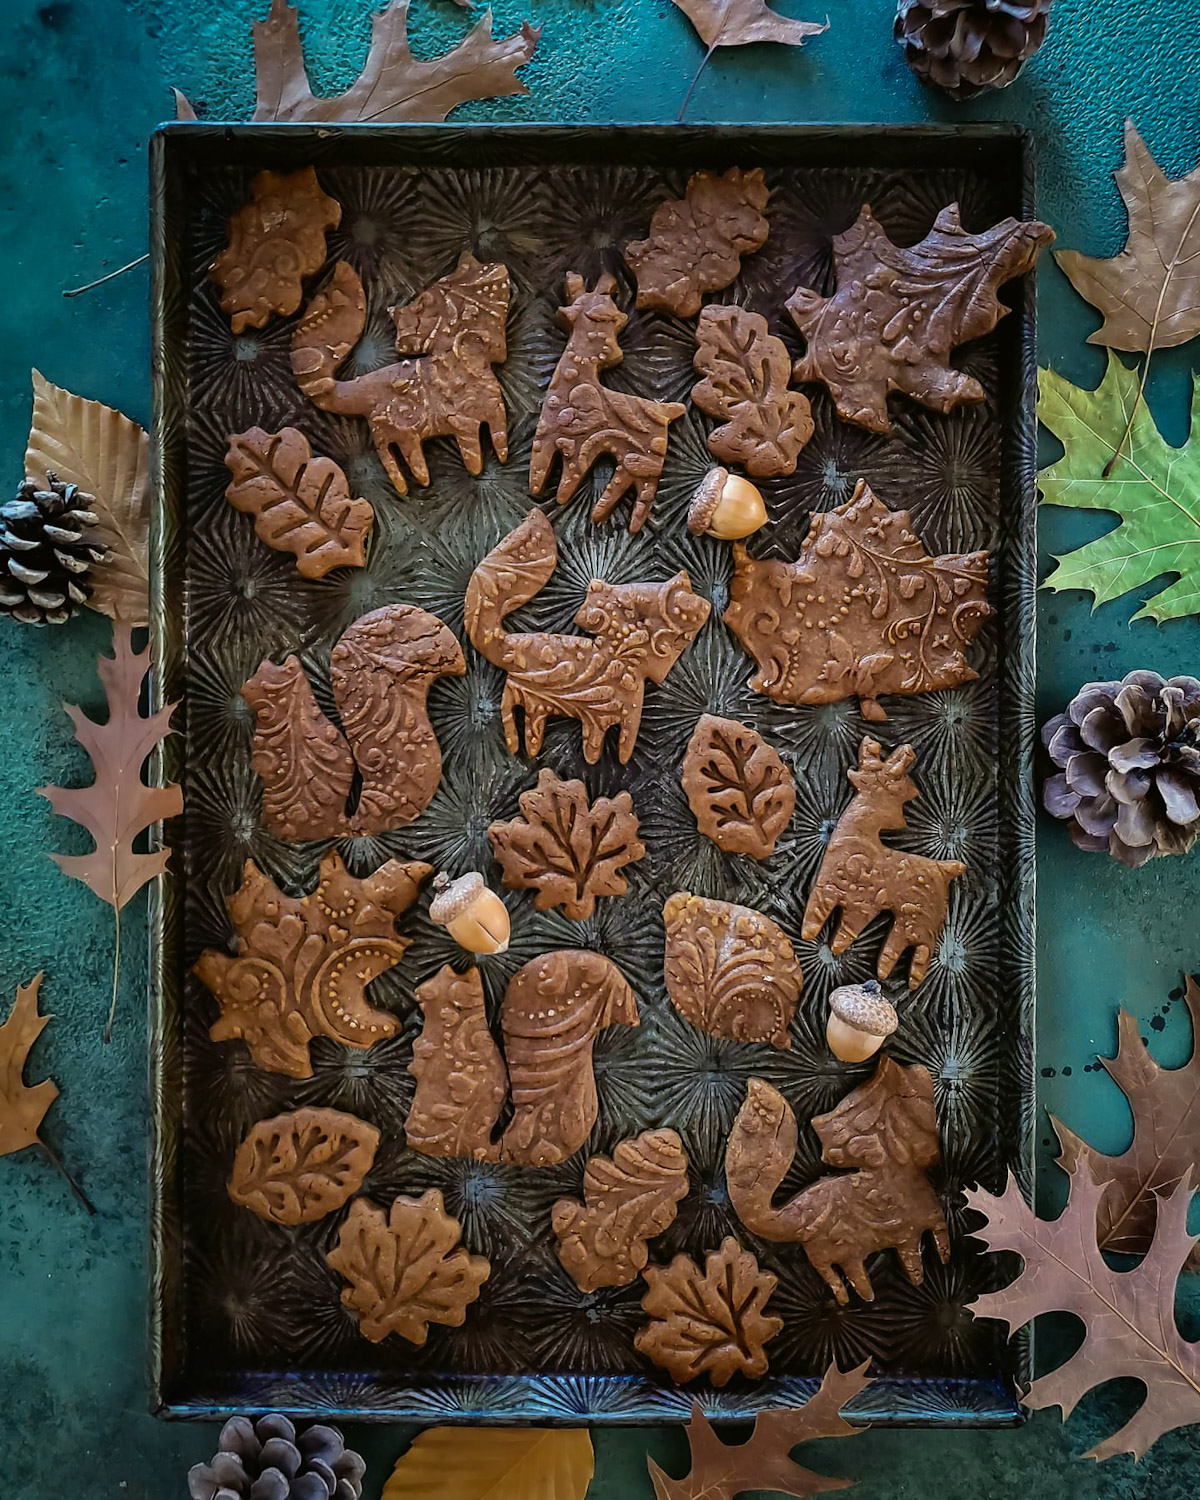
So I combined the spice blend from the Speculaas recipe into my Gingerbread Cookie recipe, and rolled out the dough. The dough can be rolled out, cut out, and rolled up for more, till used up. And if you don’t have an embossed rolling pin or stamp of any kind? Why not use some fun shapes or cookie cutters with patterns (see my leaf cutters on many of my pie crusts) These will work perfectly to accept some of the glaze of the other Sweet cookbook recipe, once baked up. And if all you have is a biscuit cutter or glass, that’s just fine. The glaze will just be a smooth addition to your final cookies!
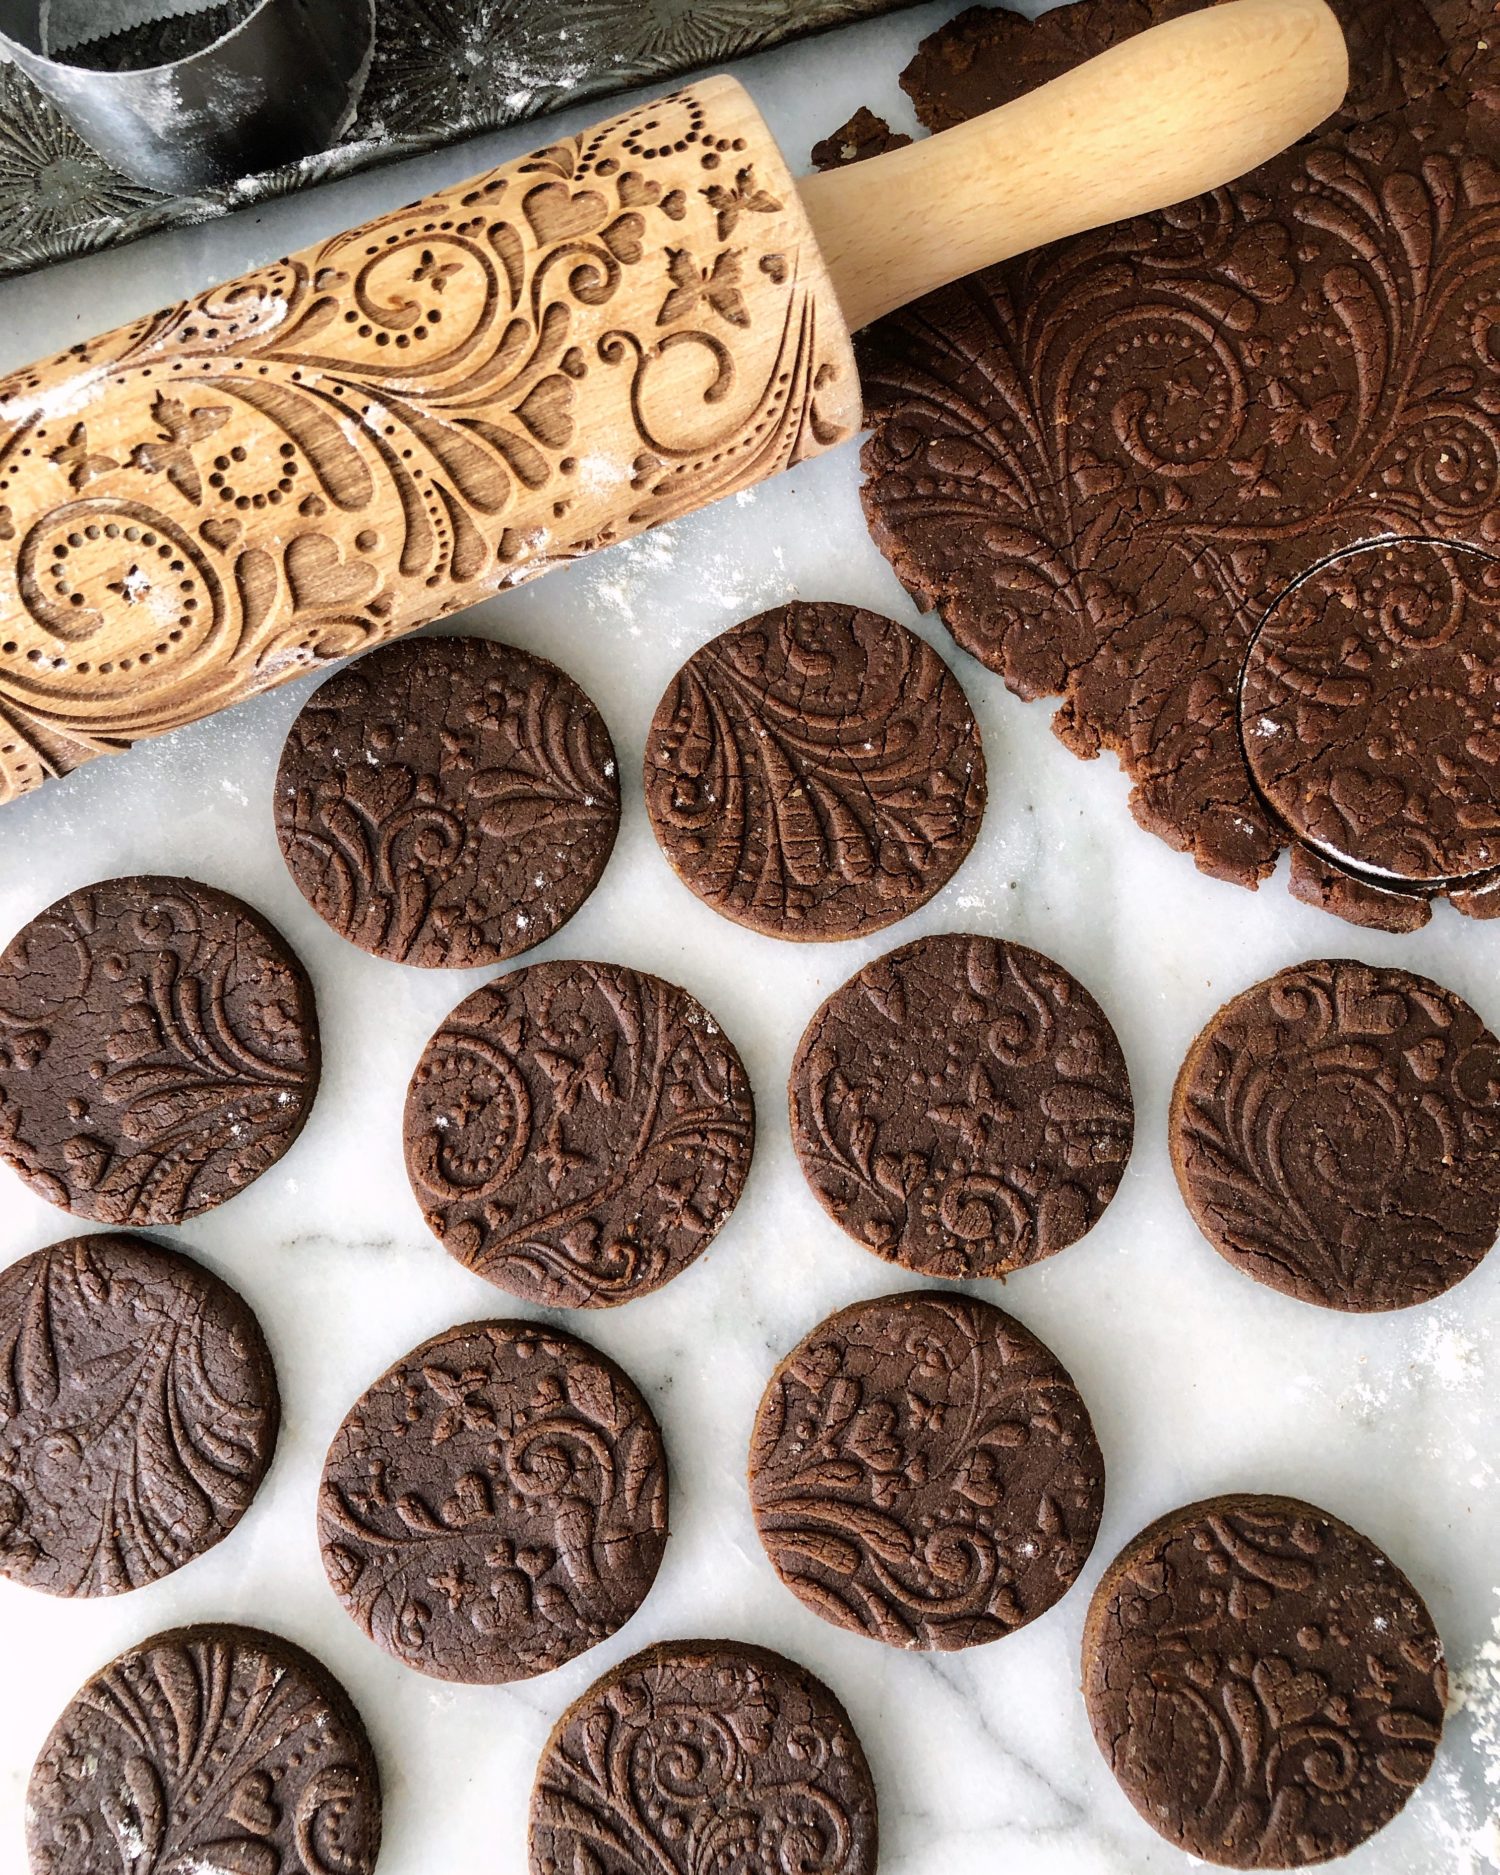
I laid out the embossed cookies onto parchment lined cookie sheets. They only took 12 minutes to bake up. They do puff up a little bit, so the more intricate the design of your embossed device, there is a chance that some of those details may disappear. See below for how to help avoid this. Yes, a cookie stamp is less patterned, so they will keep the pattern intact. Also, do push into the dough well when using any version of embosser- to make sure you have gone as deep as possible to create grooves that will still be there once baked up- it’s those grooves that the glaze will especially look amazing in!
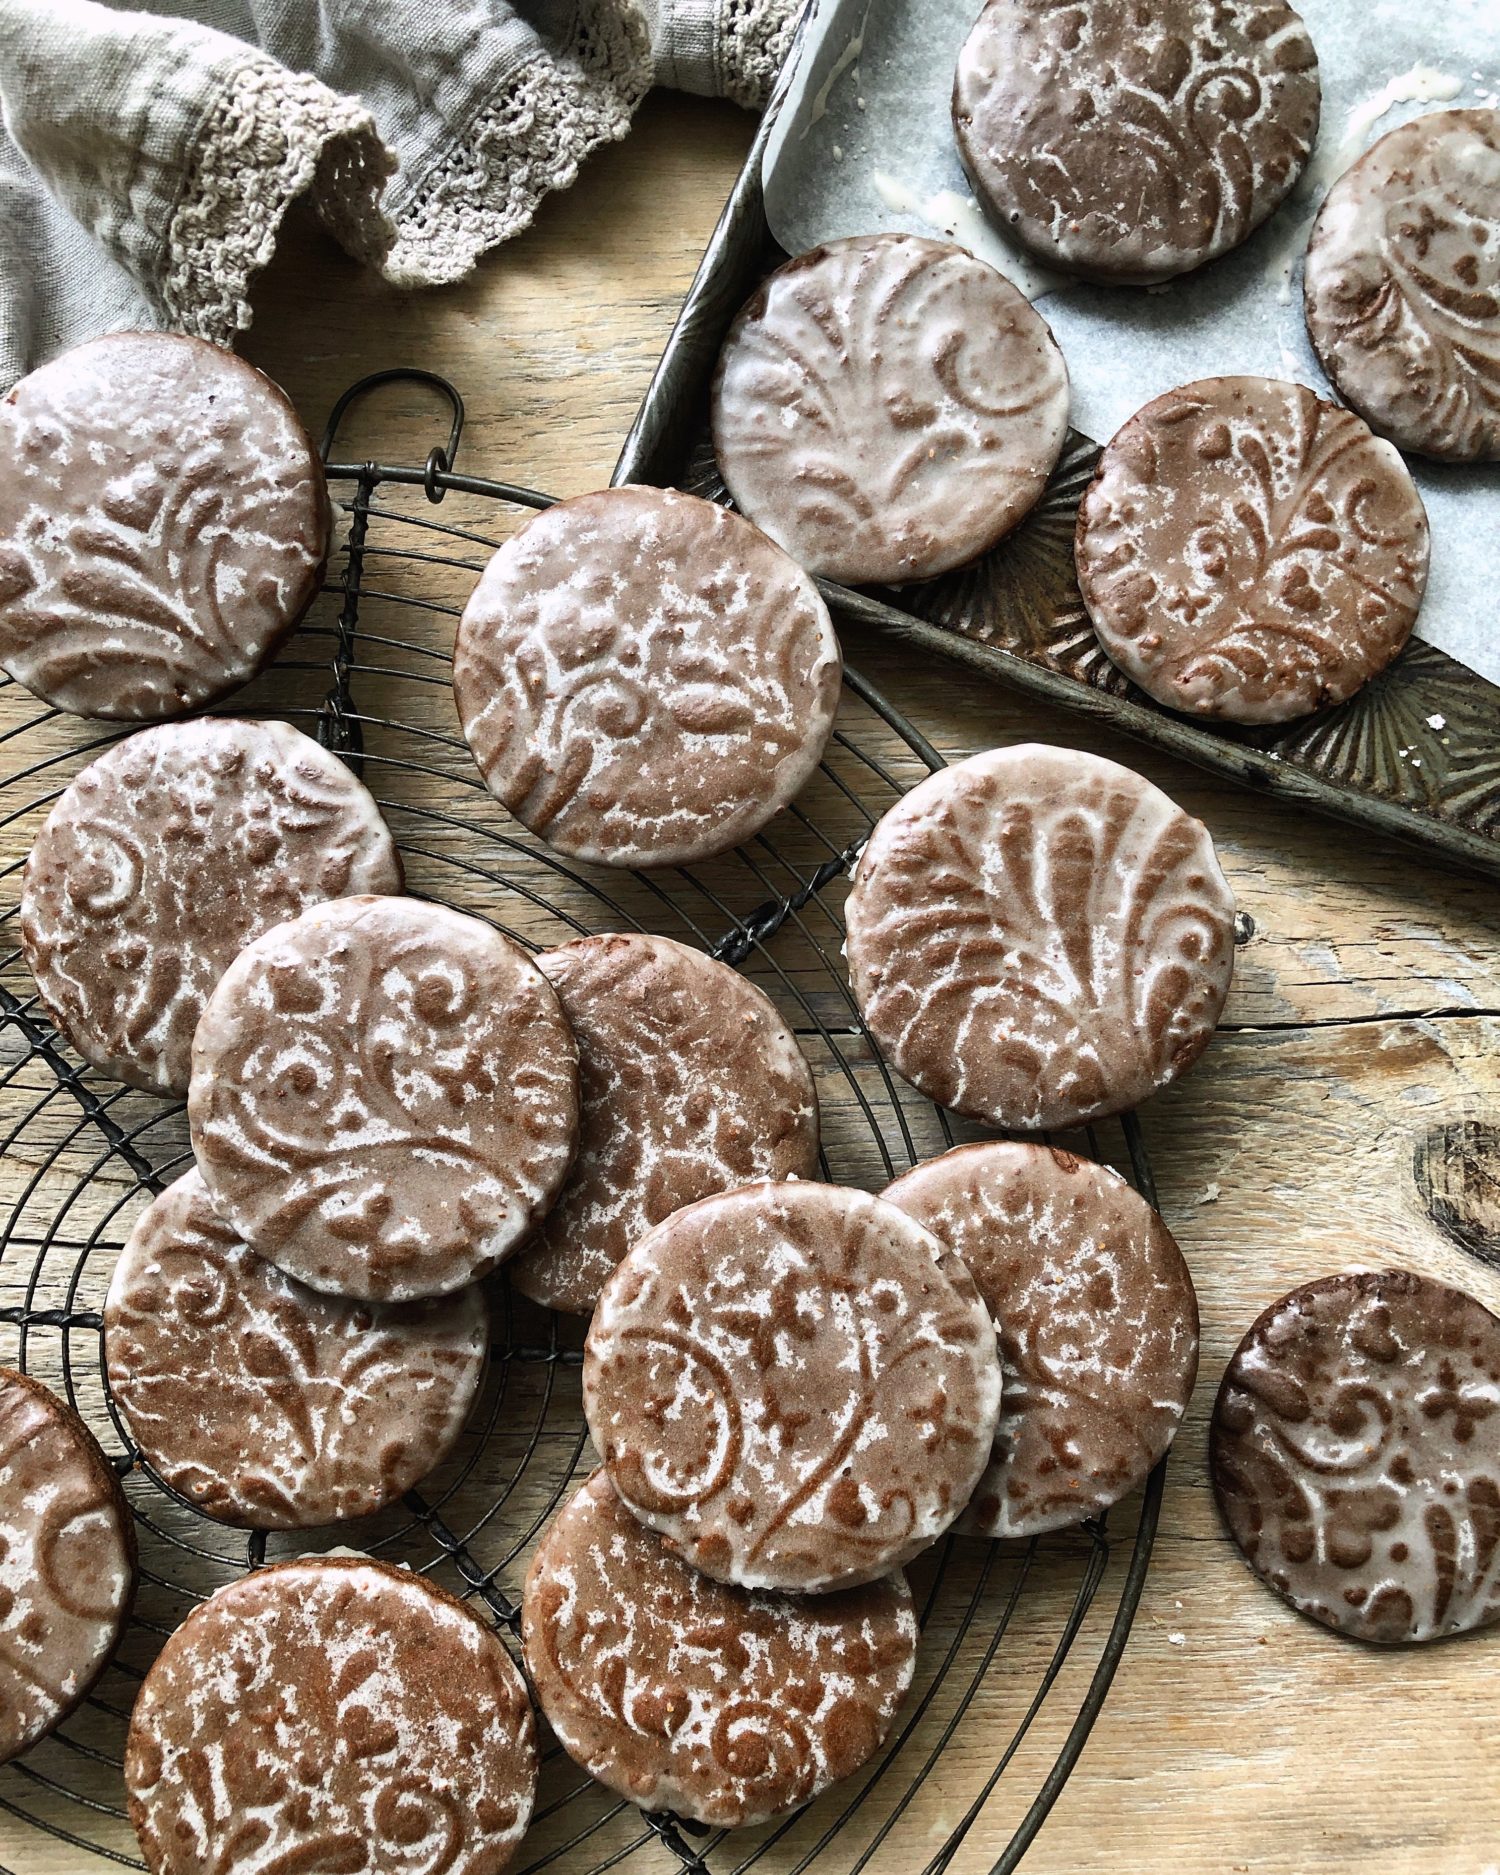
I made my first batch, and they were inhaled by friends in mere moments. I already need to make a second batch. And yes, I will be making these in April! Why should gingerbread be only a cold weather flavour!?
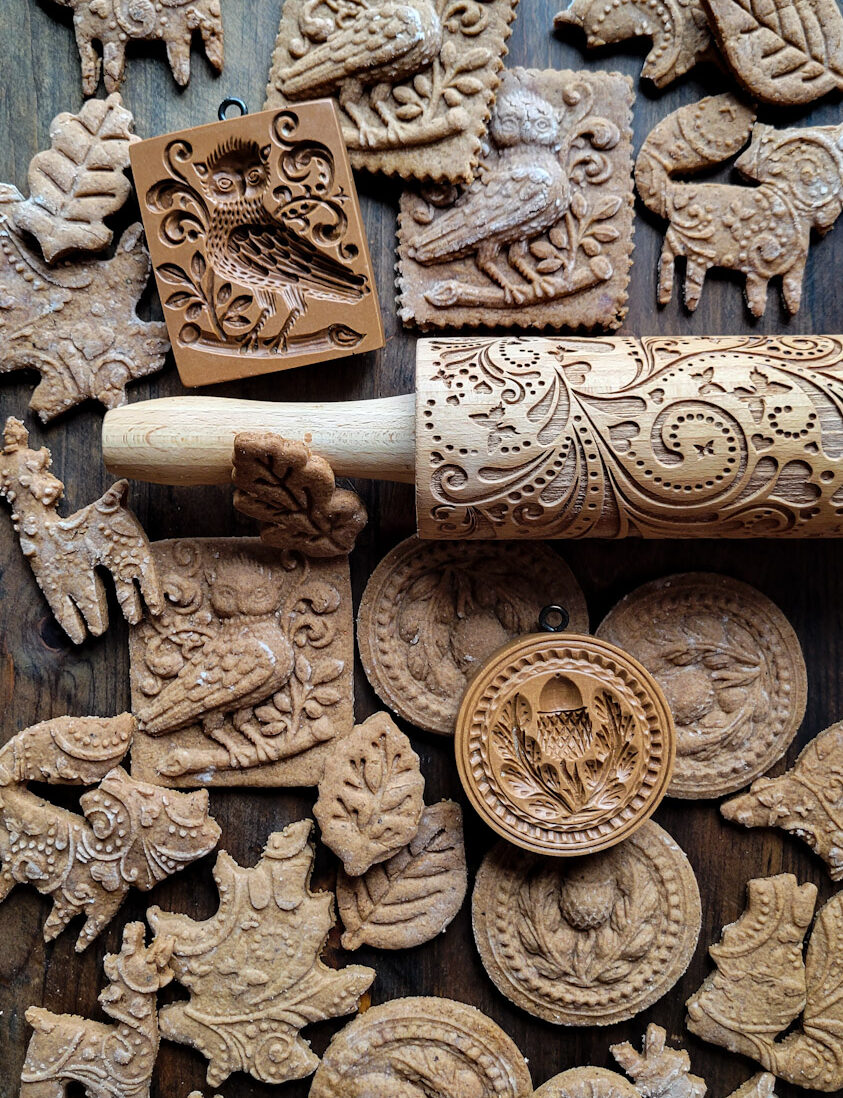
Tips for working with gingerbread cookie dough and an Embossed Rolling Pin or Springerle Molds
Make the dough, wrap it and let it rest in the fridge for a good 12-24 hours. When rolling it out, don’t roll out the entire piece of dough. Break it into smaller sections to work with. Roll it out to just over a 1/4 inch with a plain rolling pin.
Flour the embossed roller with a brush before each roll, brushing away any excess. Push down firmly on the pin as you roll. This will also help reduce the thickness to a lovely 1/6 of an inch or bit more for baking.
Have a wooden skewer handy to release any dough from on the pin or around any cookie press or cutter you may be using between uses. Always give them a quick clean and fresh flouring before using again.
Lately I’ve been playing with Springerle resin molds or presses, to make German spiced gingerbread cookies, which work perfectly with this dough as well. Follow all the same directions of flouring the mold each time, brushing away any excess with a brush. With Springerle molds the dough should be at least 1/4-1/2 inch thick depending on how deep the mold gets. Pushing down firmly and evenly is a necessity. Once you have stamped the dough, use a biscuit cutter that encircles the pattern and cut it out. Repeat with another chunk of dough. With square patterns use a knife or rick rack patterned wheel to trim away the excess dough. See the photo below for the results.
If you find that the pattern didn’t show up perfectly when you lifted the mold off of the dough, no worries, just re-roll the dough, a little thicker this time. Make sure the mold has been brushed well with flour into all the little nooks and crannies. Press down firmly and evenly, pushing until you think the deepest part of the mold has been filled. Lift up. It should look better!
A few have asked where my Springerle Molds come from. I purchase them from Springerle.com These molds are of high quality, made in Switzerland. They are not inexpensive. My tip if you do want to invest in these or in an embossed rolling pin: choose a motif or pattern that is year round, ones that aren’t occasion or season specific. Then you will have spent money on a pattern that you can use all throughout the year.
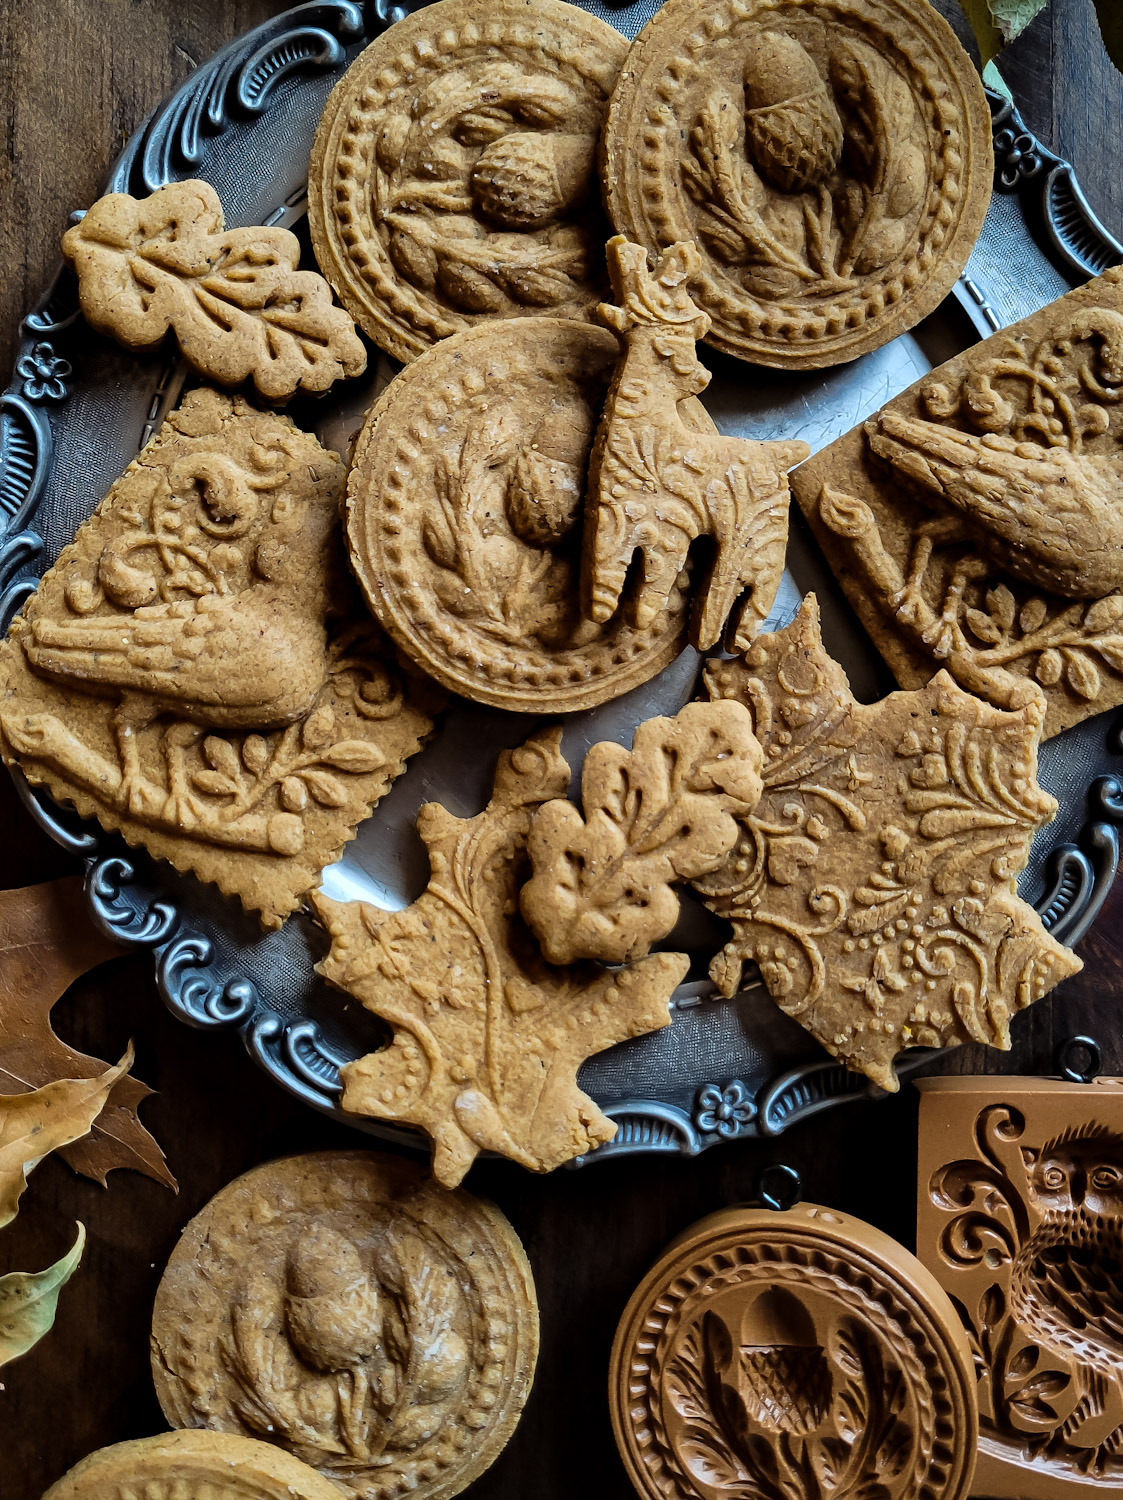
Once the cookies have been pressed and cut out, place them on a parchment lined sheet and let them rest for at least 12 hours, on the countertop. This will help the outside harden a bit, to help the pattern stay put during the baking time. If you are not covering the cookies with a pattern, you can bake them right away. You can also place the sheet with the cookies into the fridge to help firm up and dry out the dough. A couple of hours in the fridge is good.
And don’t feel obliged to use the rum glaze. Here are some cookies, before and after, without the glaze, and they are both whimsical and delicious! Feel free to omit the cocoa powder if you want classic looking gingerbread results.
If you make these Speculaas Soft Gingerbread Cookies, please be sure to leave a comment and/or give this recipe a rating! It’s always lovely to hear from you guys, and I always do my best to respond to each comment or question. And of course, if you do make this recipe, and you post it on Instagram, don’t forget to also tag me so I can see! Looking through the photos of recipes you all have made is such a treat.
Love Jen

Speculaas Soft Gingerbread Cookies with a Rum Butter Glaze
The best of European spices blend with a soft gingerbread cookie to make for a cozy treat. Sending them over the moon is a simple rum and butter glaze
Ingredients
Spice Blend
- 1 tsp ground ginger
- 3/4 tsp ground cinnamon
- 1/4 tsp ground cardamom
- 1/4 tsp anise seed , crushed (omit if you want a more North American flavoured gingerbread)
- 1/4 tsp ground white pepper
- 1/4 tsp black pepper
- 1/4 tsp kosher salt
- 1/4 tsp cloves
- 1/8 tsp nutmeg
Cookies
- 1 3/4 cups AP flour
- 1/4 cup sugar
- 1/4 tsp baking soda
- 1 tbsp cocoa powder, sifted, optional
- 1/4 cup vegetable oil
- 1/4 cup fancy molasses, unsulphured not blackstrap (too strong)
- 1/4 cup runny honey
Rum Butter Glaze
- 2/3 cup (80 grams)confectioners (icing) sugar
- 1/8 tsp ground cinnamon
- 1 tbsp (15 grams) unsalted butter, melted and warm
- 1 tbsp dark rum or lemon juice
- 1 tsp warm water
Instructions
-
Blend all the spices (ginger through cloves) together in a medium bowl. Add the flour, sugar and baking soda and whisk together. If you want a chocolate undertone, feel free to use the cocoa powder. This is not necessary though. I often omit it.
-
Measure the oil, molasses and honey in a measuring cup.
-
Now combine the flour mixture and the liquid mixture together either by hand or in a heavy standard mixer using the paddle attachment. Mix until the dough holds together, adding 1 or 2 tablespoons of water only if necessary to help bind the dough.
-
Turn the dough out onto the counter and knead it into a smoothish ball. If you find the dough too sticky, knead in small small amounts of flour until it is not sticky to the touch. Press it into a rough disk and place into a freezer bag. Let the dough rest for at least 1 hour or refrigerate overnight. I refrigerate overnight as it makes the dough easier to work with.
-
On a lightly floured surface, roll the dough with a plain rolling pin about 1/4 inch or a bit more thick, depending on the depth of your embossed rolling pin or cookie stamp. Using a pastry brush, flour the surface of your rolling pin or cookie stamp. Press firmly onto the flat surface of the dough and then lift the stamp straight up. Re-flour the rolling pin or stamp for every pressing. Roll slowly and deliberately. If you aren't embossing the dough, then aim for just around 1/6-1/4 inch thickness.
-
Using a biscuit or cookie cutter just larger than your stamp (if using a stamp) cut out the cookies, surrounding the stamped pattern. If using an embossed rolling pin, feel free to cut out cookies throughout the pattern.
-
Transfer the cookies to parchment lined baking sheets, leaving 1/2 inch (1 cm) space between each.
-
Re-roll the dough and continue till all used up.
-
Let cookies dry on the baking sheets for at least 12 hours. Up to 24 hours is good to help set the pattern so that it won't melt away during the baking. If you are cutting them out without a pressed in pattern, you can bake them right without waiting.
-
Pre-heat the oven to 300F. Bake for 12 minutes, rotating the sheets halfway through the baking time, until just firm to the touch. They will continue to firm up as they cool, so don't be tempted to cook them further.
Rum Butter Glaze
-
While the cookies are in the oven, create the glaze and have it ready- it works best brushed on while the cookies are still warm out of the oven. Having said this, I have also glazed cooled cookies, with fine results.
-
Sift the sugar and cinnamon in a small bowl.
-
Add the melted butter, rum and water and mix till smooth. The glaze will thicken slightly if it sits around, so stir in a little more water when needed. It should have the consistency of runny honey (but not too runny)
-
Remove the cookies from the oven, and leave them to cool for 5 minutes.
-
Then brush or dab the cookies with the glaze. Let it settle into the crevices.
-
Transfer to a wire rack to cool completely.
-
PLEASE See blog post for more details.
Recipe Notes
I have updated the recipe to be easier to work with. There are no longer eggs in the dough.
I state that this recipe makes 16. If you are using a larger stamp, you will get less. A minimum of 12 will be achieved for sure.
This recipe will totally work if you don't have a stamp or embossed rolling pin. You can use cookie cutters with a press in patter (like veins in a leaf) as long as the patterns aren't too small. Or you can even just use a round or fluted biscuit cutter. The glaze will simply spread out over the finished cookies, but they will still taste amazing!
You can totally use the spice blend on its own in other baking, or even in pancakes, etc!
White pepper and anise seed makes this flavour uniquely European. Don't feel obligated to use these spices in your spice blend. The anise may be strong for some. Try less to begin with if you are curious to see what effect it has on the overall flavour.

Jennifer! On IG I asked you about this recipe and you kindly shared it:)Thank you..just pulled some out of the oven.
Perfection.
I love how they kept their shape and imprint and… the glaze:)I used a speculaas spice my childhood Dutch girlfriend brought me from The Netherlands.
Merci!Keeper.
Just recently found you:)
Hi Monique! Oh, I’m so happy you had good success with the cookies- isn’t the texture and flavour wonderful! Yes, that glaze really makes them! So happy you ‘found’ me- I will try my best to keep you happy and well fed! Love Jen
🙂
Can the dough be frozen and if so how long do you think it will keep?
Hi Karen, I do know that you can make and store the dough in the fridge for a couple of days. I haven’t tried freezing it yet. But I can’t see why it couldn’t be frozen. But I wouldn’t freeze it for too long. This isn’t the kind of cookie dough where you can roll the cookies and then bake from frozen. Because you need to roll the dough out flat again and again till all the cookies are cut out, you don’t want to compromise the texture or integrity of the dough. I guess if one of us does it first, then we can let the other know!! 😉 Love Jen
Yes, That was my concern. So much easier when it’s a log! I will probably just leave the dough in the fridges for a few days, but if I try out freezing I will let you know!
Jen, love the cookies! I found that the dough was way too crumbly and had to go back to work in more butter. Have you had this issue?
Hi Loyce, I haven’t had the issue of the dough being so crumbly that it wouldn’t hold together. It is a drier dough. But if you had to go back and add more butter, I might think that it must be very dry where you are. Dry air can affect the flour being able to absorb liquids of any sort. So if you did have to add butter, and it worked in the end, then that might be what you’ll need to keep in mind for the next time. Hope this helps. Love Jen
Dough was waaaay to crumbly to roll! guess ill add some water, hoping this works….
Hi Rhonda. Sorry you had problems. I just followed Ottolenghi’s recipe as is. It definitely isn’t a soft dough. If you think a bit more butter will help, go with that instead. The temperature and humidity of your kitchen, even the size of the egg will all play a part in this dough. I did find it cracking at times, but it did hold together in the end. Love Jen
I added like 2 TB of water and that helped. Next batch I lowered the flour amount and that also helped.
thanks for following up
Hi Rhonda, yay! As long as the dough maintains its shape after embossing or pressing, without being too soft, you’re good to go! Enjoy! Love Jen
Hi Jen – This recipe looks wonderful! Can you please share where you got your embossed rolling pin? Love the pattern!
Thank you!
Hi Mary, Thanks so much for your comment. Sorry for the delay in responding. We’ve been overseas, and I’ve been away from the computer. You can find all sorts of sites on Etsy and Amazon that carry the rolling pins. Just look for a pattern that you like. Also, do read the reviews regarding delivery etc in making your choice. I purchased mine from a company based in Lithuania or the Ukraine. Or maybe Poland!! Hope that helps. Love Jen
Hi! I made the recipe and they are AMAZING! Thank you so much! However, they are not soft. They are crispy. And they didn’t rise much. On my instructions for my embossed rolling pin it said I should put the cookies in the fridge for 10-15 min before baking so the design stayed firm; could that be the reason? Or can I add more baking powder? Thanks! Laura
Hi Laura, Thanks for your feedback. Sorry for the delay in replying. We’ve been overseas and I’m just seeing my computer for the first time in weeks! Sure, you could add some more baking powder if you want a bit more rise. They really don’t rise alot tho. Also, yes, firming them up in the fridge may assist in keeping the pattern, but it may affect the texture. I don’t bother with firming them up. Try them again without the fridge and see if that makes a difference in the texture for you. Love Jen
Is the anise seed supposed to be ground or whole?
Hi Anneke, Thanks for your comment. Sorry for the delay in replying, we’ve been overseas and I’ve been away from the computer. Yes, I would gently crush the seeds with a mortar and pestle before adding them to the rest of the spices. Or you could use a small coffee grinder etc. I have adjusted the recipe to show this. I appreciate the feedback. Love Jen
I just finished making these cookies and love the flavor! However, my embossing was uneven and sometimes indistinguishable. What could I be doing wrong? Wondering if you may have any tips? I love my new embossed rolling pin from Lee Valley, so I will definitely try another batch tonight! Can’t wait to try the glaze when they’ve cooled!
Hi Heidi, I’m so happy you love the flavour! So do I! If you are finding that the embossing ends up being somewhat uneven, you may try using the dough in smaller batches to roll out. This way you won’t have to much dough to roll over to get to the other end. Hope this helps. Love Jen
Thank you for your feedback on the embossing issue! I made another batch just before Christmas and rolled them out in smaller amounts and the turned out perfectly!! Very happy to have found this recipe, a keeper for sure.
Hi Heidi, So happy to hear! I’m sure everyone was thrilled with the outcome as well! Here’s to much more baking in 2020! Love Jen
I chose this recipe to bake for a cookie exchange because I love Ginger and had all of the ingredients as well as the rolling pin. Like others my dough was too crumbly. I added an additional yolk thinking that perhaps mine weren’t as large enough. That did the trick. I would have preferred a stronger Ginger taste . I added more ginger after tasting the batter but it was still not enough. If I made these again I would definitely increase the ginger and decrease or eliminate the Cocoa which tended to overpower the ginger.
Thanks for your feedback Wendy. I’m sorry that a few of you have found it crumbly. Again, it could even be affected by the lack of humidity in the kitchen. I used Ottolenghi’s recipe as is with no issues. But maybe the next time I make them I might find them dry as well. I’m glad the addition of one more egg yolk did the trick for you. Will keep that in mind. I guess the amount of ginger is a personal taste thing. I hope in the end you’ll find the perfect ratio. Love Jen
I just made a triple batch of these and wow! These are fantastic. I got 80 cookies out of the tripled recipe with a 2” round cookie cutter. Perfect for bringing to a friends’ house tonight and party tomorrow even if I grab one every time I walk by them.
My dough was pretty crumbly, but I was able to press it together pretty easily. I found it easiest to work in smaller batches and flatten my dough by hand most of the way before using my rolling pin to even it out and make sure it was smooth on top before going over it with the embossed rolling pin.
Hi Aimee, Oh I’m so happy! Yes, it is good to have those few extra for the ‘cook’ to enjoy before sharing! The dough is a pretty dry dough. But I did exactly the same thing- smaller batches was perfect. Here’s to more baking in 2020! Love Jen
I bought two Christmas designed embossed rolling pins two years ago with no idea on how to use them. They just looked so pretty I couldn’t resist! I was thinking about giving them away, when the thought occurred to me to check online for recipes using this type of rolling pin. That is when I found your website! Even though Christmas is now past, I want to try out your cookie recipe to see if it will work for me. If so, then I will keep the embossed rolling pins. My question is: Are there any adjustments needed to this recipe for high altitude? If so, what would they be? We are over 6,000 ft in altitude. I have had to adjust cookie recipes in the past, on an trial and error basis. Sometimes it can be wasteful in time and product and I would like to avoid that if possible. Thank you so much for your help.
Hi Marilyn, Thanks for visiting. I wish I could give you first hand knowledge to help you out. If you go to King Arthur Flour’s website, there is a section for high altitude baking. It may help. I will say, this dough does have a rather dry consistency. It is not my recipe, it comes from Yotam Ottolenghi’s book, Sweet. However, even though it was dry, I had no problems working with it in small portions with my rolling pin. In the end they always hold up. I also use the rolling pin on my pie crust if that makes keeping the pins more appealing. Love Jen
As someone who grew up in Germany with Spekalutius around Christmas (but never with a rum butter glaze) I’m looking forward to create them, who knows, maybe even before that time of year – Thank you for sharing it!!
…btw where did you get that beautiful embossed rolling pin?
– Markus
Hi Markus, My apologies for not responding sooner. I hope you like this fun twist. Just an added layer of flavour! I love these almost as much as my pfeffernusse cookies! I got the rolling pin on Amazon. You can search Amazon or Etsy by ‘Embossed Rolling Pins’ for all sorts of patterns. Hope this helps, Love Jen
Hi Jen. Am I missing something? Mentioned in the comments are the ingredients of butter and/or egg. Neither of these ingredients is mentioned in your recipe. If I am overlooking them in your recipe, how much butter and how many and what size egg(s)?
Thank you.
Leslie
Hi Leslie, You’re not missing anything! I updated the recipe to make it easier to work with. The eggs and butter make the dough a bit more challenging to work with, especially if trying to achieve the embossed pattern. So I adjusted the recipe following an old Springerli recipe which is also an embossed cookie recipe from Germany. This dough is much easier to handle. Have fun! Love Jen
I’m reading the comments and people said they added ‘one more egg yolk’ but the recipe does not say any egg yolks…?
I will be baking my cookies shortly. The embossing seems to be disappearing, but I hope they are tasty!
Hi Tracey, the reference to eggs is from when I added eggs to the batter. I have since adjusted the batter to be more stable, without the need for eggs. Not having the eggs will allow them to sit out for the length of time needed to dry out a bit before baking. I hope that they turned out for you. You really need to press hard with the pin, and let them dry out before baking to set the pattern. But I’m sure you found them tasty in the end, if you closed your eyes! All the best, Love Jen
Hello Jen! I can’t wait to try this recipe. Your cookies are stunning. I am curious if you weigh your flour, and if so, how many grams to a cup? I usually get about 120 grams per cup. I use King Arthur all-purpose flour, which is a bit higher in protein than some other all-purpose flours. Will this work well for this recipe? Finally, I’d love to use my embossed rolling pin for pie crust as well, but I’m afraid the design will vanish during the bake. Can you direct me to the recipe you use? Many thanks! – Angela
Hi Angela, It’s hard to say how many grams per cup, since each type of flour weighs differently. Usually between 110-120 grams though is typical. The higher protein may make these a bit tougher, but it may also help them hold shape, so give it a go, and let me know!! If you follow the directions to dry out the dough before rolling, and then rolling firmly using small sections of dough at a time, and then allowing the cookies to dry out overnight, that is your best bet to have the pattern remain intact. You can see from the photos of the animal version that the pattern remains intact pretty well. You may lose a bit once the glaze is added, but that’s alright! Happy baking! Love Jen
This dough is easy to work with and the cookie is DELICIOUS. I love the pepper, but I left out the optional anise.. Instead of traditional cocoa powder, I used 1 t of black cocoa and I loved the color of the dough as a result. I thought the glazed cookies in the blog looked amazing, so I did a glaze, but sadly had to replace the rum with vanilla (I am happy to report it was delicious). I had no problems with my embossing roller. I will absolutely make these again.
Hi Lulu, thanks so much for your kind feedback! Yes, black cocoa would definitely add a bit of drama to the finished cookies!! I’m sure the vanilla was a perfect replacement for the rum. Enjoy! Love Jen
Where are these lovely forest animals and leaves cookie cutters from?
Hi Mad, The cutters come from various sources. The leaves can be found online at Sur La Table or Williams Sonoma. The little woodland animals were purchased online at the Meri Meri website. Hope this helps. Love Jen
Hi Jen! Can the finished cookies be frozen so they can be made in advance? Thanks!
Hi Stephen, for sure, as long as you don’t glaze them. Having said this, these cookies will keep for a few weeks unglazed in a sealed container. Glaze and let them set, before wanting to serve or share. Hope this helps, Love Jen
I love this recipe! I live in a dry climate and found drying them for 7 hours was sufficient. I will be making these over and over. Thank you so much.
Hi Marti, so happy you found a way to make the recipe work for you! Enjoy, Love Jen
These gingerbread cookies were very delicious, reminiscent of Christmas markets in Austria, Germany and Switzerland. We loved the spiciness.
However, I followed recipe completely and I lost most details. I made the dough, refrigerated it overnight, stamped and cut cookies, dried them for 24 hours and still there is very little detail. Three days of work for 17 cookies.
Next year I will just use cookie cutters. Thank you for this very old-world taste.