I love pie. All kinds. Fruit, Custard, Mincemeat, Chess, Pot, Tortiere… But they all have one thing in common. The need for a crust. The elusive, mindblowingly frustrating crust. At least that’s how I always viewed it.
 I tried recipe after recipe, and yet my crust either required a chisel to get through, or didn’t even make it to the pie plate- it would fall apart and refused to piece back together. I thought there was something wrong with me, and that I was resigned to purchasing that pumpkin pie from the grocers.
But anyone who knows me, knows I’m nothing if not tenacious. Okay, the word most used by my family is butt stubborn. I’m like a dog with a bone. So, I was’t going to let the pie crust have power or victory over me. I realized it was really just a matter of making pie after pie, paying attention to what I was doing, the conditions of the day, etc, and monitoring the results. After a while a pattern developed. And I was thrilled to find out that it wasn’t just me. As I watched cooking shows, and listened to the experts lament the odd mishap with their own pie crusts, then I realized I was in good company. I mean, if they could have a crust tear, crumble while rolling out, then who was I to complain? Did you know the cracking at the edges happens when you let the rolling pin roll over past the dough? Stop just short. And turn.
The recipe that I’ve been using for about 15 years now has never let me down. Sure it has torn a couple of times. Sure I’ve had to do a quick patch job in the dish. But in the end it always bakes up flakey, tender and yummy. I’m sure there are other magnificent pie dough recipes out there. But I haven’t been inclined to try another. This is my go-to, it never lets me down. If I want it to be for a savoury pie, I omit the sugar and replace with salt and herbs. Even cheese can replace some of the butter.
Butter and Shortening
Yes, this pastry recipe uses both butter and shortening. While I have often used an all butter recipe, I find that there is actually more tenderness with the shortening addition. Butter means flakey, but shortening means tender. You really want both! Also, usually all butter recipes seem to warm up too quickly for me, giving me less time to work with them, if I am using cutouts or lattice etc. But if you would rather use all butter, you will be fine with making the adjustment, replacing the shortening with more butter in the recipe below.
Adding your own Spin
2 tbsp of cinnamon when adding the sugar gives you a great cinnamon sugar crust with the best hue;
1 tsp of crushed lavender buds added to the flour and sugar pulse is perfect for a blueberry pie; 1
tbsp (or more) of either cocoa or matcha powder (food grade) added with the flour will add a lovely colour punch to the dough.
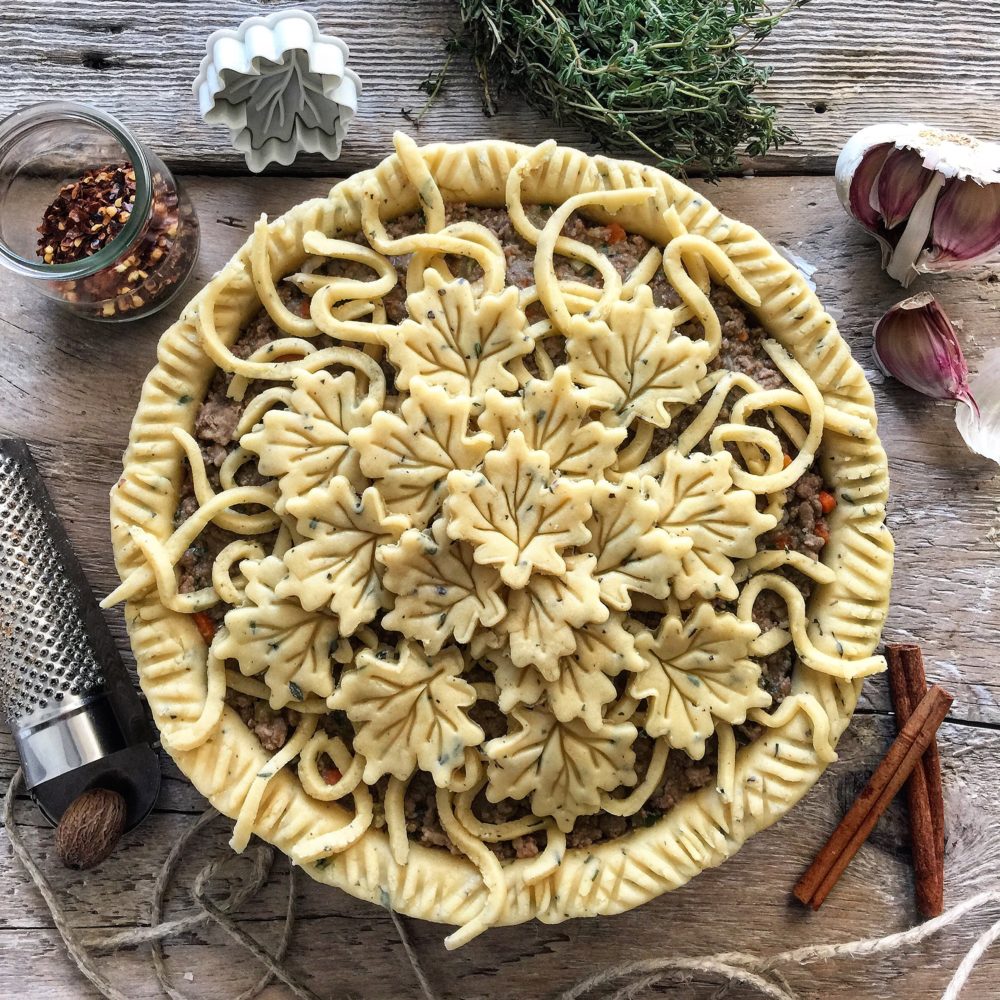
And of course herbs of all sorts (except maybe dried rosemary) are perfect for savoury and even sweet pies!
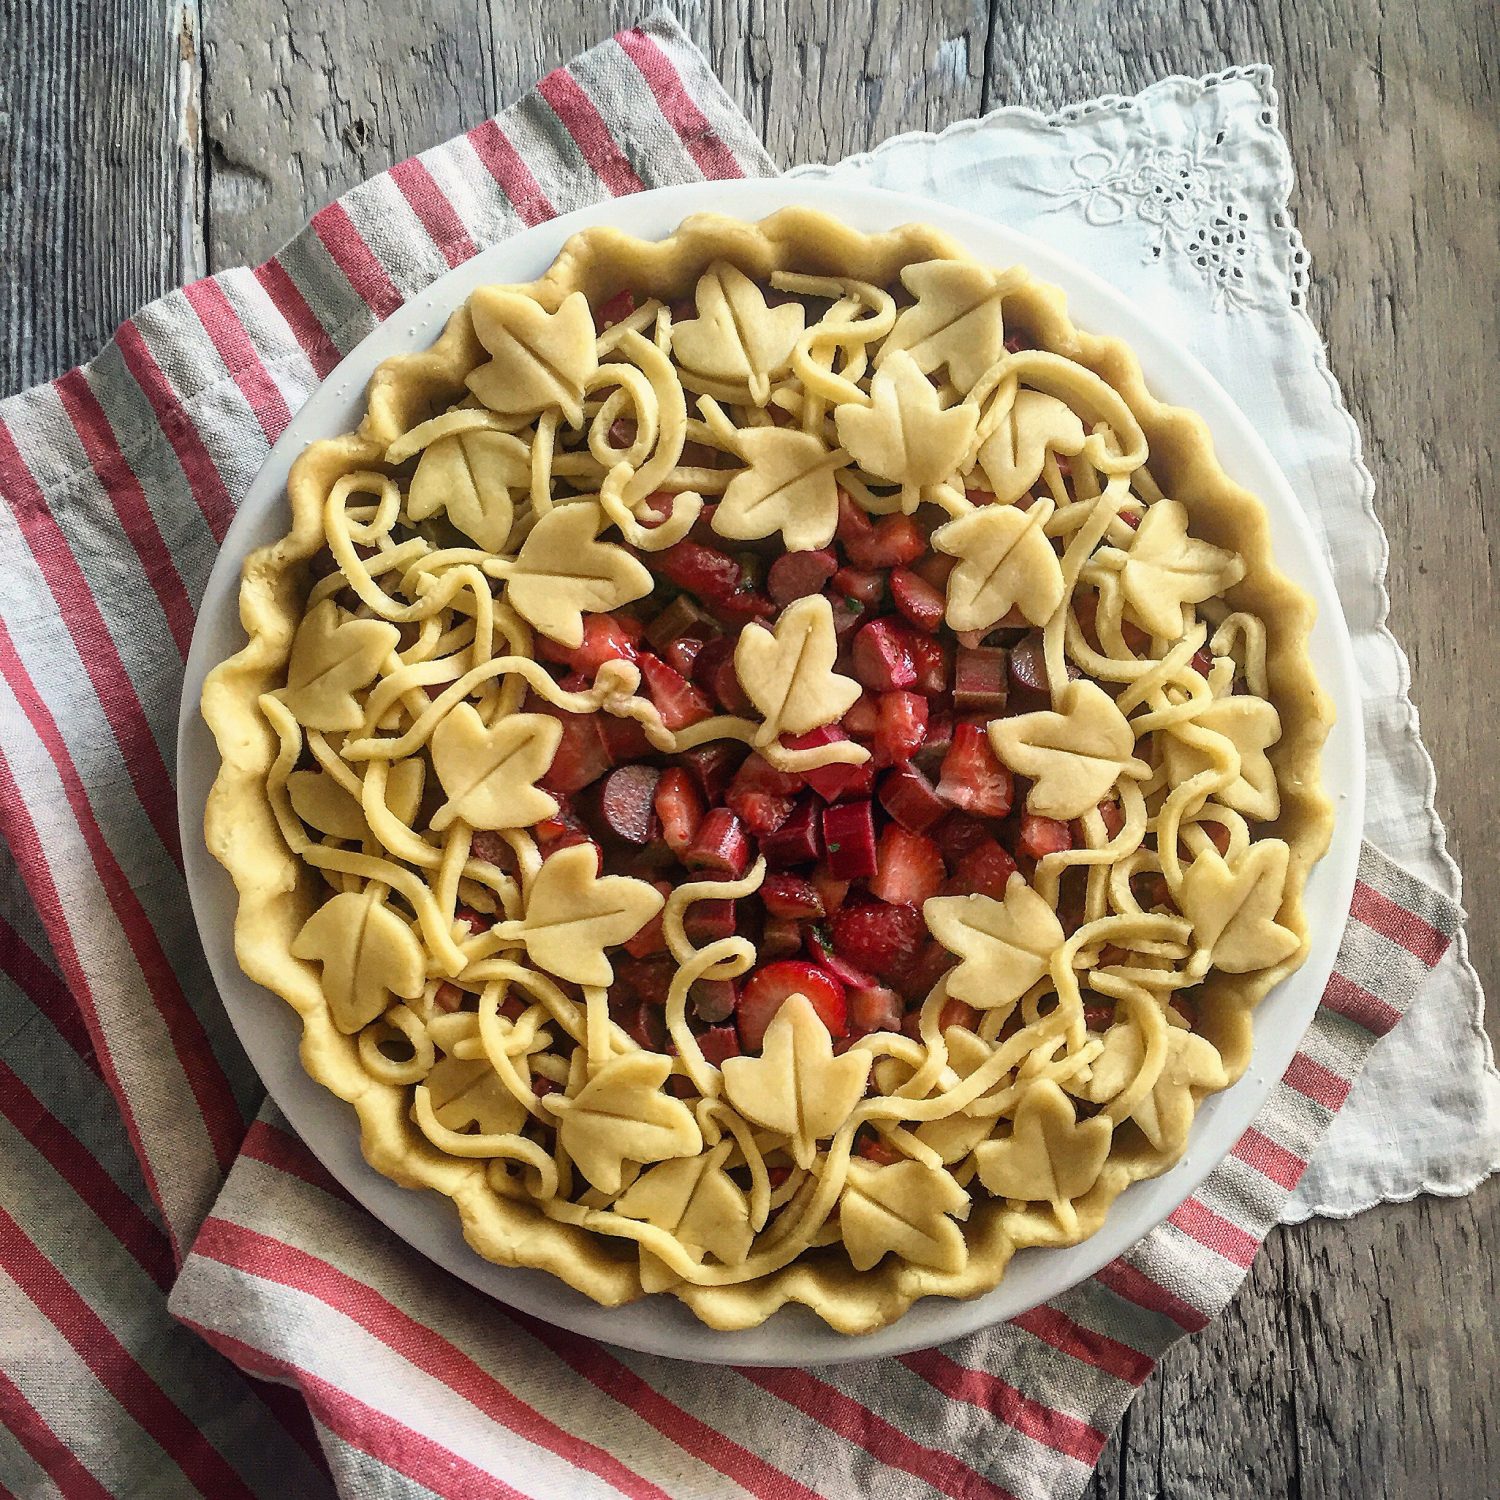
The strawberry rhubarb pie below has thyme in the pastry. *If the addition of herbs or cheese are specific to a recipe that I am including on the blog, I will always state how much and when to add it.
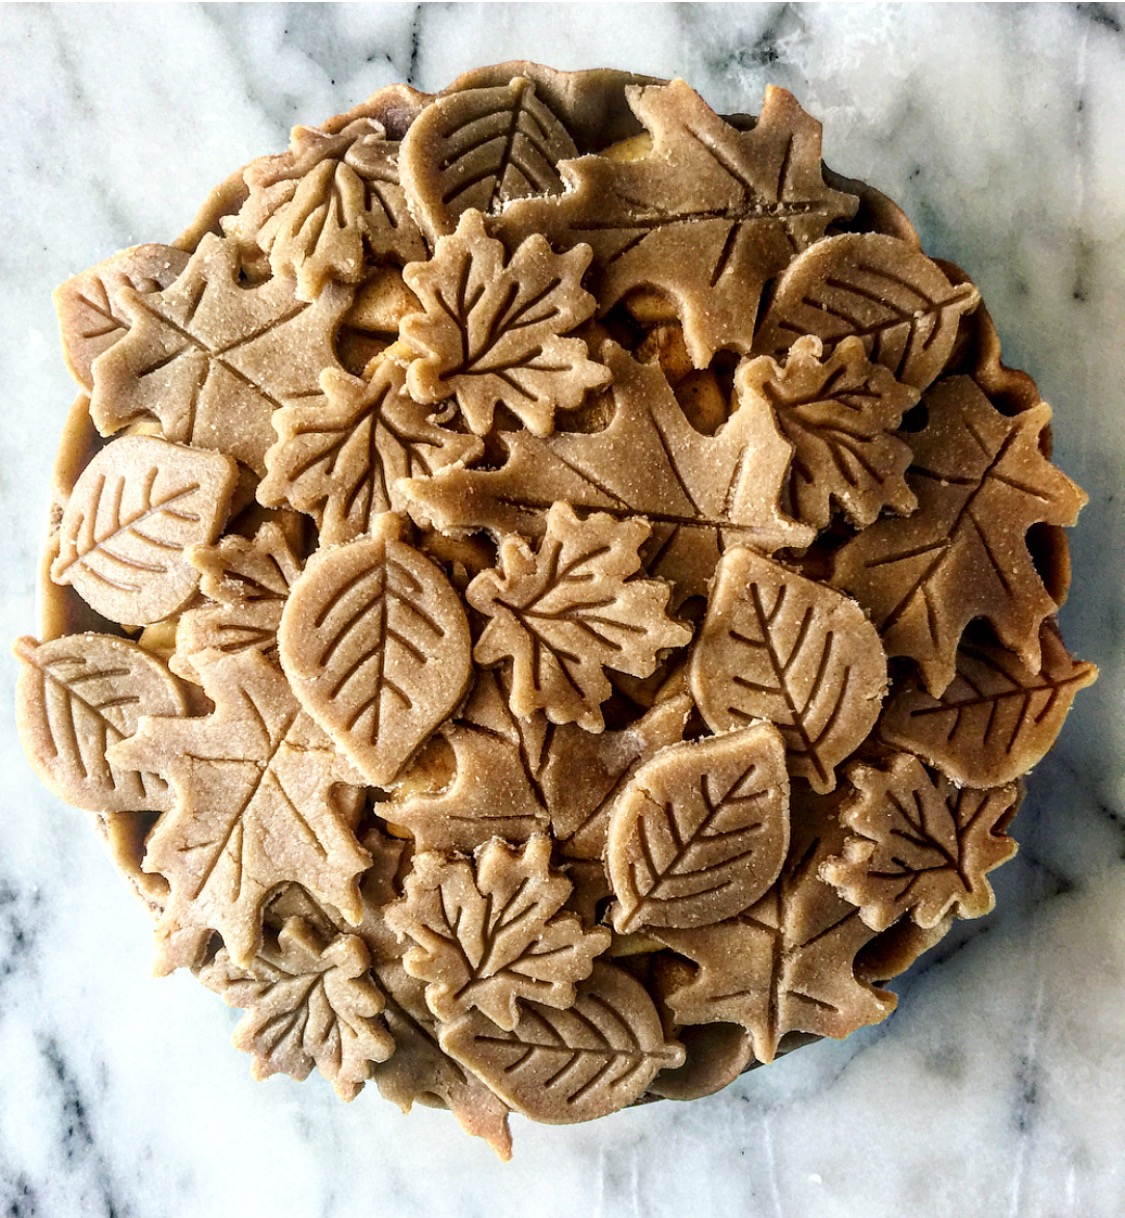
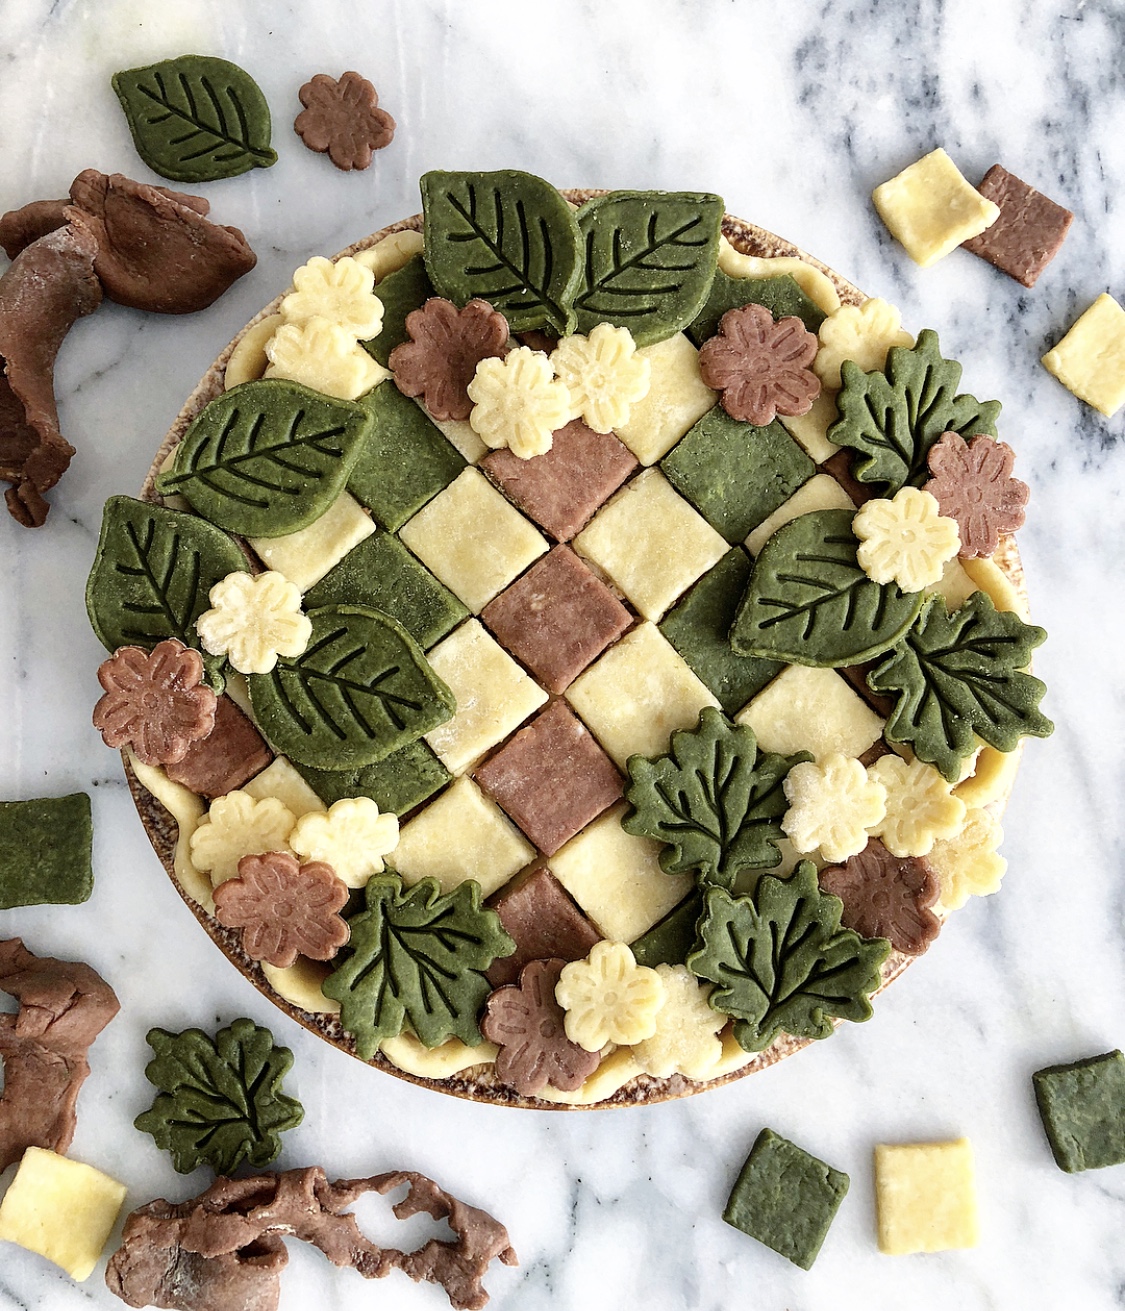
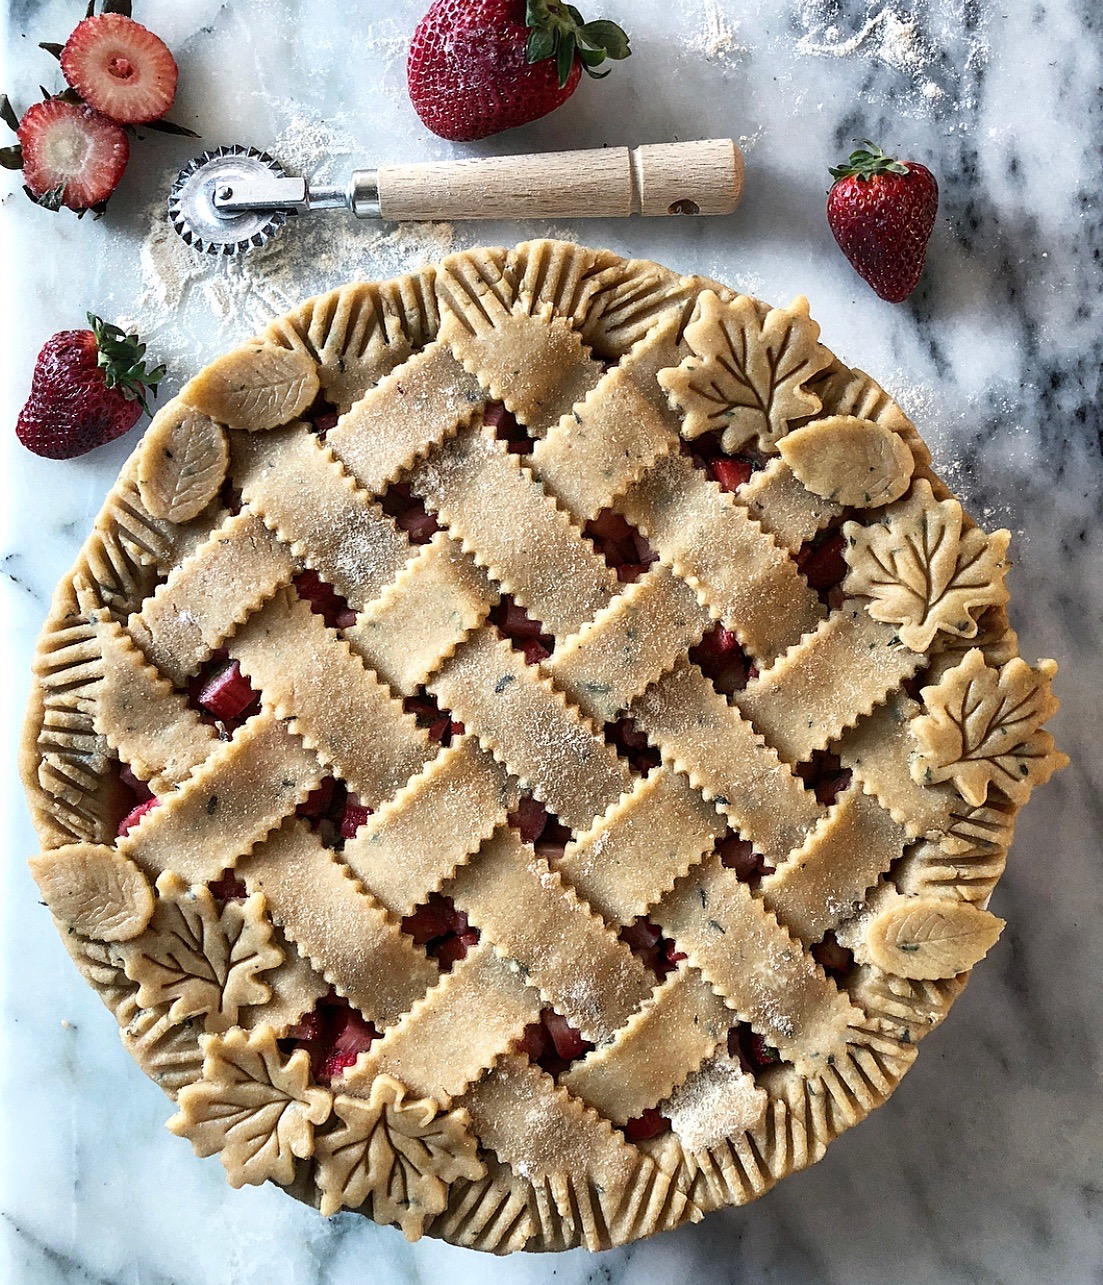
These days, if I’m feeling extra organized, I will make up two or three batches of the pie pastry. I will divide each batch into two disks (as outlined in the recipe below, wrap them each in cling wrap and place the two disks into a freezer bag. If I have two or three bags ready in the freezer, then pie baking becomes that much more immediate, and fun!
Working With Cut Outs
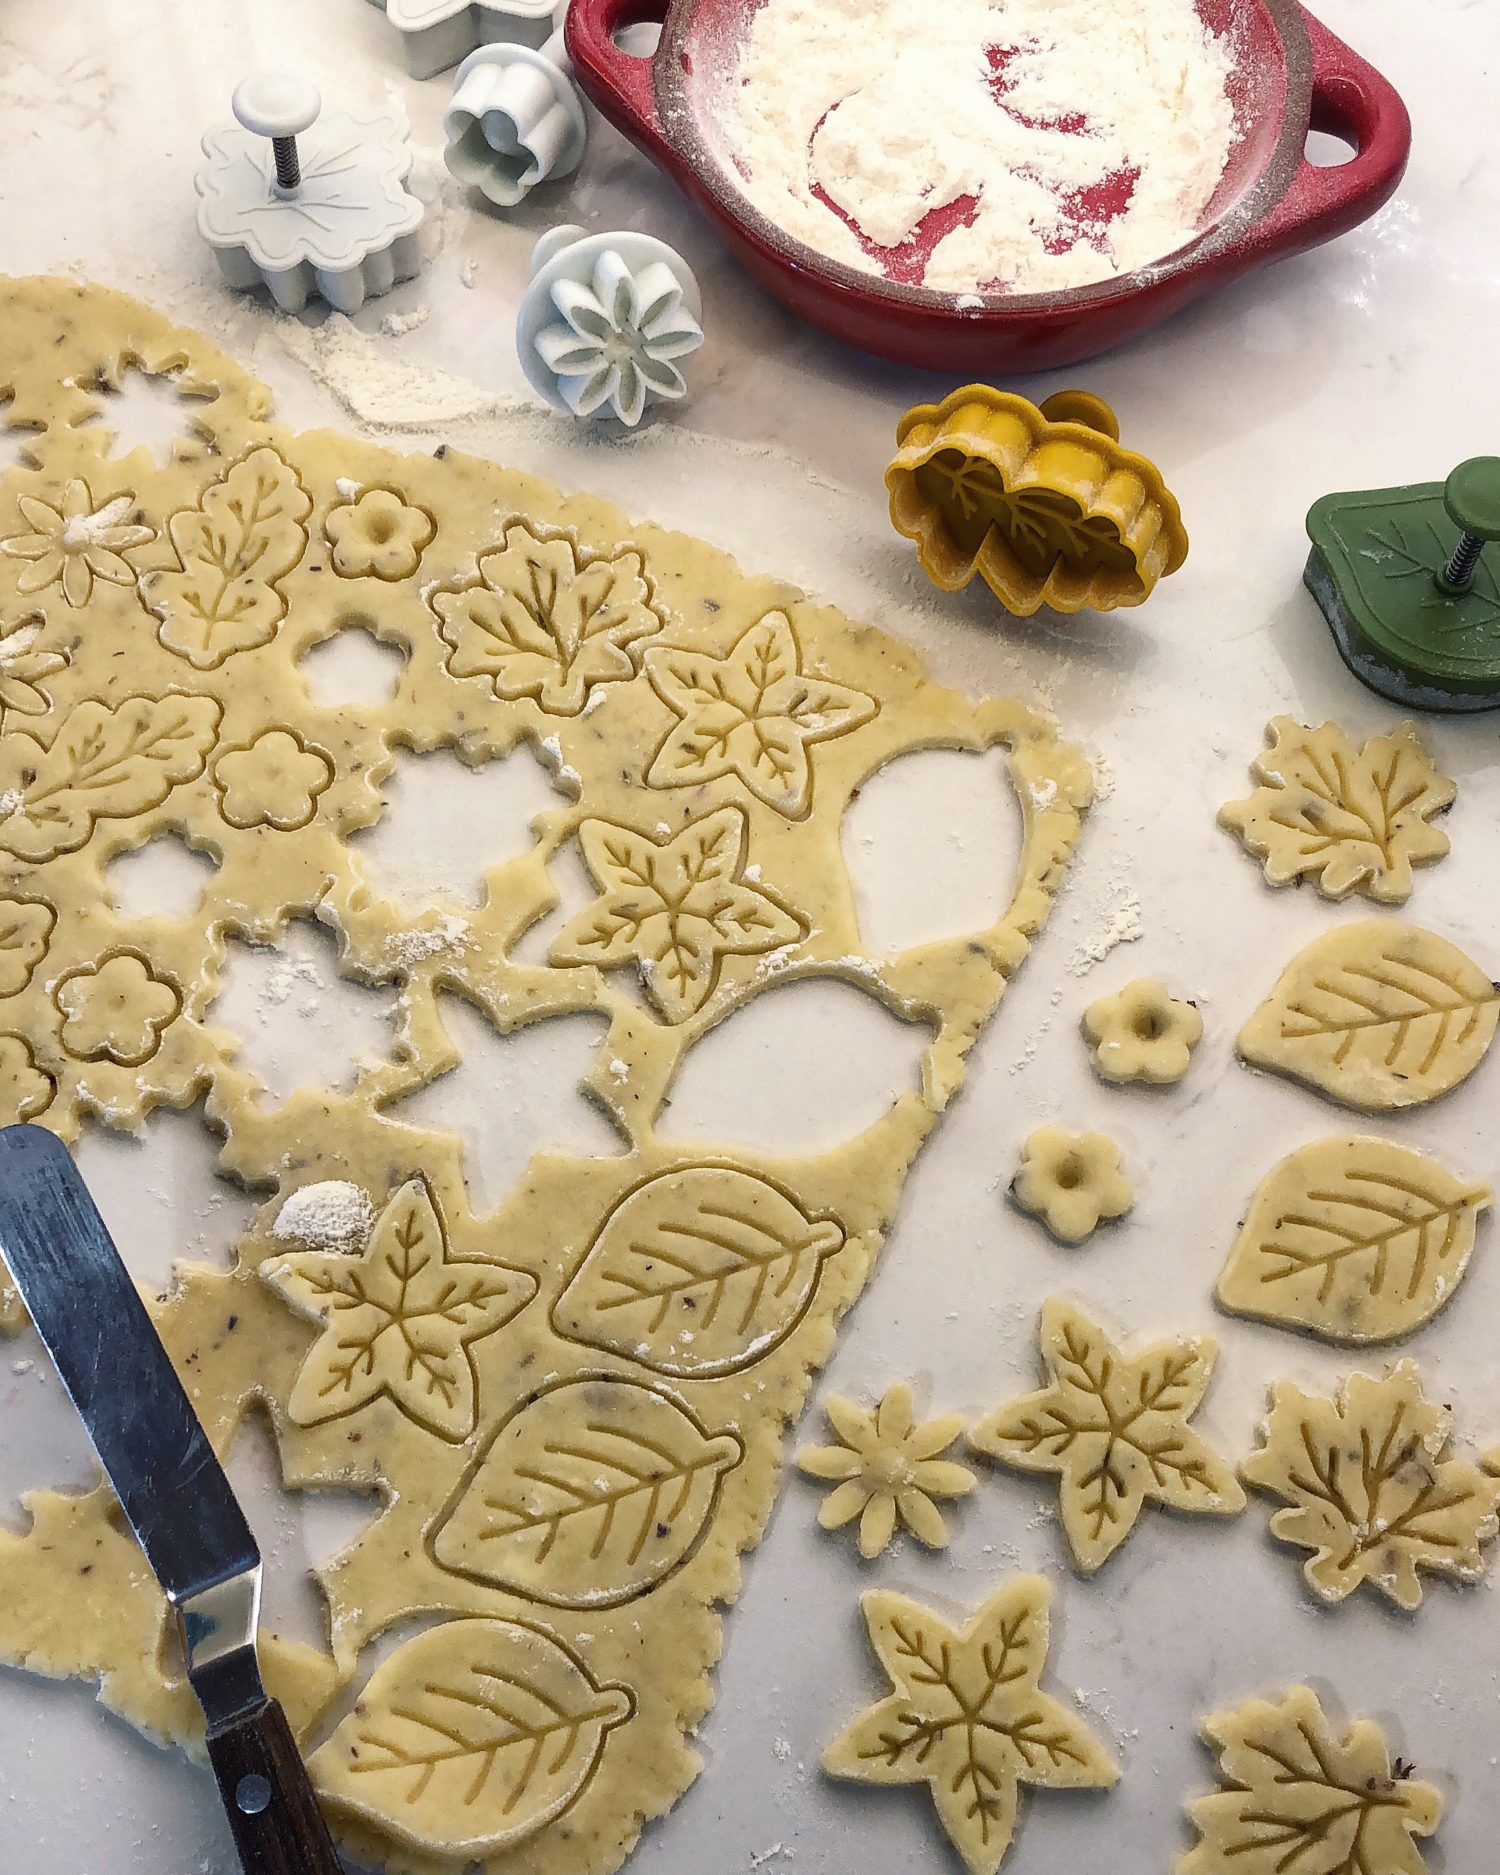
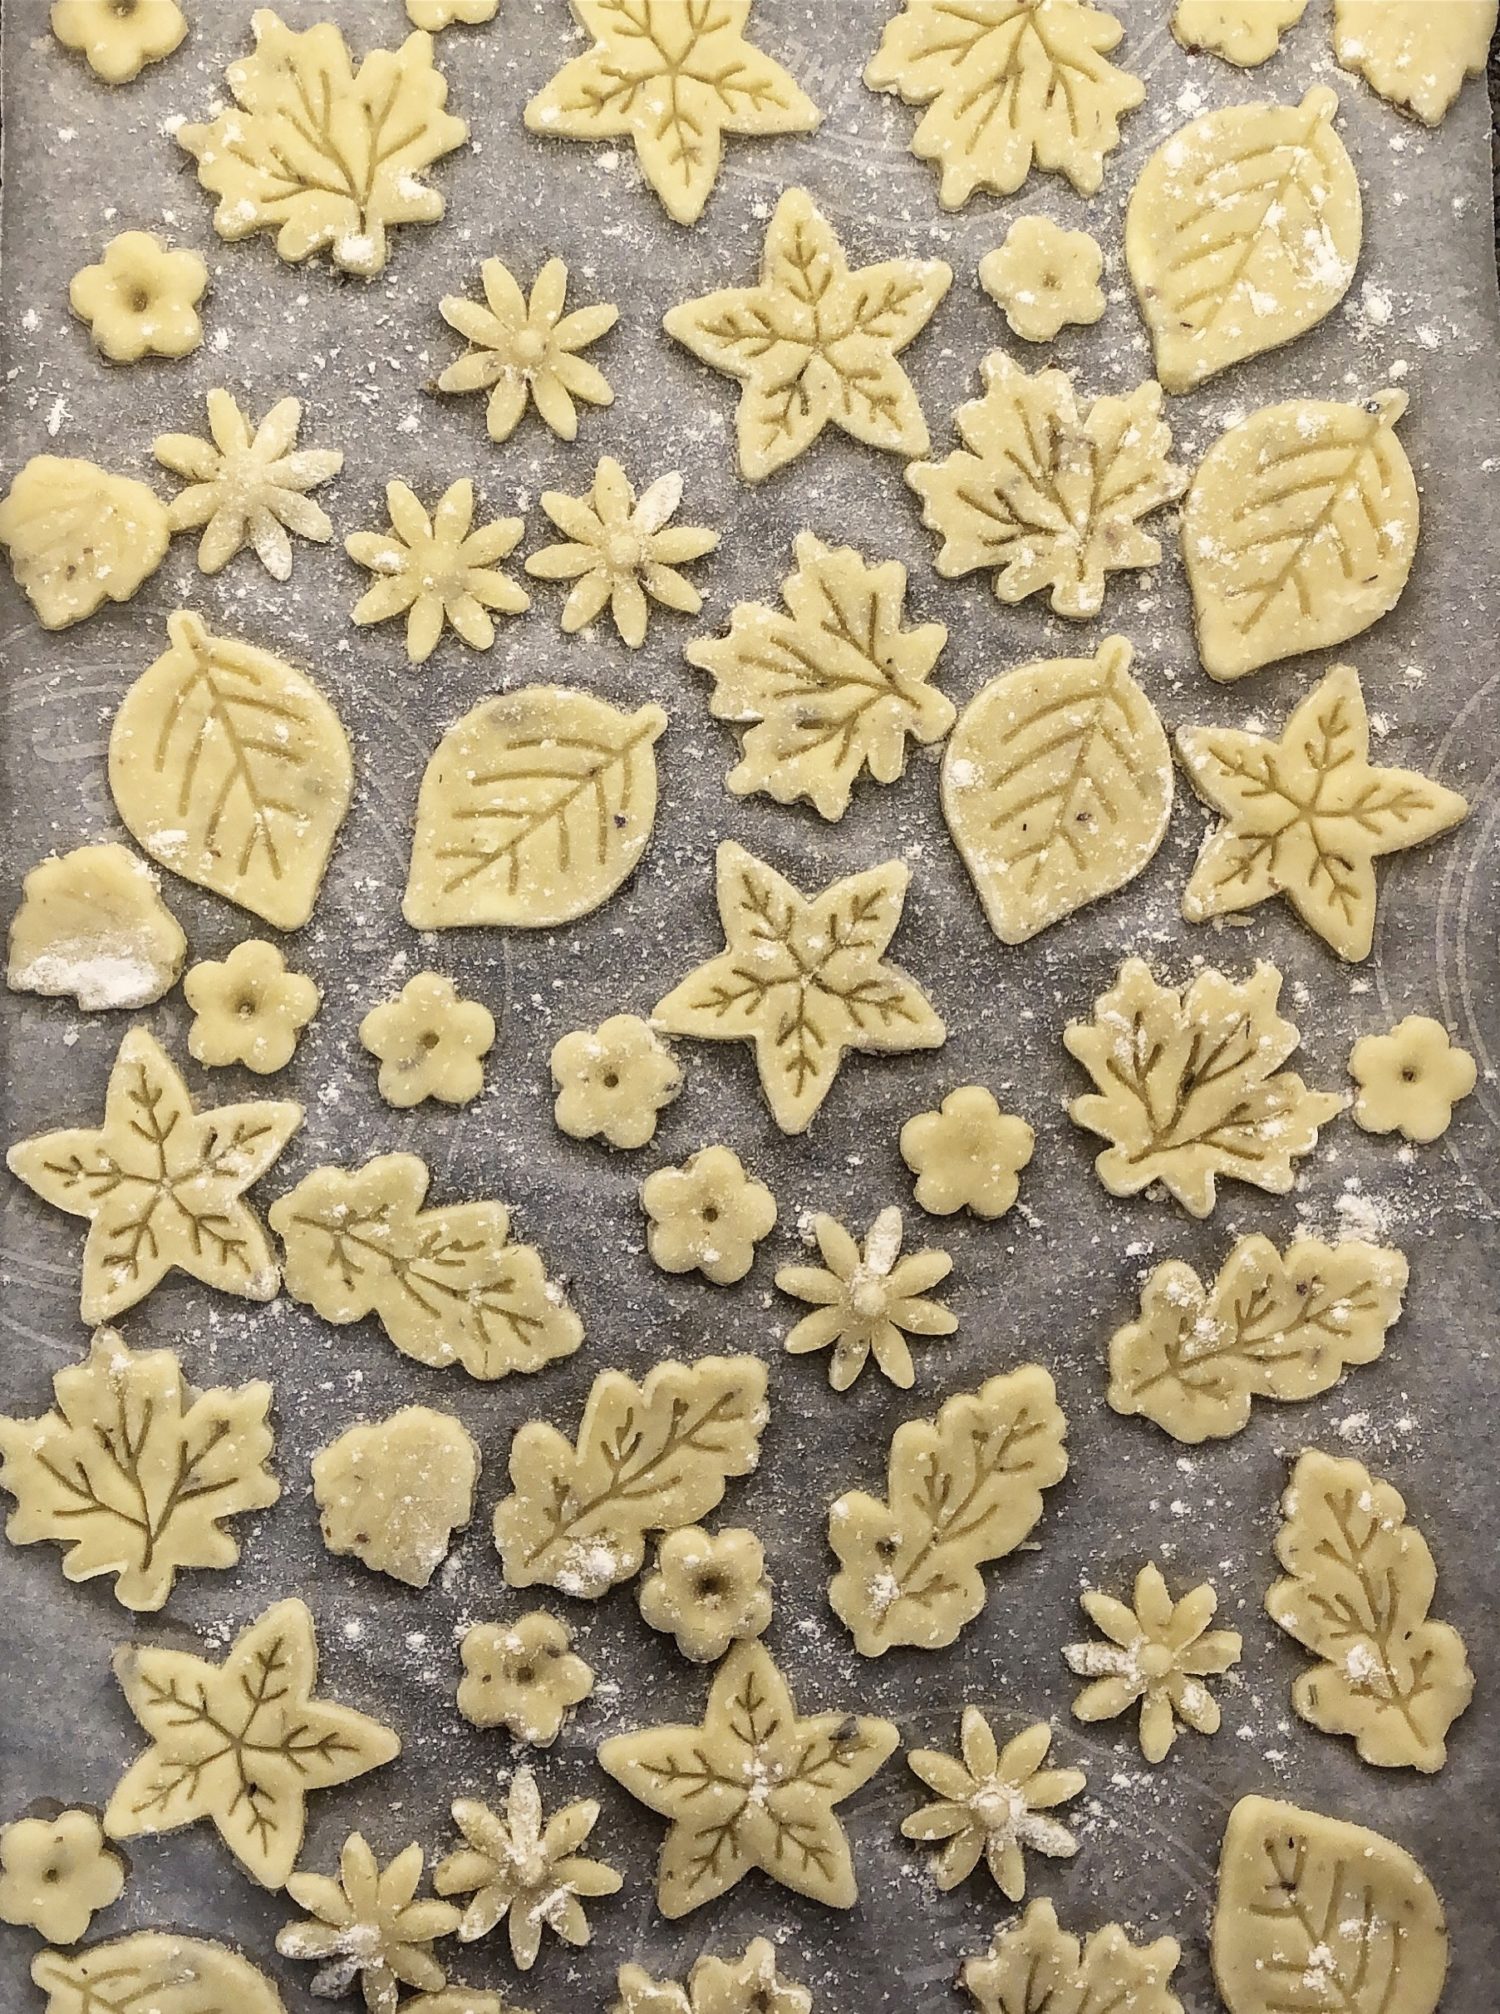
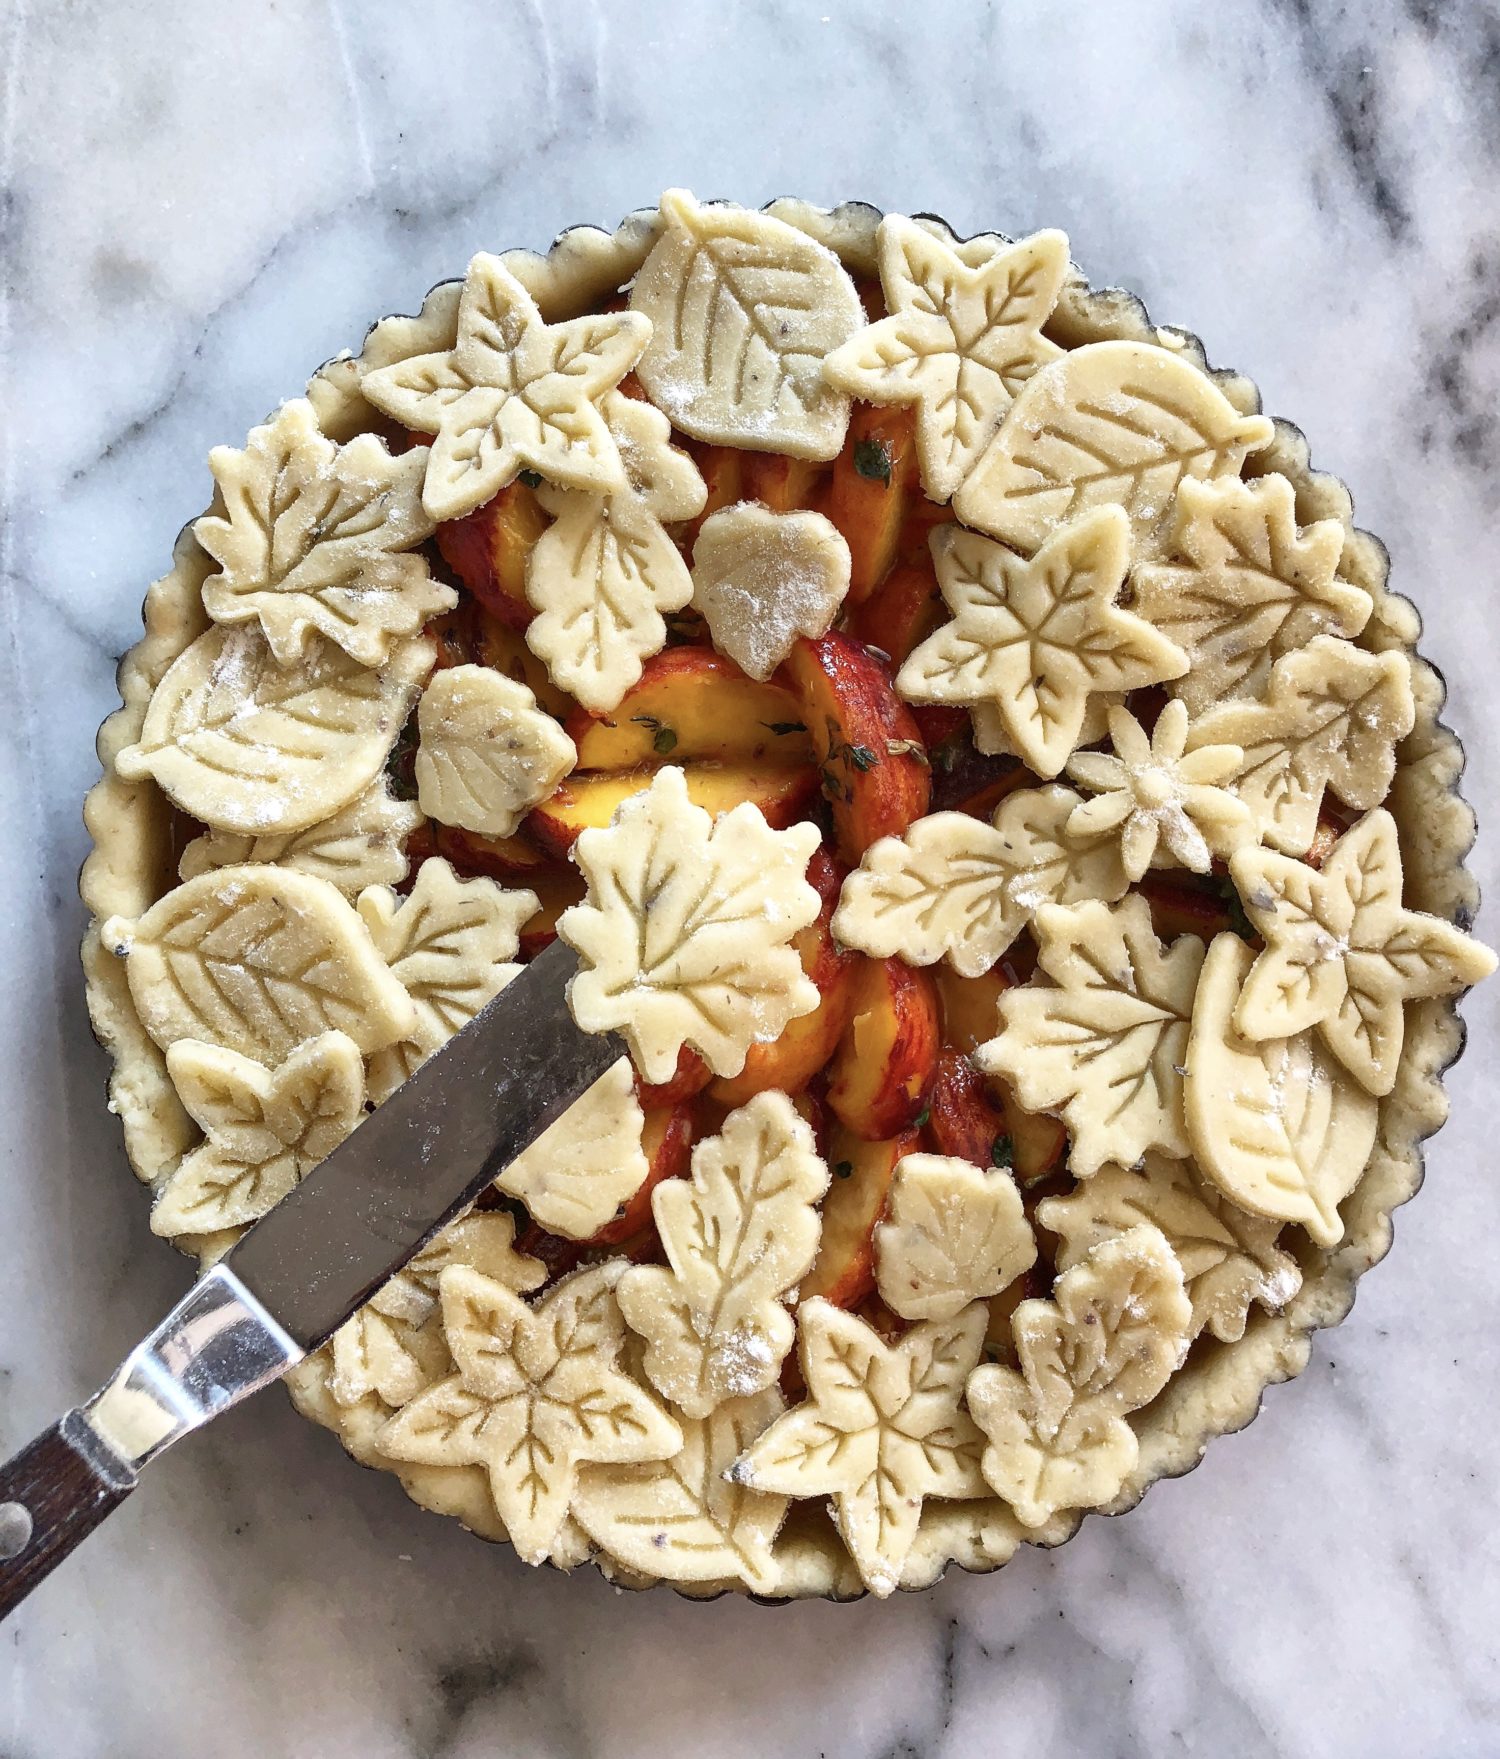
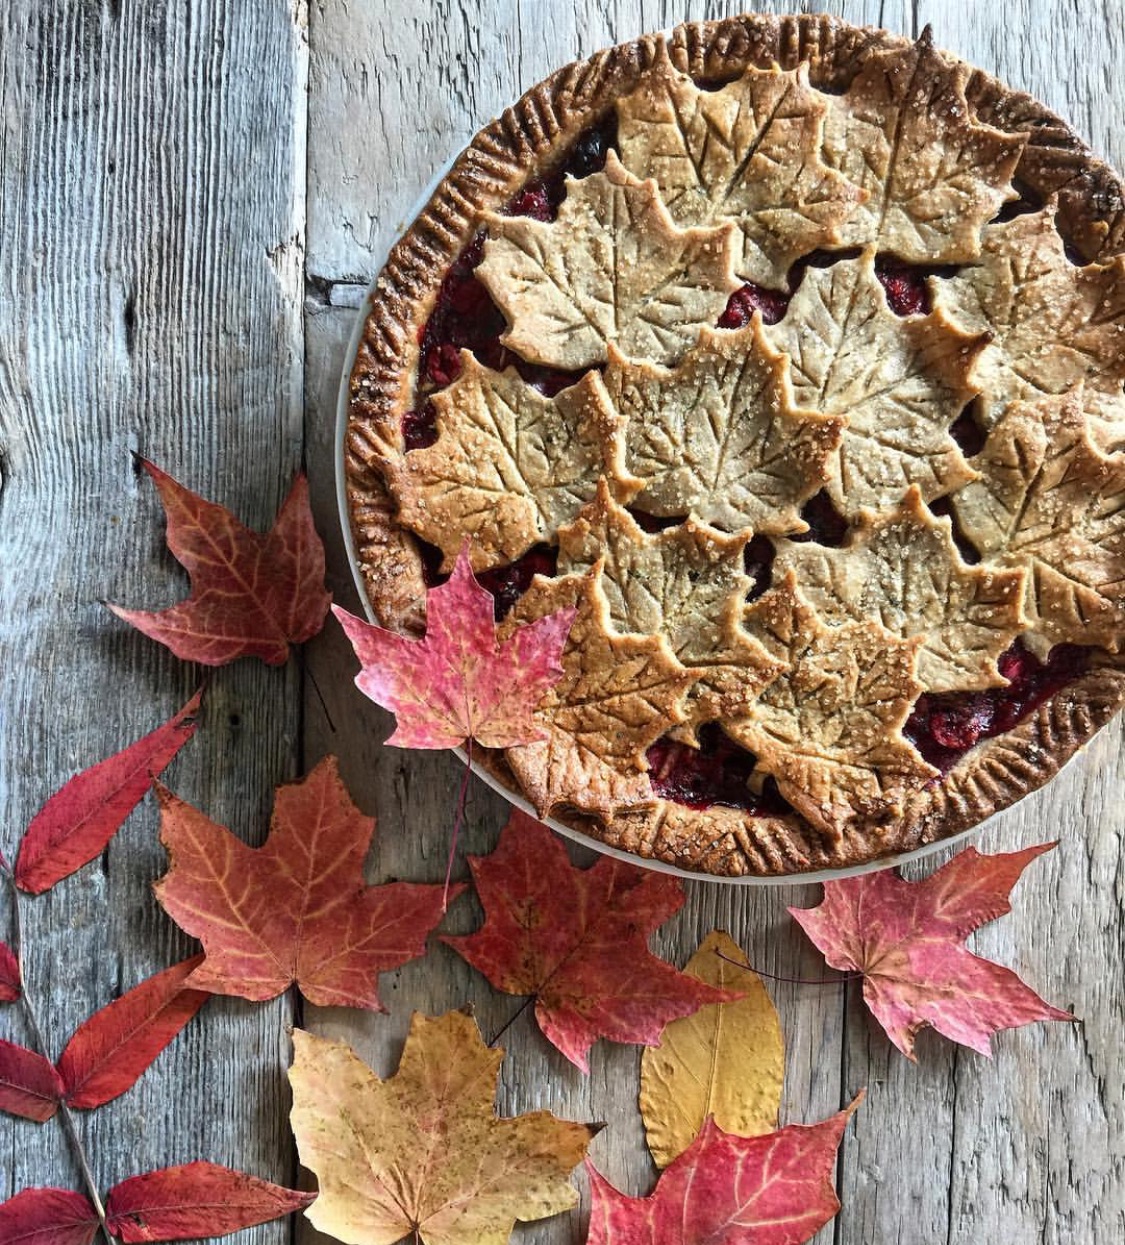
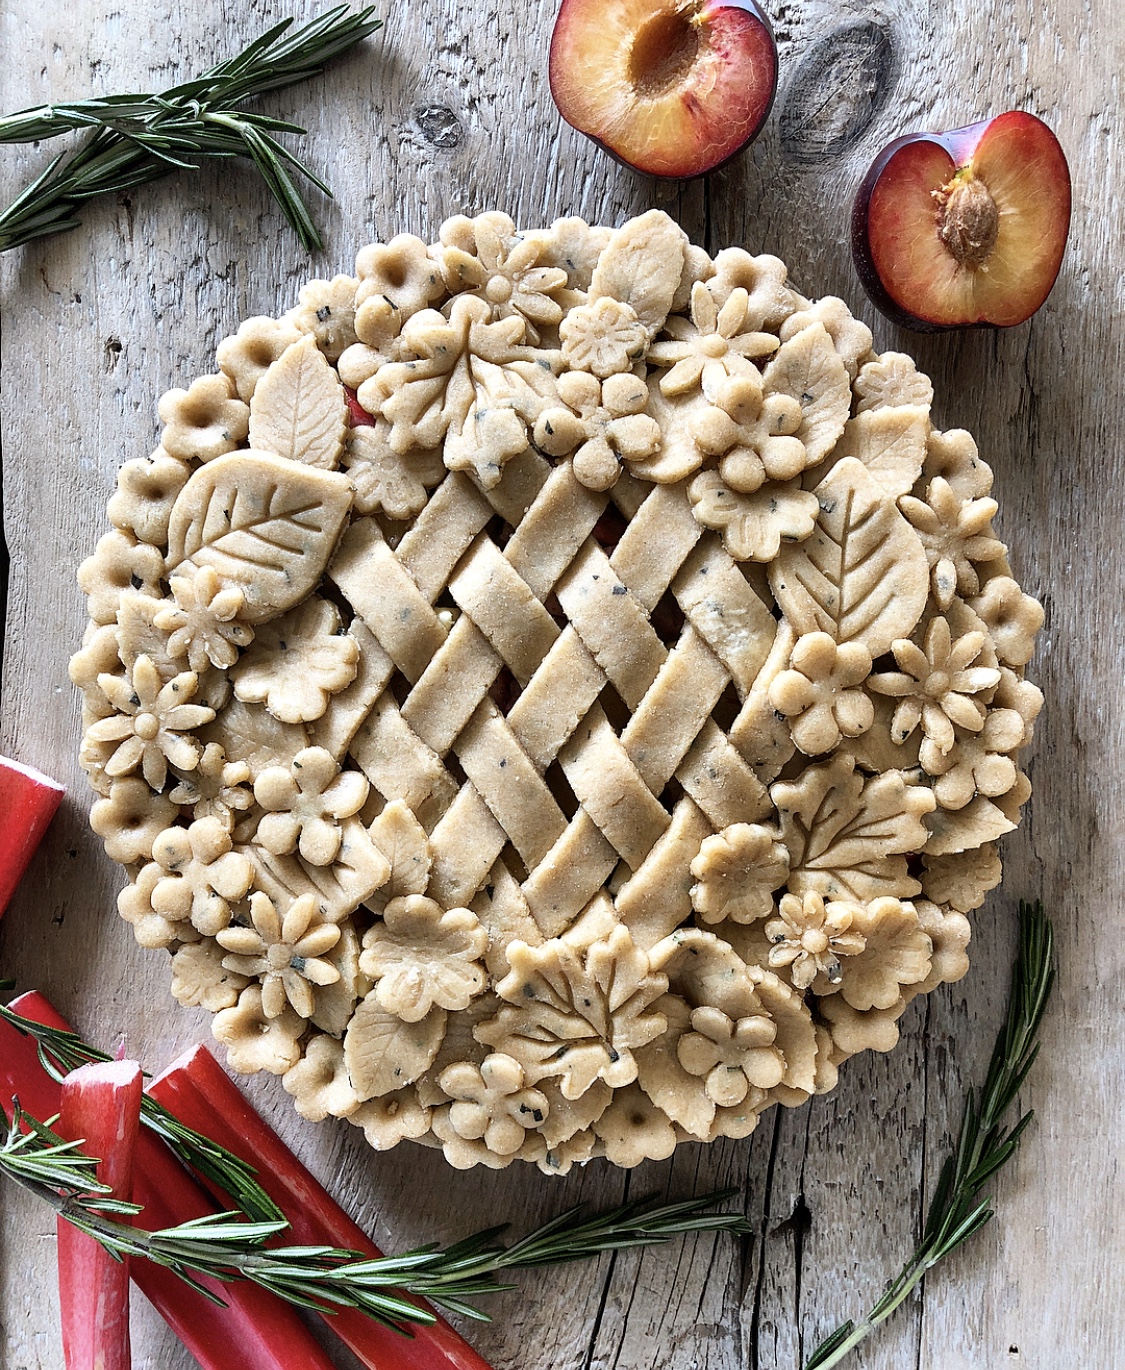
If you are going to use cut outs or create a lattice of any sort, here are my tips. Roll the softened upper disk of dough out on a well floured counter with a floured rolling pin. Also flour your cutters. Use an offset spatula to transfer them all to a parchment lined baking sheet. If only doing a lattice, place the dough on the parchment paper and then cut out the lengths you want. Cut more than you need, just in case of emergency breakage! Refrigerate them for at least 15 minutes before adding them to the pie top. Once they come out of the fridge, let them warm up just a bit (especially if it is a lattice you are doing) so that they don’t crack or break if you fold them in any way. If it is just leaves etc that you are adding to the top of a pie, they don’t need to warm up much.
Once you know where you want to lay them, brush the back of the cut out with water, using your finger gently, and place onto either the edge of the crust, or onto the cutout it will be layered over. Once the entire pie has been decorated, place it back into the fridge for at least 20 minutes before giving it the egg wash and sugar dusting. From that point it can go straight into the oven.
Bake the Cut Outs Separately
For my pumpkin pies, blueberry pies, or any custard pie where the filling is exposed or not baked (ie, coconut cream pie) I bake my cutouts separately and lay them on top after both the pie and the cutouts are cooled. If you try and lay cutouts onto a custard pie that needs to bake up still, you will find that they will sink into the custard. Better to have them baked separately where you can totally control how long they are in the oven. For the most part, ‘cookies’ at about 1/6 inch thickness, with a slight egg wash and sugar dusting should take approximately 15-20 minutes in a 375F oven. Just watch them, and remove if they are ready earlier. Set them on a cooling rack before decorating with them. I also find that if my cutouts are on the smaller side, I omit the sugar dusting after the egg wash. The sugars will brown faster, and smaller cutouts may scorch on you. Sometimes you really don’t need the extra pizzazz of the sugar for the shapes to look good. Here is a recent pie with cutouts which were sugarless, and they look great! Purple Sweet Potato Pie with Maple Cream.
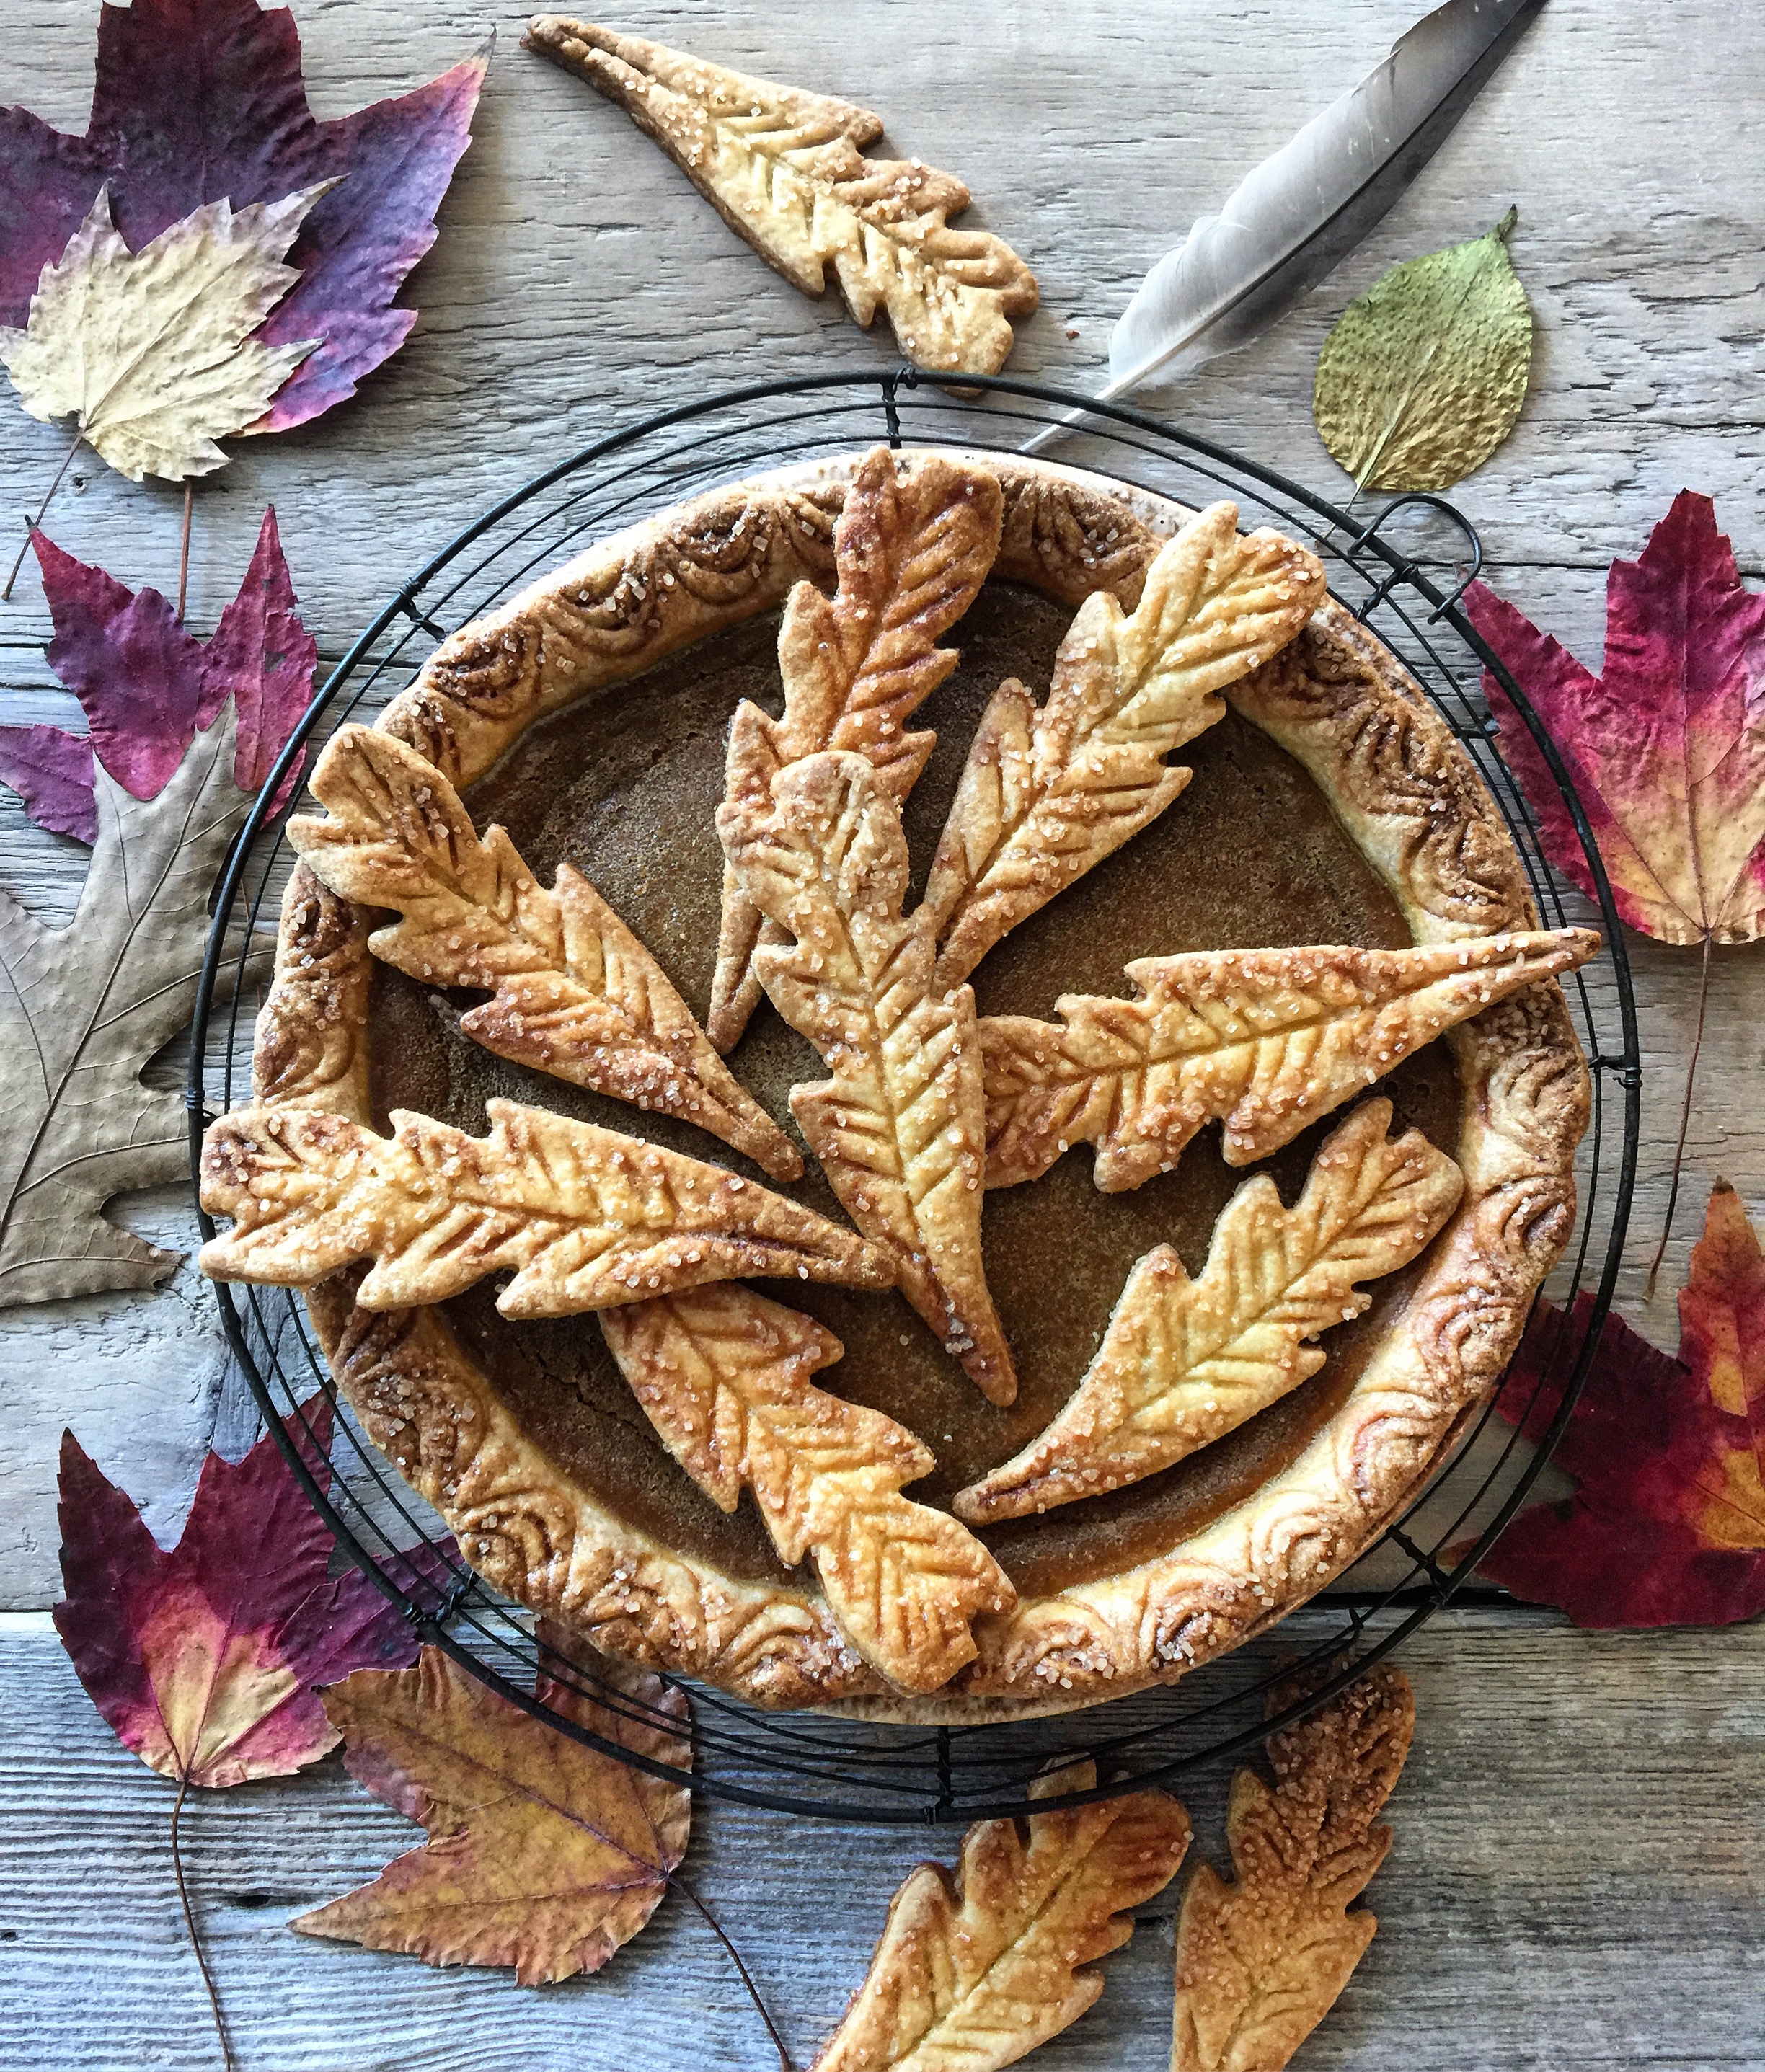

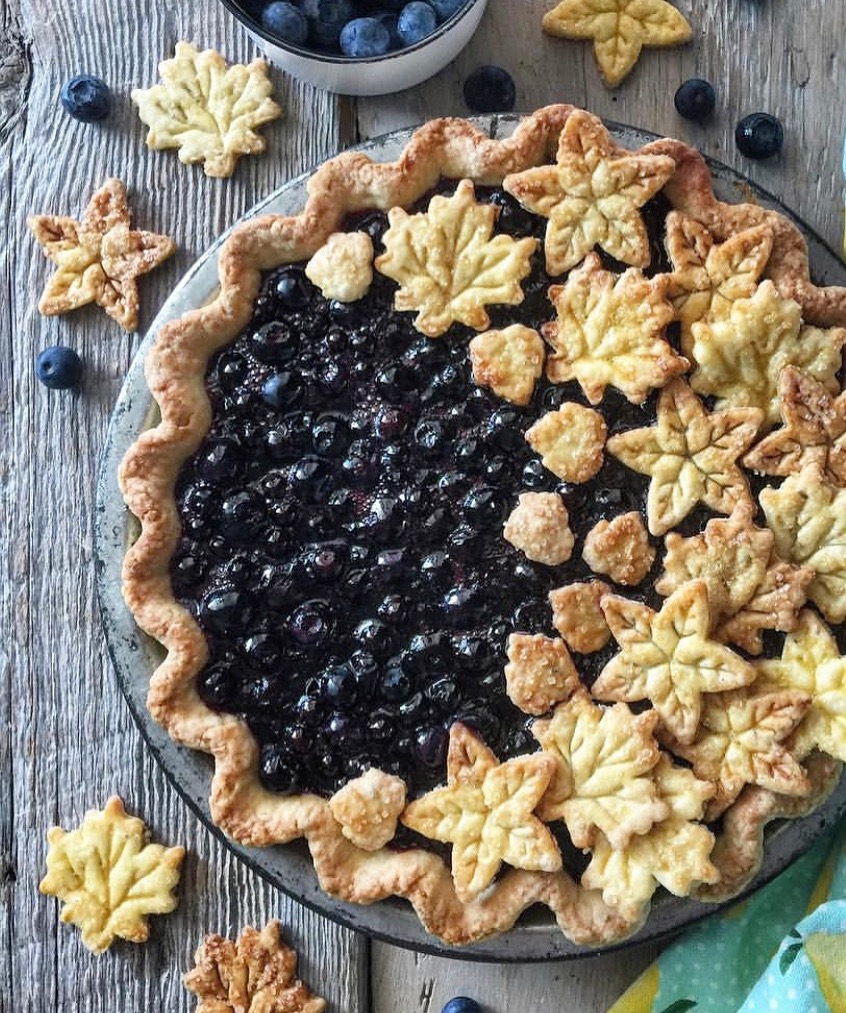
If you really want to have fun with your leaf cutouts, why not add veins to the cutouts that don’t have any? Just use the back of a knife, being careful not to cut all the way through. You don’t need to add too many lines to get some great details. And then when you are ready to bake the leaves on the baking sheet, take some rolled up tinfoil to push under parts of the outer edges etc. This will make them look more realistic and windblown. Below you can see how I prepared my leaves (adding veining to those cookies that didn’t have any) for baking, and then how they were added to the finished pie after everything had cooled. The pie baked separately from the cookies.
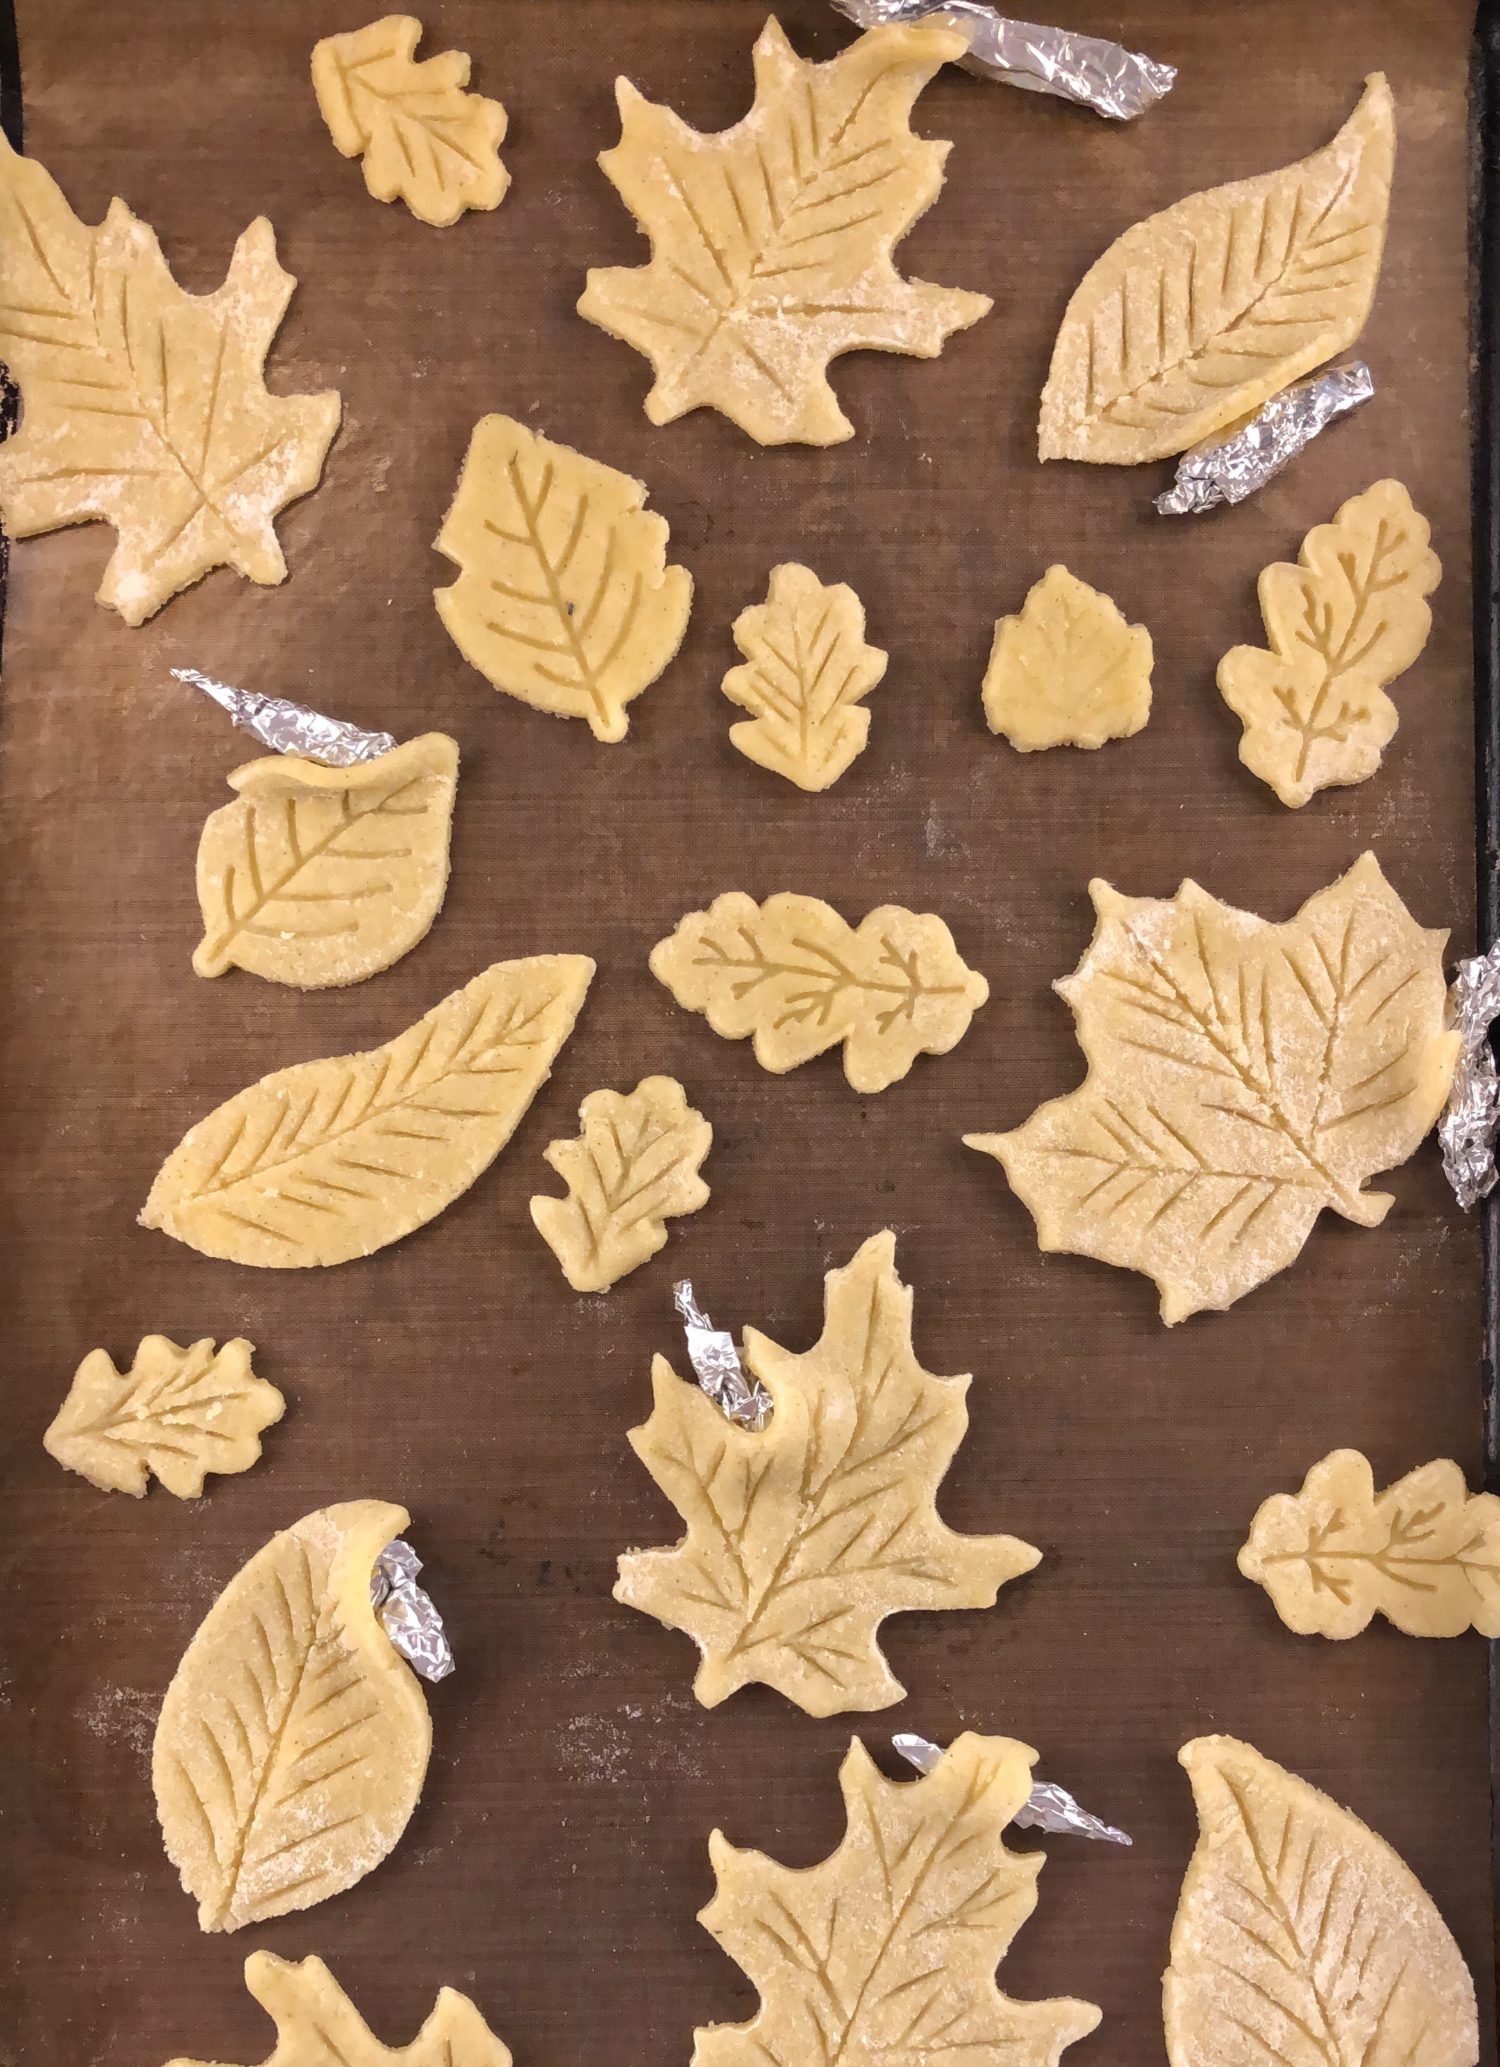
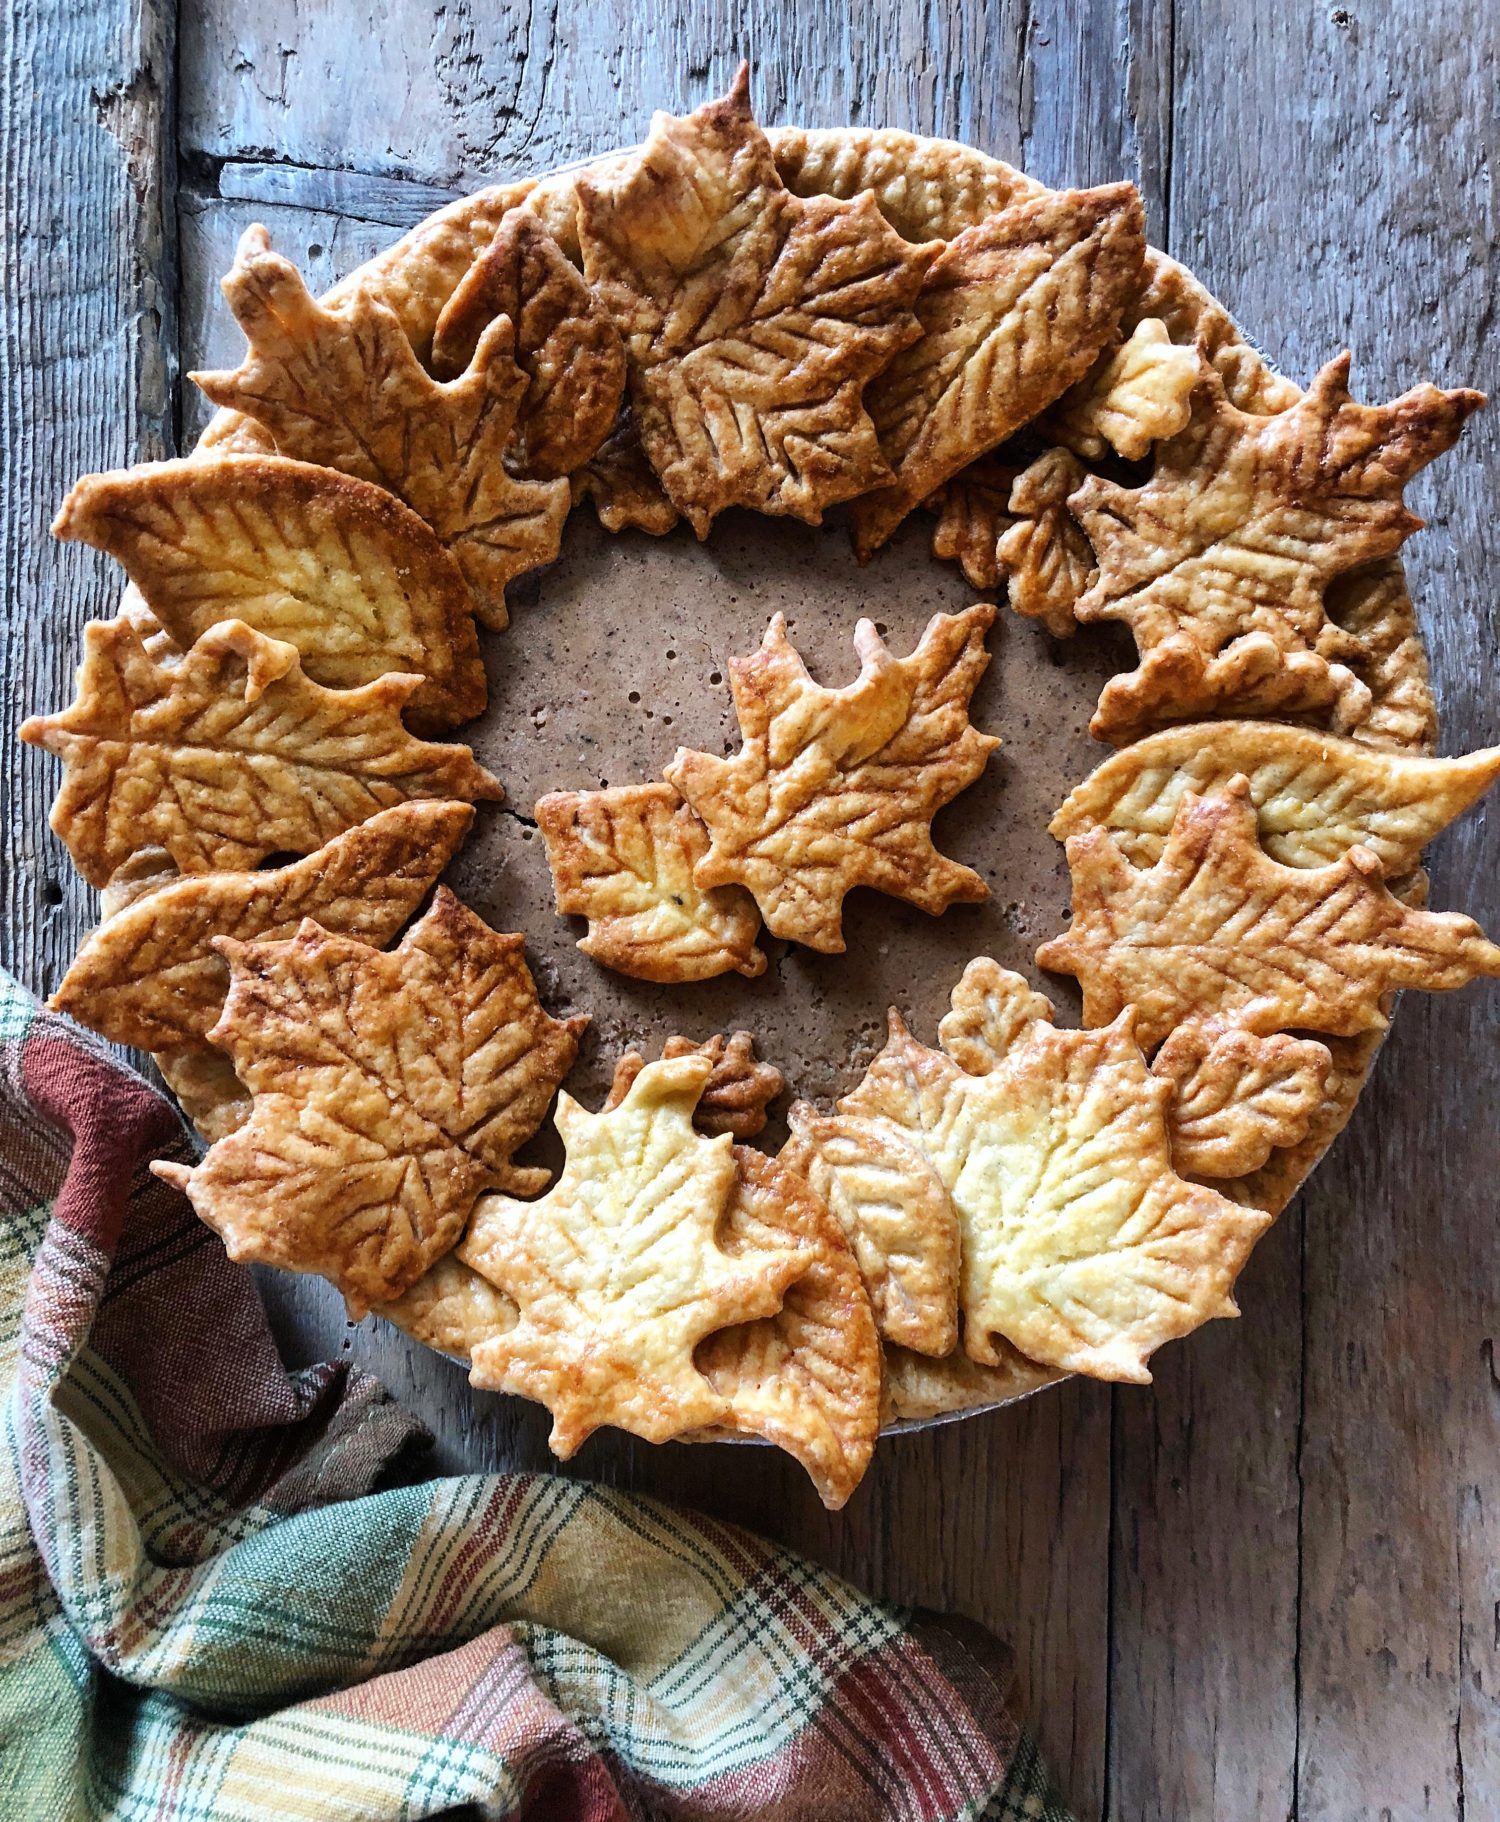
Sourcing cutters: I have found most of my embossed ones at either Williams Sonoma, Sur la Table, or on Amazon. You can also visit the cake decorating section of a baking or kitchen wares shop.
Have fun with pie, and don’t get discouraged. It may take a few times for your fingers to get the ‘feel’ of the crust, but it will truly come together in the end. I promise.
Love Jen.
The Perfect Pie Crust
This tender, flakey pie crust recipe has never let me down! Easily adapted for sweet and savoury fillings.
Ingredients
- 2 cups AP flour, sifted, or a cup for cup gluten free blend which contains xanthan gum or other binder
- 3 tbsp granulated sugar
- 1/2 tsp kosher salt
- 1/2 cup unsalted butter chilled and cubed
- 1/4 cup shortening chilled and cubed
- 1 large egg
- 1 tbsp fresh lemon juice
- 1/4 cup ice water
Instructions
-
Combine flour, sugar and salt. I use a food processor, feel free to do this by hand, using a large bowl and a whisk. (this is also where I would add any herbs or spices to a specialty pie crust)
Add the cubed butter and shortening and pulse only until blended to a rough, crumbly texture. It should only take 2 or 3 pulses. You still want to see large pieces of butter (the size of marbles). Or use a pastry blender or knife to achieve this. Try not to overwork with your hands though- their warmth will warm up the butter too much.
-
Whisk the egg, lemon juice and 2 tbsp of the ice water in a small bowl.
Add to flour mixture and pulse just till the dough comes together into a rough ball. Don't worry about grabbing every little bit from the sides, you can add this to the ball you turn out onto the counter by hand. Ideally you should still see pieces of butter. If it isn't coming together in the first few pulses, add more ice water, but no more than the original 1/4 cup stated in the ingredients. On a humid day you will most likely need less water.
-
Shape the ball into two disks and wrap. Chill at least 1 hour, or freeze till needed. If using these disks for uncovered pies, then you can divide them into equal sized disks
-
Take out one disk and let return to room temperature for 10 minutes. . Don't roll a disk that is still cool, it will crack along the edges. Place it on a well floured counter.Flouring your rolling pin, roll the disk out. Decrease pressure as you reach the edges. After each roll, spin the dough 1/4 turn. Keep flouring all the surfaces to keep from sticking. Roll to 2-3 inches larger than the pie plate you are using (should be around 1/8" thick.)
-
Either roll the disk up around the rolling pin and release it over the pie plate; or dust with flour and fold it in half and then in half again loosely and lay across the pie plate and then open it up. (In either case make sure that the dough is floured enough so that it won't stick together)
Allow the pastry to fall down the sides of the pie plate, so that there are no gaps between the dough and the pie plate. This will ensure that the dough will not pull up from the base, or shrink during baking. Trim it, allowing enough of an edge to work with the type of crimp you wish to use.
-
Place the prepared pie shell back into the fridge to chill for about 20 minutes.
From this point follow the directions for the pie recipe you are using.
-
Repeat the above instructions for the remaining disk of dough. If using as a lid for a covered pie, roll to about 2 inches larger than the pie plate, allowing it to cover any raised filling.
Or use to create lattice or cut outs (either with a well floured cookie cutter or free hand) Cut out the dough on a parchment lined sheet, but don't remove transfer the entire sheet over to a baking sheet to cool in the fridge.
Place the baking sheet in the fridge for 15 or so minutes. Once they come back out, let them soften just a little so that they don't crack or break when you start using them. If they warm up to much as you work with them, return to the fridge for a few minutes.
Use an offset spatula to remove the piece you are working with. Dab the place on the pie where you want to place the cut out with a little water to help adhere the dough.
-
Once your pie has been filled and covered the way you like, place the finished pie back in the fridge for at least 15 minutes. Once the oven is warmed up, only then take the pie out and do an egg wash. The fridge time will help the pastry from shrinking too quickly when it goes into the oven.
-
See blog post for more details
Recipe Notes
To make for a savoury pie, replace the sugar with 1/2 tsp salt, 1 tsp finely chopped fresh or dry herbs (except woody ones like rosemary)
You can also add cheese to the recipe by removing 3 tbsp of the shortening, and replacing it with 1/2 cup of shredded cheese.
I also add fresh herbs such as mint or thyme or even dried lavender to my sweet pies. These herbs will always be added to the flour before the addition of the butter and shortening. I will include the amount in the specific recipes that I share.
Store the pastry in the fridge if you will be using it within a few days up to five days. You can freeze the pastry for a few months. Thaw frozen pastry in the fridge overnight. Proceed as directed.

Hi Jen – a couple of questions. What is “AP” flour – is it “Self Raising”? And when you say “shortening”, do you mean like lard? I had a go at a crust ages ago, and really want to try this one to get it right. Ta! Anne
Hi Anne, AP refers to All Purpose Flour. Shortening is usually vegetable shortening. Do you have this in Australia? Ta!!
After reading your blog on the perfect pie crust, I finally have the courage to try again! Thanks for the tips.
It always works for me. Don’t be discouraged if it cracks or tears a tad, nothing a good patch job in the pie plate can’t fix. Just make sure the counter is well floured, as your rolling pin, and that the dough is back at room temperature. It’s when it’s too cold still that most problems occur. Have fun!!
I think all purpose is called “plain” here. And yes, there’s this vegie shortening called “Copha” I think, will have to look it up. (Knowing me, it could be something else entirely which would not help my attempts! 🙂 ) Anne
Well, I hope that Copha is exactly what you’re looking for!
I’m not sure if I’m doubling up here. I posted a comment but it didn’t appear. I think in Oz, All Purpose is “plain” and yes, I’m pretty sure there’s a vegie shortening in supermarkets, will check it out.. Thanks, looking forward to trying again, Anne
Hi Anne, no worries- it’s just the way this back end is set up- all comments have to be approved before they show up at the front end 🙂 Yep- good ole Plain flour! I would think you have veggie shortening. Pretty common. Is lard still in common use down your way?
Oh thanks so much Amisha. I love chai! I think the first time I had it was like 20 years ago. It’s still one of may favourite flavour combos. Yes, do try the Ginger gelato, even if you are the only one eating it, is is AH-Ma-Zing!! And if not, then this is the exact same process, but with flavours maybe the whole family will love! Love Jen
Hi! I would love to try your recipe for pie crust, but in the Netherlands we don’t have shortening, can I sub it? And if yes, in what quantities? Thanks in advance!
Hi Mirjam, vegetable shortening is similar to lard, so if this is popular where you are, it will achieve the same texture of tenderness in the pastry. If neither are available, I would stick to using all butter. It may not be as tender, but it will be very flakey!
Hi I love your recepies and your amazing explanations! I have never used gluten free anything-except fro pancakes and diy mix was a disaster. That said o would like to give the gluten free a try but I am not sure how to go about it. Will the mix be sticky (as it always is with my pancakes)? What kind of GF flour do you recommend?
Hi Beatriz, I usually use Bob’s Red Mill 1 for 1 gluten free blend, with wonderful results, especially in this pie pastry. It won’t be any stickier than my traditional pie pastry texture. Now, too warm, and the butter or shortening will make the pastry harder to work with. Make sure everything is very chilled. Adding a little gf blend on the surface and rolling pin should help. Let me know how it goes. Love Jen
Thank you so much Jennifer! I will be trying out the recipe this weekend. One more question, would it be wise to substitute the butter for olive oil? My husband has a bad dairy intolerance, I have a recent gluten intolerance and wold like to work around that.
Hi Beatriz, I wouldn’t use oil, it will affect the texture of the pastry. You are best to purchase vegan butter sticks and treat them as butter. Chill them well before using. Hope this helps, Love Jen
I just find your site and recipes not only inspiring but delicious and so beautifully presented. I too have had a thing for lemons since I was a young child.
I have a question. Im more of a savoury person and whilst I like sweet things I often find sweet pastry and sweet filling is too much for me.
Can I omit the sugar, and will that create a problem with the mix? I do love to cook but I am not as gifted as you.
Thank you in advance
Hi Evie, greetings from a fellow lemon lover! For sure you can omit the sugar. If you read through the recipe, and down in the Notes, I show the savoury version. This is the pastry I use for meat pies like tourtiere etc. Hope this helps, Love Jen
Well rather embarrassingly I didnt pick up on that. Thank you Jen!! I printed it off but hadn’t had time to go through it in full. My bad, and thanks for you good grace 🙂
Hi Evie, it happens to all of us! No worries, enjoy! Love Jen
The only recipe I use now. Thank you!
Hi Andy, so happy to hear. It’s quite a versatile recipe. Enjoy, Love Jen
Hiya! I know the recipe says if you’re not baking the dough right away you can freeze until needed, but can you just keep it refrigerated instead if you’re baking it in a day or two? And if you do freeze it, is it better to let it thaw in the refrigerator first, or can you bring it to room temperature straight from freezer to counter? Thank you!
Hi Susan, of course, if you know you will be using it within a few days, keeping it in the fridge is just fine. Always thaw frozen dough, whether pie pastry or puff pastry in the fridge overnight. Hope this helps. Love Jen