This is a post all about dressing up a simple cake so that it’s ready for a night on the town!
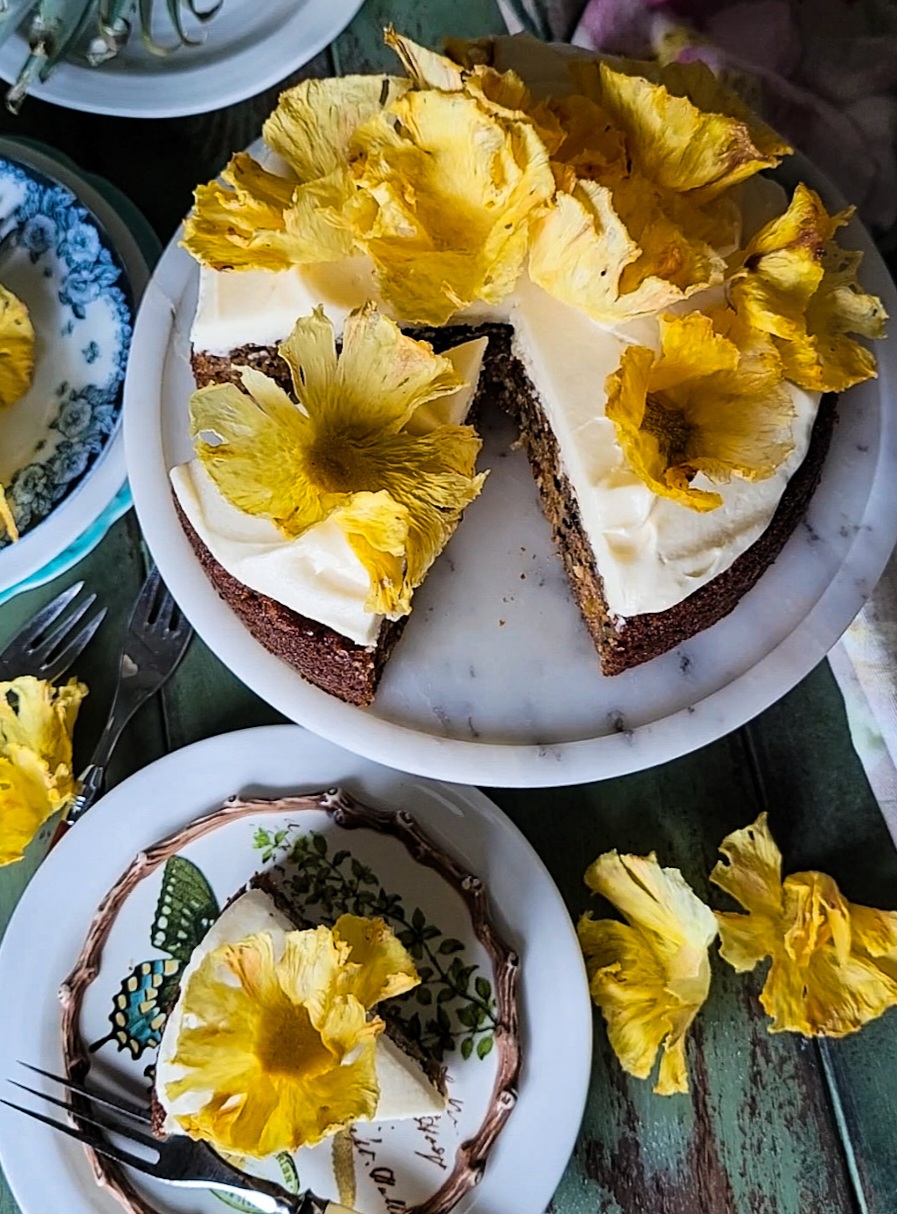 There is no time of the year that Jim doesn’t welcome carrot cake. For that matter, I feel exactly the same.
The Easiest Way to Customize this Cake!
But with summer comes zucchini, and plenty of it! So why not replace some of the carrrot in my classic recipe for Carrot Cake with zucchini? In fact, why not replace all the carrot with zucchini?! And if you want an even more yummy and fresh flavour, replace some of the amount of shredded veggies with grated Granny Smith apple! Tart and bright! The only rule is, the amount needed for this cake is 2 cups, so you can use any combination you desire, just no more than the two cups! Now you have a recipe that you can use all year round. You’re welcome!
Feel free to swap out the walnuts for pecans, or even hazelnuts. No matter which nut you choose to chop up, make sure to toast them first. This will enhance their flavour immensely. Toasting on a baking sheet in a 350F oven till aromatic, or using a clean skillet on the stovetop over medium heat both work. Just keep your eye on them, occasionally shaking them about to keep them from scorching. Your nose is your friend here. As soon as they release their oils and aroma, remove them from the heat. Let cool and chop.
How Much of This Cake Do I Need?
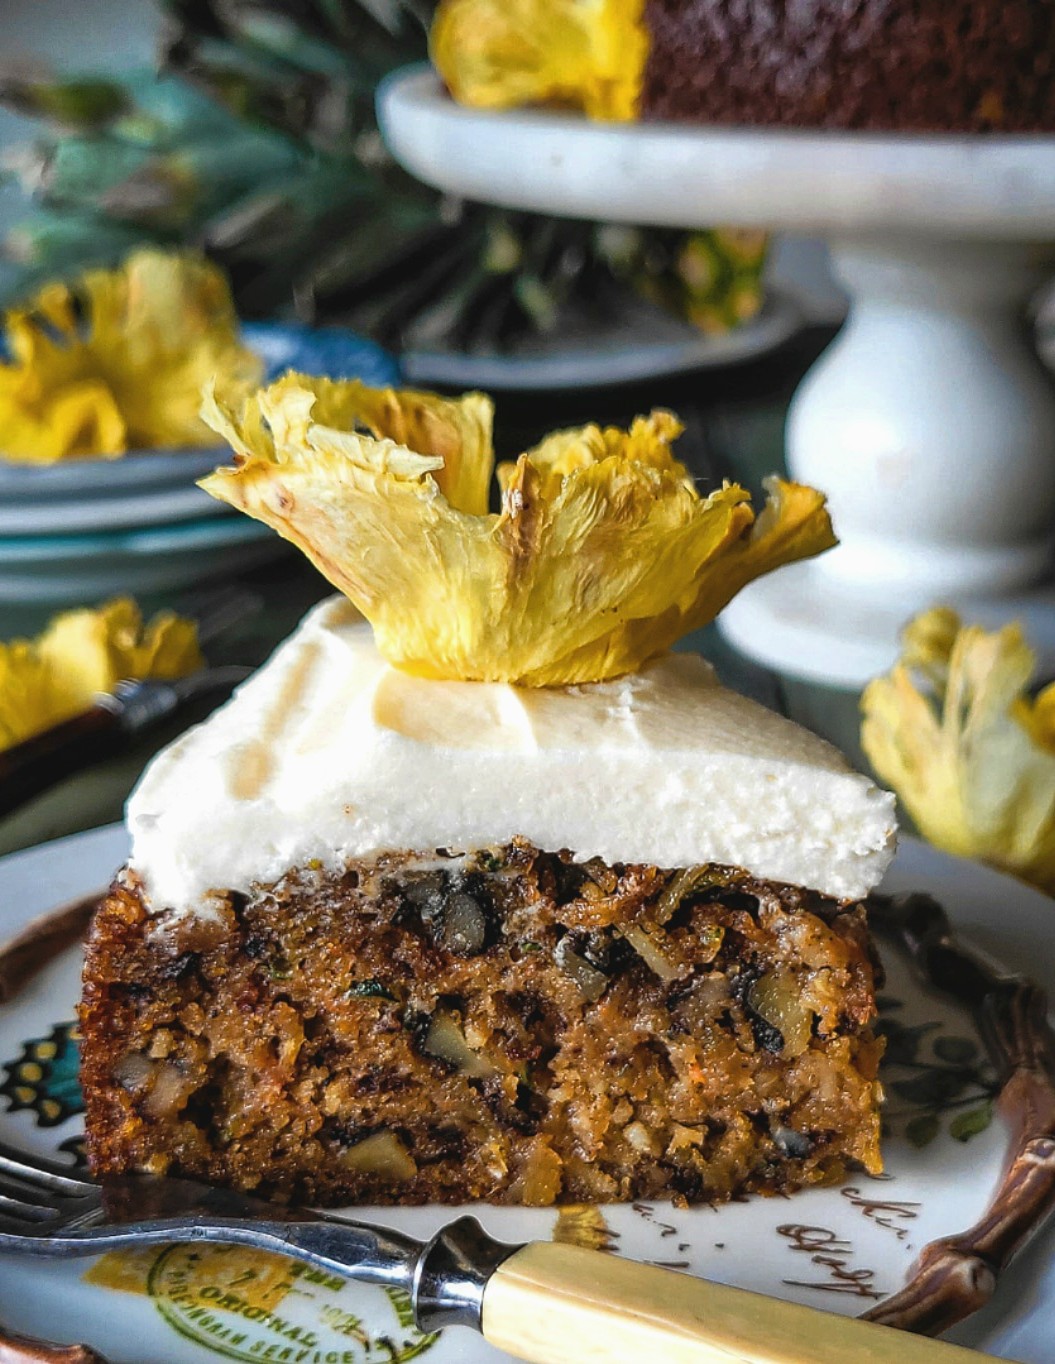
The full recipe for this cake will make a double layered, iced cake, enough to feed 10 or more people.
But, what if it is just two of you? And you don’t need a whole big cake? Then why not cut the recipe in half. Check out HERE for how to halve ingredients that may stump you.
Or if you want to bake the full recipe, then bake the two rounds, but freeze one for future noshing. Or bake up some in regular sized muffin tins for sharing. Yes, feel free to make muffins, but you will need to adjust the baking time to 20 minutes or so.
Icing This Cake
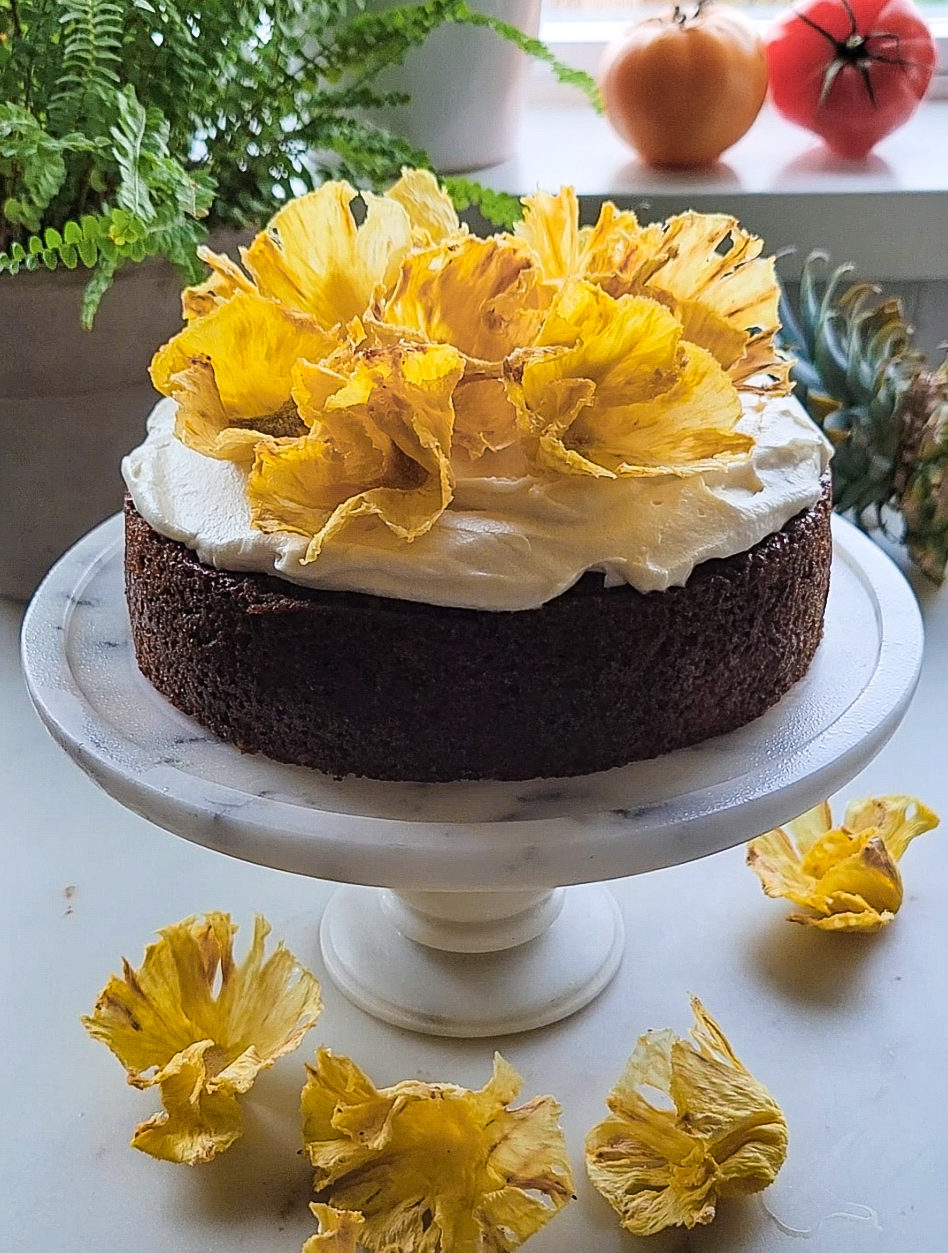
This is just a classic cream cheese, butter and icing sugar icing. I love to spice it up, as the spices really bring out the flavours of the cake. But don’t worry, that perfect tang from the cheesecake is still there. The contrast of that tang against the sweetness of the cake never ceases to make my tastebuds smile.
You can whip up the icing ahead of time and store in a sealed container in the fridge till needed. Just make sure you bring it up to a warmer temperature before you want to work with it, for optimum spreadability. Feel free to make the entire batch if you are wanting to cover the entire cake, and want to bake up both layers. If you are only baking up one cake layer, you can reduce the icing to half, and you will still have enough to cover it entirely. And if you only want to do a topper, as I am showing here, make up one third of the icing batch.
Of course, you can make it all and freeze what you will not need right away. While it will keep in the fridge for up to a week, freezing is a great option. Thanks to the butter and sugar, cream cheese frosting does well when frozen. Just freeze the unused portion within the day of making, in a sealed container or freezer bag, removing any air pockets. It will keep for two to three months, and it is best to place the cream cheese frosting in the refrigerator to thaw overnight. If you notice that the frosting has slightly changed texture or consistency on defrosting, use an electric mixer to mix the cream cheese frosting back to its original fluffy and smooth consistency before frosting any cake or cupcakes.
Topping This Cake, Pineapple Flowers!
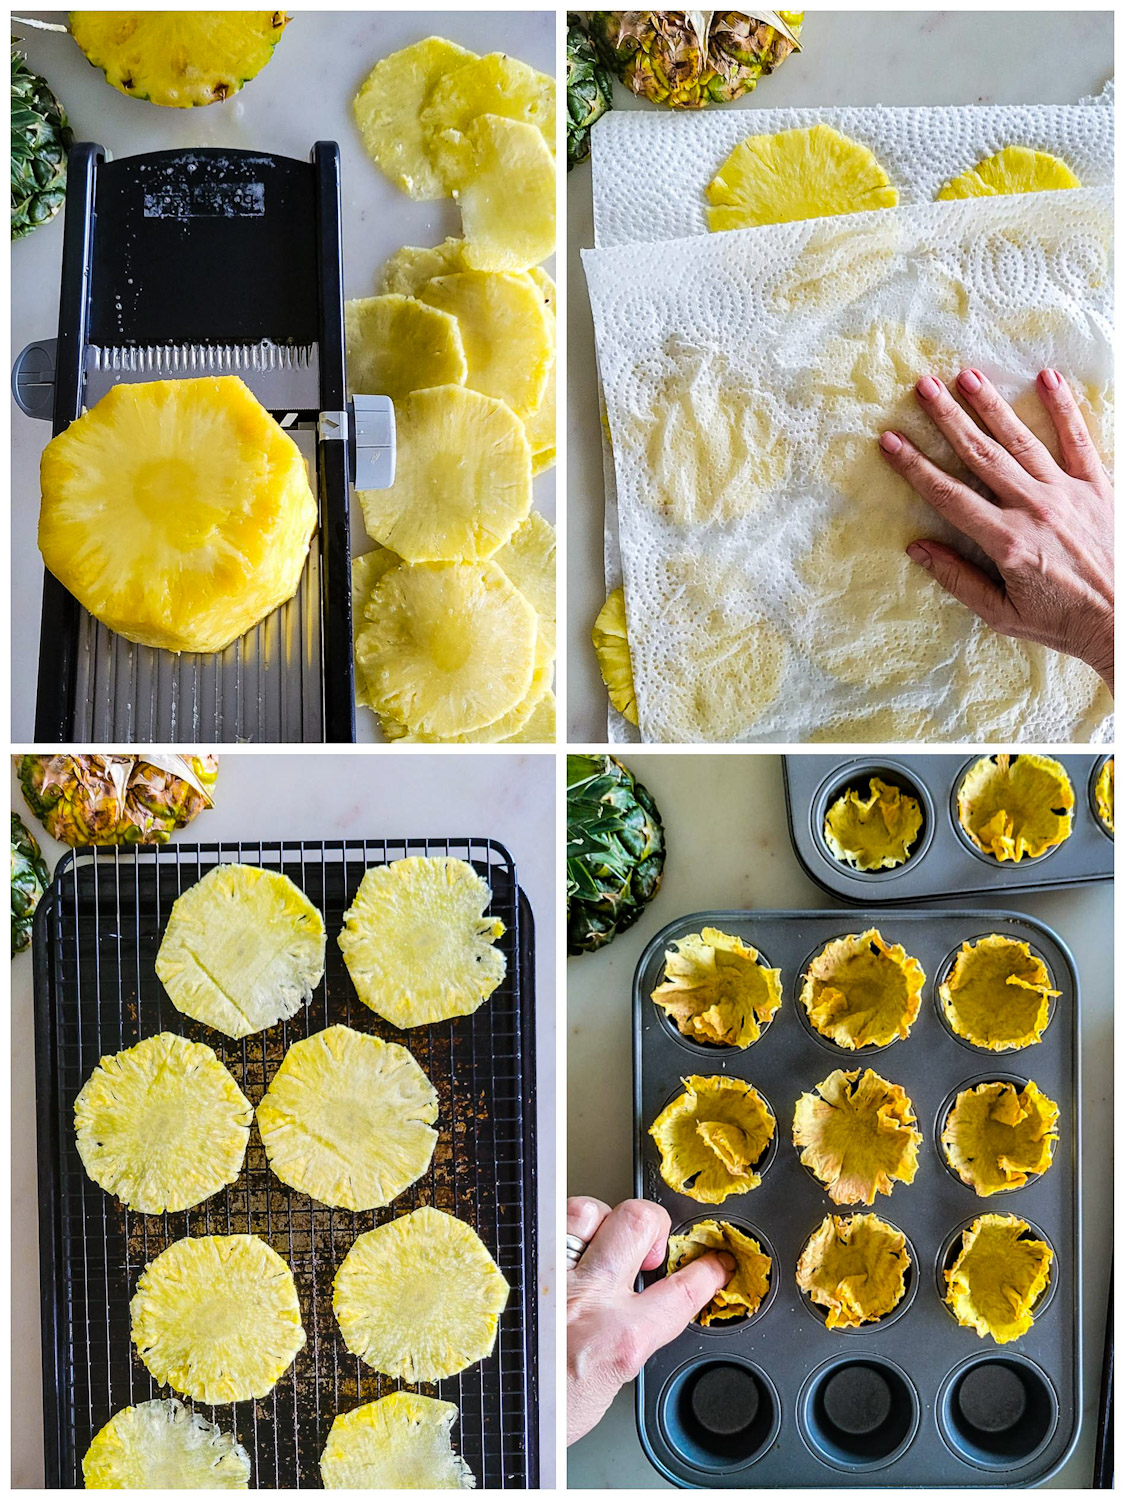
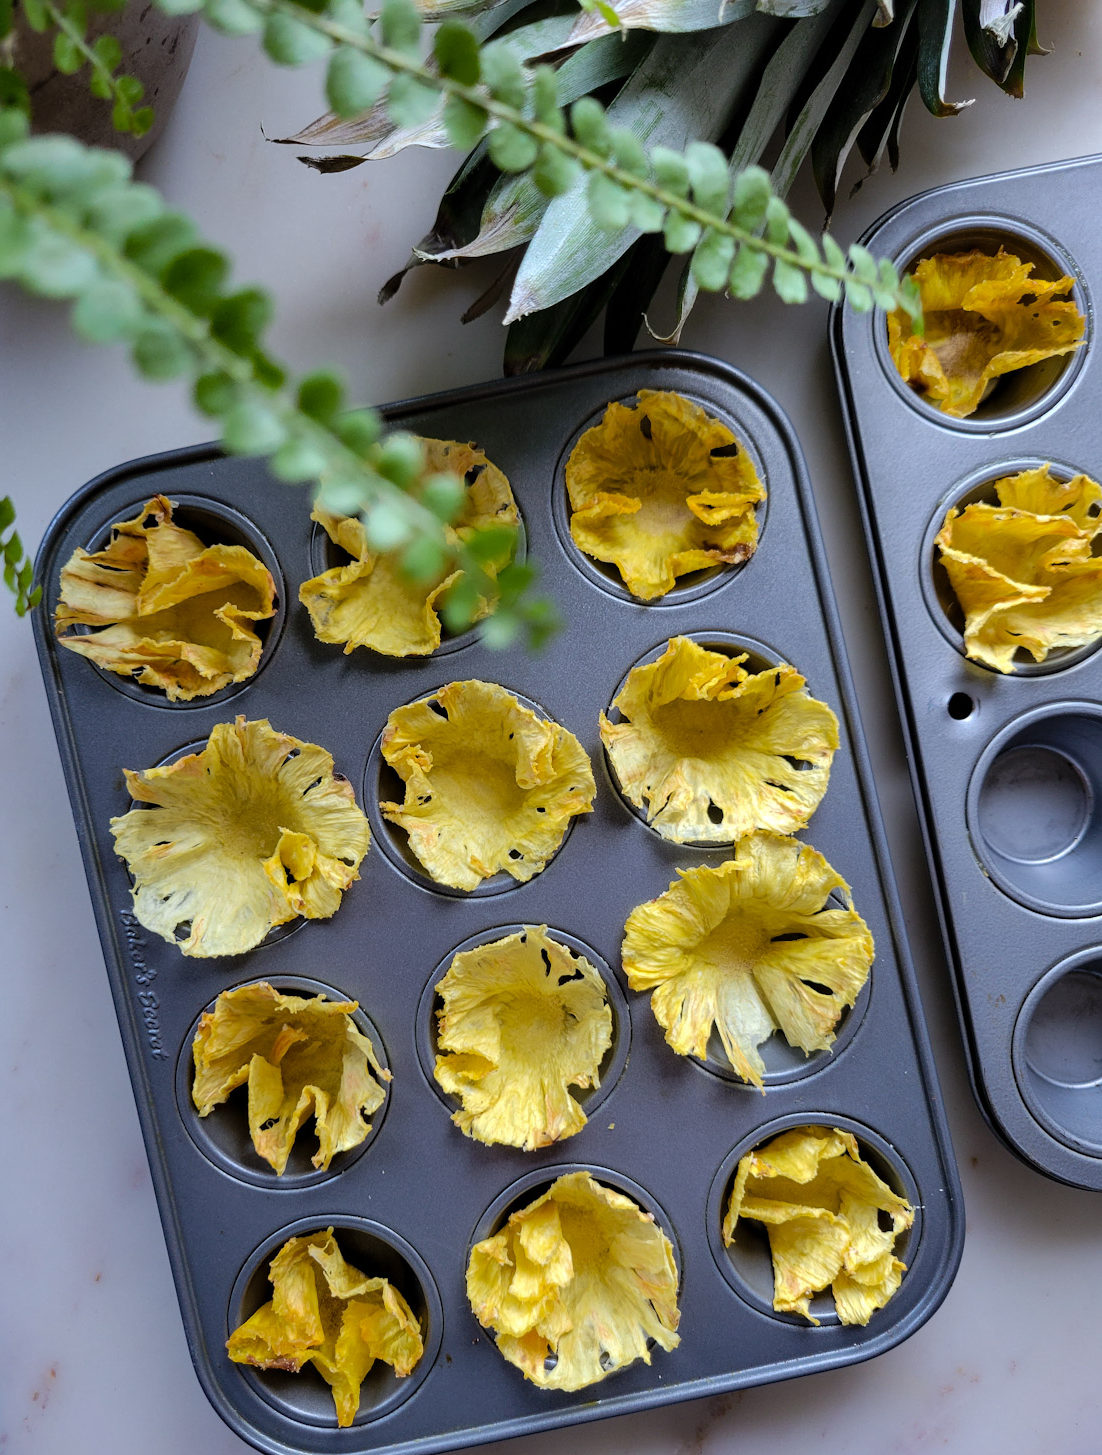
This is just the prettiest way to top a cake or cupcakes. And it really couldn’t be easier. You will need a whole pineapple. You can’t use previously sliced pineapple, since the core has usually been removed for that style of ready prepped pineapple. The core is what will keep the pineapple slice together as it dries out and starts curling and turning frilly at the edges in the oven.
Start off by slicing off the top and bottom of the pineapple. Then use a sharp knife to remove the rind. Go back with the knife and cut away any of the brown ‘eyes’ that may have been left on the flesh. Once the pineapple is ‘naked’ you are ready to slice it into thin rounds. Ideally you want a slice around 1/8-1/6th inch thick. Too thick and they won’t dry out in the oven. You can do this with a sharp knife and a steady hand. But if you have a mandolin, this is the time to pull it out. Once you have enough rounds cut (always cut more than you think you will need, as some may tear, or not turn out perfect as they dry out) lay the rounds on paper towel. Press more paper towel on top. You want to remove as much moisture as possible. The more moisture left in the rounds, the harder time you will have in drying them out.
Lay the dried rounds onto a cooling rack set over a baking sheet. You may need two, depending on the size of the pineapple you are using, and the amount of flowers you want to make. Place these into a 200F oven on a rack set in the lower third of the oven. After the first hour, remove the baking sheets and carefully lift the slices off the cooling rack and turn them over. Move the baking sheets from front to back and side to side if you are using more than one baking sheet, for even baking.
Keep turning the slices every half hour or so, until dried out and golden brown at the edges. Immediately press the rounds into the wells of a mini muffin tin (or two) and place back in the oven. Turn the oven off, and let them dry out overnight. The next day they will be ready to use. They are best this next day, but if you are not ready to use them, place them on a cooling rack and leave on the counter. Placing them into a sealed container will cause them to wilt and get soft. To see this whole method in action, I have a video on my Instagram account, and also in my Pinterest account.
Final Thoughts
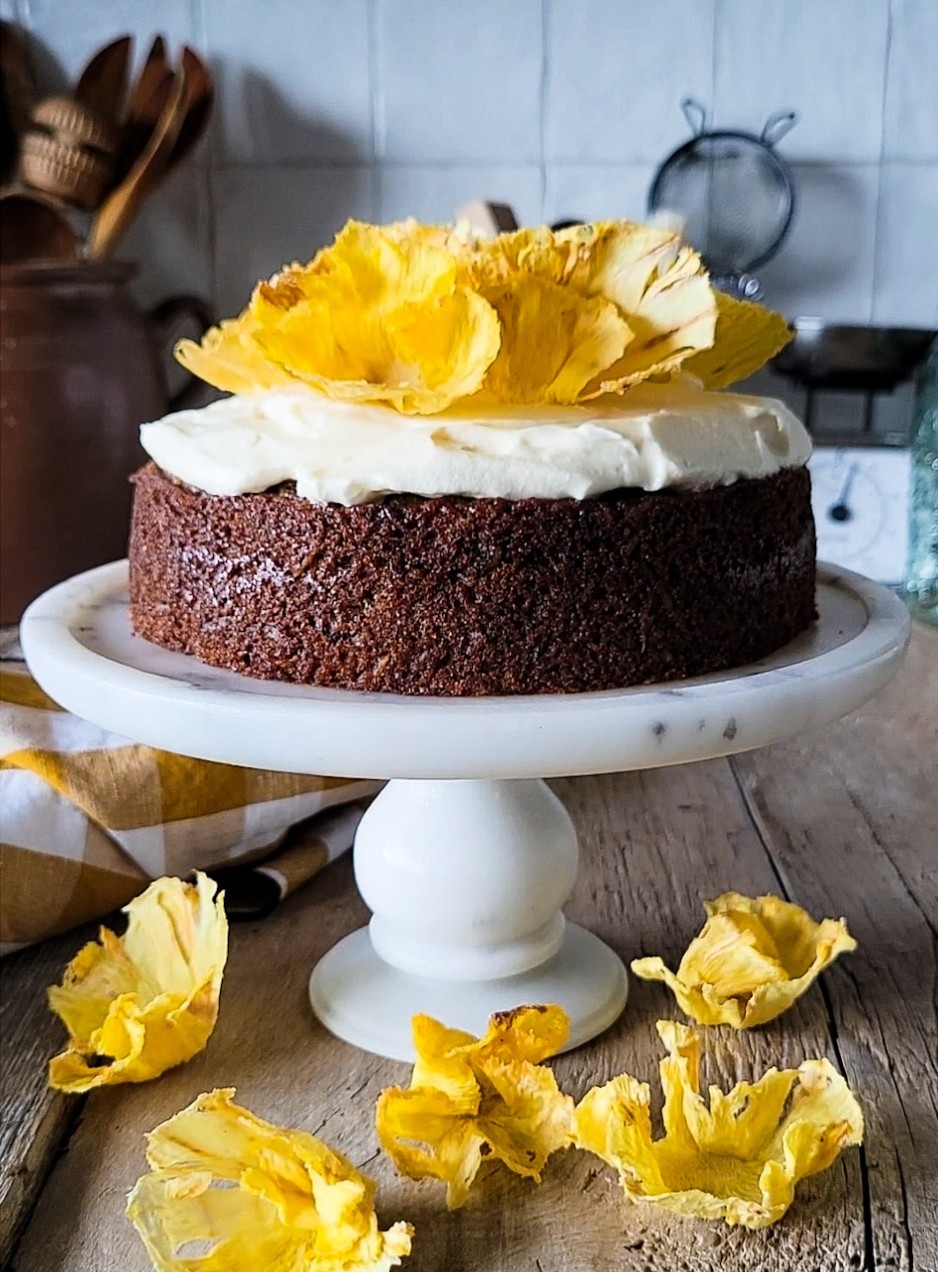
Even if you don’t decorate this cake, it will still taste good! The pineapple flowers just add an extra little touch, and are perfect for events like showers, anniversaries, etc. Try them on a hummingbird cake, or even banana or chocolate cake.
Zucchini Carrot Cake with Pineapple Flowers
Taking a simple but delicious tender cake filled with zucchini, carrot, and green apple, and dressing it up with homemade pineapple flowers. Now it is a showstopper, with very little effort!
Ingredients
Zucchini Carrot Cake
- 2 cups (300 g) AP flour, (can also be a gluten free cup for cup blend)
- 2 tsp baking soda
- 2 tsp ground cinnamon
- 2 tsp ground cardamom
- 1/4 tsp salt
- 3 large eggs
- 3/4 cup kefir or buttermilk
- 3/4 cup vegetable oil: canola, sunflower or grapeseed
- 1 cup (225 g) sugar
- 2 tsp vanilla extract
- 2 cups (245 grams) shredded zucchini, carrots, and green or Granny Smith apple, see Notes
- 1 cup (100 grams) shredded coconut, it can be sweetened or unsweetened, your call, I use sweetened
- 1 cup (120 grams) pecans or walnuts, chopped small
- 3/4 cup (170 grams) crushed pineapple and juice
Spiced Cream Cheese Icing
- 3-3 1/2 cups (390-455 g) Icing sugar, whisked or run through a sieve to remove any lumps
- 1 8- oz (250 grams) packaged cream cheese, softened to room temperature and cubed
- 1/2 cup (110 grams) butter, softened to room temperature
- 1/2 tsp ground cinnamon
- 1 tsp vanilla extract
- 2 tbsp milk, as needed
Pineapple Flowers
- 1/2 of a large pineapple
Instructions
Zucchini Carrot Cake
-
Preheat oven to 350F. Grease and flour two 8 or 9-inch round spring form pans. Alternatively try lining the bottom with parchment paper. I do this by layering the parchment on top of the bases, and then secure the sides and clamp, trapping the paper inside and outside the pan. This makes for easy removal once the cakes have cooled.
-
In a medium bowl sift together the flour, baking soda, cardamom and cinnamon and salt.
-
In a large bowl combine the eggs, kefir, oil, sugar and vanilla. Add flour mixture to the bowl. Mix until all incorporated.
-
In a medium bowl combine the shredded zucchini, carrots and apple, coconut, walnuts, and pineapple.
-
Using a large wooden spoon, stir the carrot mixture into the egg and flour mixture, Fold in well.
-
Pour into prepared pans. Tap the pans on the counter to release any air bubbles.
-
Bake until a skewers comes out clean, about 50 minutes to one hour, depending on your oven. Start checking after 45 minutes. Timing will be affected by the size of pans you are using.
-
Allow to cool completely on rack before icing. I actually chill the rounds in the fridge, even overnight.
Spiced Cream Cheese Icing
-
In a stand mixer add the cream cheese, butter, spices and vanilla extract. Mix until completely smooth. Add the icing sugar 1/2 cup at a time. Stop when you have enough or it is sweet enough for your liking. If it is too thick use the milk to thin it out.
-
Wait until cake is completely cool to ice.
-
After chilling properly, it will be easy to cut away any domed part of the cake with a serrated knife. This will ensure that you have smooth, level surfaces to ice and layer. Save the scraps for snacking on while you ice the cake the way you desire. You can do a simple, naked approach, but there is enough icing to cover the entire cake.
-
Chill before serving. In the meantime, make the pineapple flowers.
Pineapple Flowers
-
Preheat the oven to 200F.
-
Using a sharp knife, trim away the top and bottom of the pineapple. Slice away all the exterior of the pineapple, including any brown eyes that may be left behind. Depending on how many flowers you are wanting to make, you will probably only need 1/3-1/2 of the pineapple.
-
Do not core the middle. This is necessary to hold the flowers together as they dry out in the oven.
-
Using a mandolin, slice the pineapple into 1/8th thick rounds, by pressing firmly as you push the pineapple. If you don't have a mandolin, you can use a sharp knife and a steady hand. You really don't want anything thicker that 1/8 inch (you should be able to see the knife through the slice) since it will affect how well they dry out in the oven, and how delicate the frilly edge will become. Don't worry, some will turn out, others will be for smoothies!
-
Place the rounds on paper towel, and dry the tops with more paper towel. Press firmly to remove as much moisture as possible. Place the rounds onto cooling racks set over baking sheets. Make sure none are touching or hanging over the edges.
-
Bake in the lower third of the oven for 2 1/2-3 hours. Remove the baking sheets from the oven after 1 hour, and carefully peel the rounds off the cooling racks and turn over. Repeat every 1/2 hour after this, depending on your oven. They should be dried out, only ever so slightly tacky. Remove them carefully and immediately place them into mini muffin tins, pushing down on the centre of the pineapple flower causing the edges to become frilly. Turn off the oven but place the muffin tins inside. Let them dry this way for over night.
-
Do not place into a sealed container, as this will cause them to soften and flop. Transfer them to a cooling rack, to continue allowing the air to circulate around them, till needed.
Recipe Notes
For the shredded veggies, you can use any combination of zucchini, carrot and green apple, as long as the amount equals the final two cups. I use the smaller holes of my box grater for the zucchini and carrot, but the larger holes for the apple. Feel free to use this template for just carrot or zucchini.
If making a simple cake (ie only using one round and freezing the other round) you can reduce the icing by half.
For the pineapple flowers, make a few more flowers than you think you will need (10-12 for the top of a large cake) since you may need backups for any that tear etc while drying out.
Use the remaining pineapple for smoothies.

Delicious.I made this recipe for Easter. I made one cake with half the batter and used the rest for cupcakes so guests could take one home if they didn’t have room for dessert. My cake didn’t rise as high as the one in your photo. I used a 8″ springform pan. Any tips?
I didn’t have time to try the pineapple flowers but I plan to try them the next time I make this recipe.
Many of your recipes are on my meal rotation. I recently tried your traditional Swedish meatballs and gravy with mashed potatoes. We loved them. Lamb meatballs with kale will be tried soon. Thanks Jen!
Hi Victoria, Thank you for your kind words! Sorry you didn’t get the rise you could have. My first thought is the age of the baking soda. Also, over mixing will make a denser cake that will have difficulty rising. When adding everything together, only stir till just blended, kind of like muffins. No need to keep going. Enjoy all the meatballs! Love Jen
Thanks for the feedback. I’ll give those tips a try.
Let me know how it goes 🙂